
/https://storage.googleapis.com/s3-autonomous-upgrade-3/static/upload/images/new_post/building-an-adjustable-standing-desk-simple-steps-1287-1615133279934.jpg)
Building an Adjustable Standing Desk with Complete Simple Steps
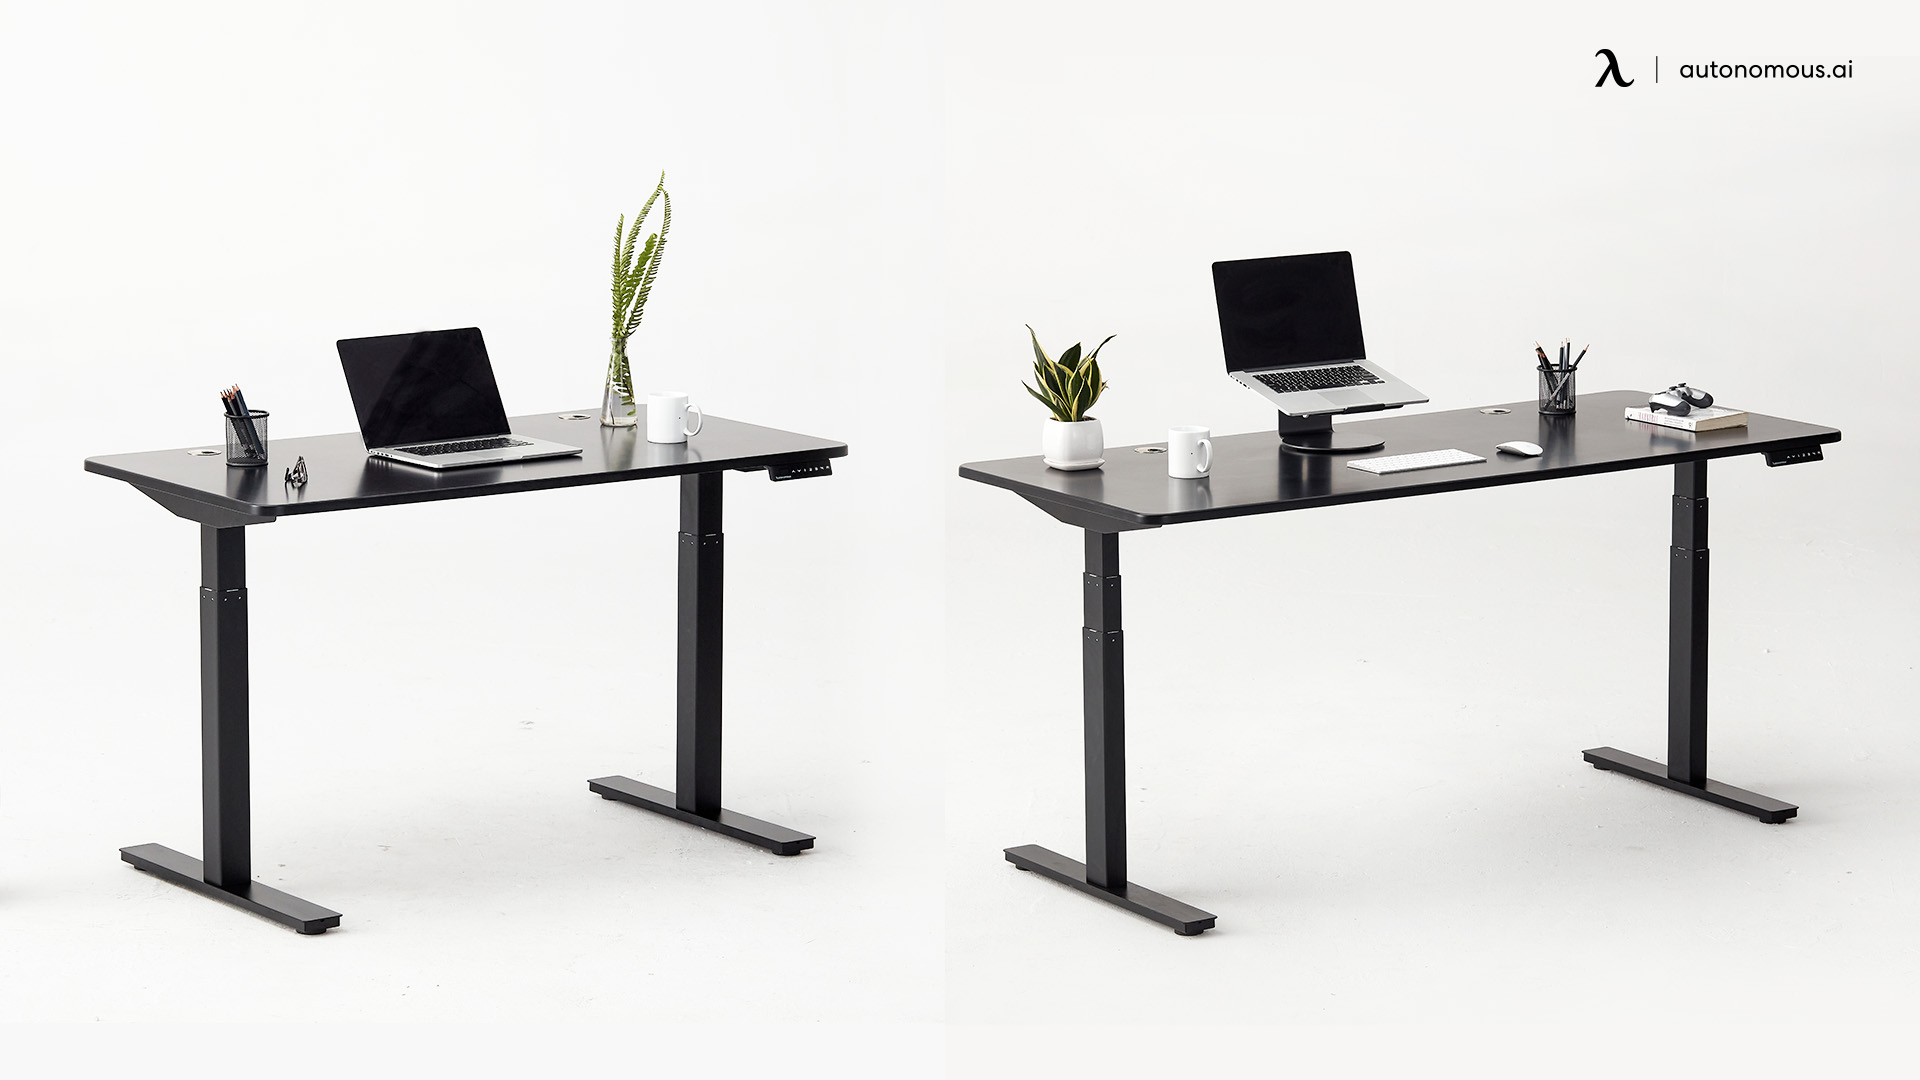
A standing desk is a wonderful addition to any office workspace. By investing in one, you are not only improving your productivity and efficiency while working but are also making significant improvements to your overall health. The issue when choosing a standing desk is that there are so many options to choose from, as well as being pretty expensive in general.
The solution to this problem is choosing to invest in a standing desk that you can assemble yourself. These options are much cheaper than purchasing an already assembled version and offer all the same benefits and features. The complication with these options relates to their assembly process. Putting them together can prove to be tricky at times. If you find yourself struggling with putting them together, then you are in the right place.
If you want to know how to build an adjustable standing desk, then we have the solutions for you. By reading this article, you can learn how to build your own electric standing desk with little to no risk of complications. We go through all the necessary steps that you should go through to assemble a perfectly well-functioning standing desk.
Step for Assembling a Standing Desk
There are some steps that you should follow when assembling a standing desk for the best possible outcome. By following the steps that we provide for you, we ensure that you can easily put your standing desk together. The steps make the process of building an adjustable standing desk much easier and can help you avoid any confusion while doing so. Trying to figure out how to assemble the desk without these steps is understandably complicated, and we provide you with these steps so that you do not have to spend hours scratching your head, staring at the various parts.
There are four parts to the assembly process of a standing desk. Following these steps helps make the whole process much more straightforward. The four steps of the process are:
- Planning: This includes the budget, material, whether the desk is motorized or manual, and the size of the desk.
- Assembly: This step involves putting the desk together as well as the tools you need to do so.
- Building the tabletop: In this step, you have to start cutting the material for your tabletop, sanding and planning it, as well as applying the staining and sealant to it.
- Finish: This is the last step of the process and it involves you attaching the tabletop onto the frame and completing the process.
Step 1: Planning
In this step to build an adjustable standing desk process, there are several factors that you should consider in order to find the best standing desk for you. The first consideration that you should make in this regard is the budget that you are working with. The budget that you have available makes a huge impact on many of the factors of the standing desk you can build. The budget is going to impact the materials that you can use, as well as whether you are going to incorporate a motor into the frame or use a hand crank.
After considering the budget that you are working with, you should decide on the material for the standing desk. Choosing the material of both the frame and the tabletop is an important choice. Some materials are more durable than others and choosing the wrong material can have a major effect on the quality of the desk you build.
A solid wooden top is often the best option, as it is durable, solid, and can also be customized with stains to achieve the color that you are looking for. The material for the frame can be either metal or wood, with metal often being the most popular choice. This is due to it being extremely durable, as well as it being able to support heavy weights.
Next, you should plan for adjustable standing desks on whether you want the desk to be motorized, or manual. A motorized desk involves the use of a motor to adjust the height of the desk. This makes it much more convenient than having to manually adjust the desk height. Manually adjustable height desks involve the use of a hand crank to adjust its height. Although this can be more taxing than using a motor, it is a much cheaper option. Incorporating a motor into the design of your standing desk is going to increase its cost and should this not be accommodated in the budget, you may have to consider using a manual hand crank.
The final consideration that you should make during the planning process is the size of the desk that you want. The desk you build has to fit into the office space that you have available. You must measure and design office space you have available to ensure that you do not have any spacing issues upon the completion of your build. The desk should comfortably fit into the space you have, as well as provide you with enough room to work on. You should also note that the bigger you make the desk, the heavier it is going to be. This affects how strong the frame has to be in order to provide the necessary support that you need.
After making all these considerations, you are able to move on from the planning phase, and onto the next one, the assembly.
Step 2: Assembly
After carefully planning out what you are after in a standing desk, you can then begin the assembly phase of the process and build an adjustable standing desk for yourself. After deciding on the materials that you wish to use, you should source them and begin making the material into the parts that you require for the project. It is important that with a standing desk, you begin with the base. By doing so, you ensure that you have a stable foundation for the tabletop. A poorly constructed base can cause a host of problems down the line, so take special care to complete this step properly.
Before you start putting everything together, it is important that you have all the necessary tools at your disposal. Trying to assemble a standing desk without these tools can prove to be quite a feat. The tools that you need in order to complete the assembly process of your standing desk are:
- A power drill
- Table saw
- Screwdriver
- Hammer
- Strap clamps
- Wood lacquer or a finish
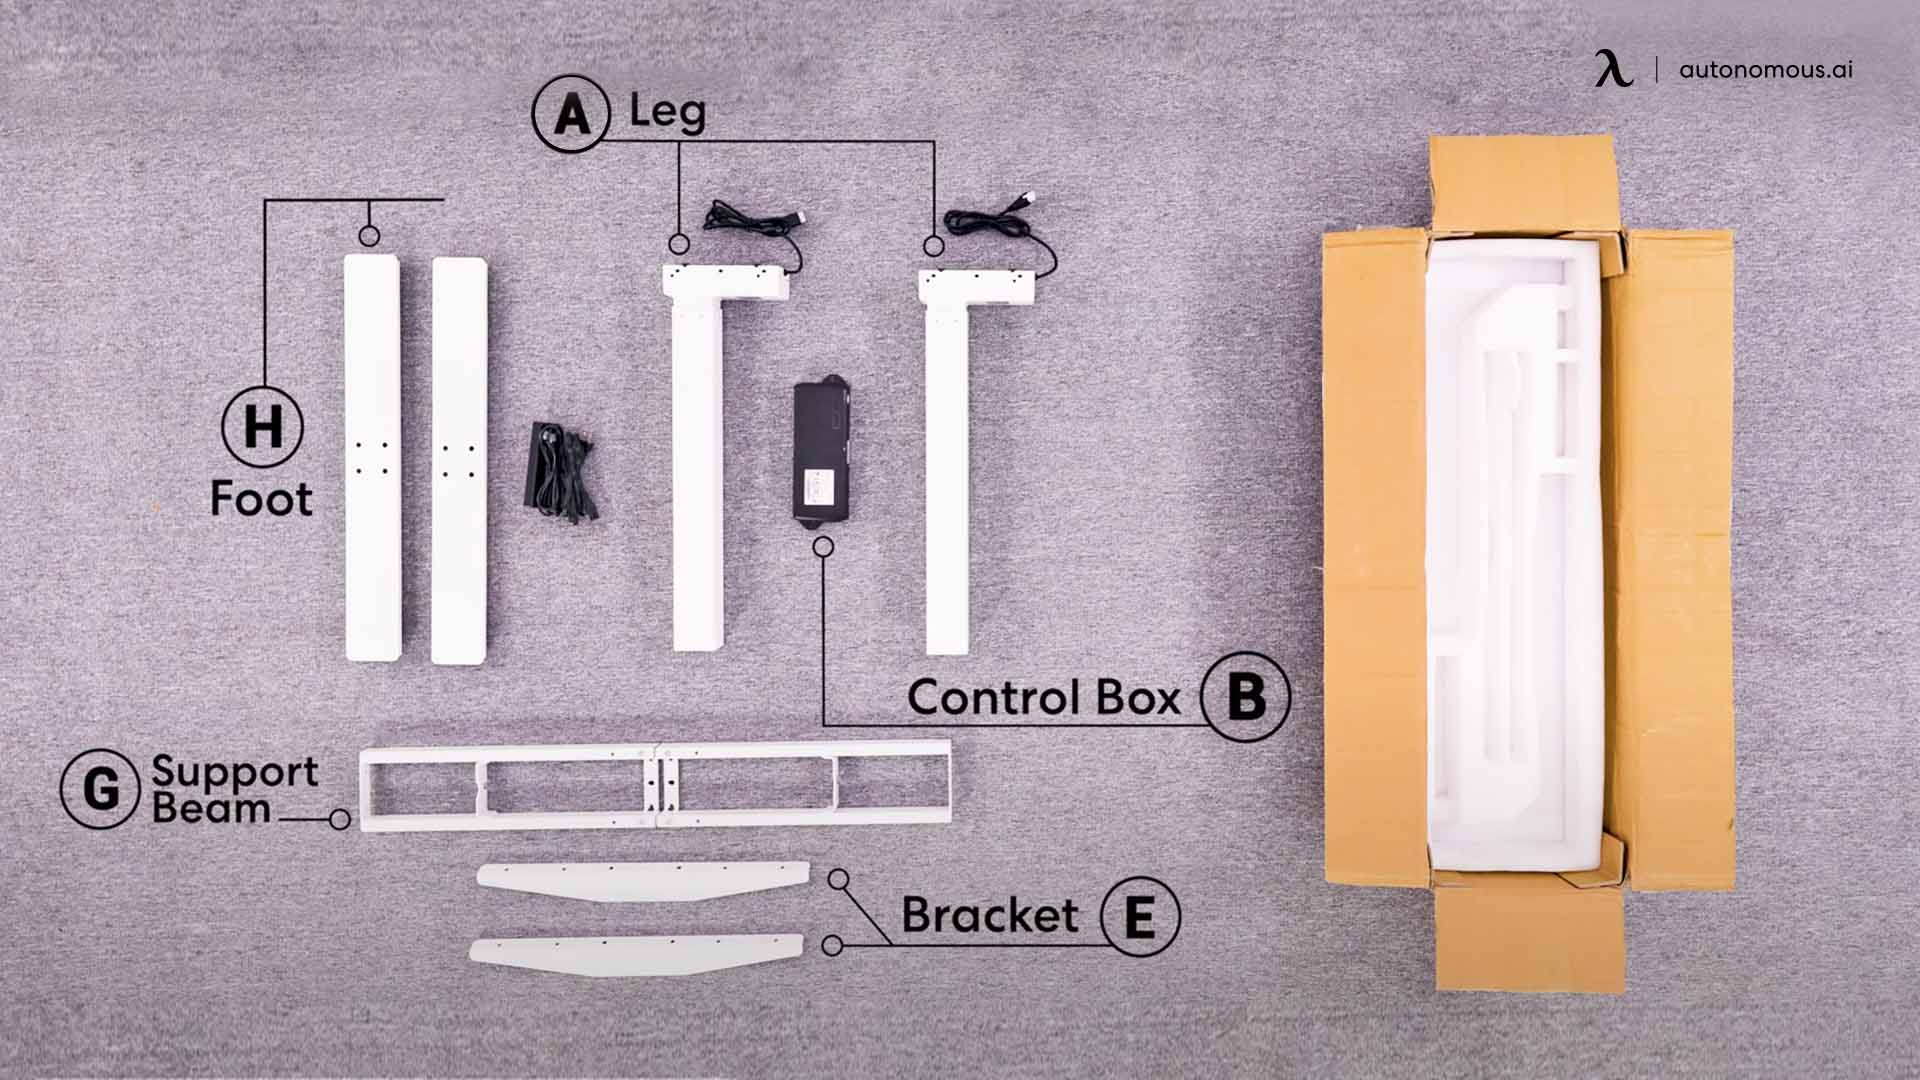
Now that you are aware of the tools that you need, let's get into the actual assembly of the desk. When you begin putting the legs of the desk together, should you decide to use wood for the frame, you can make use of carpenter's glue as an easy-to-use, effective cohesive unit. On the other hand, should you decide to use metal for the legs, you may have to smelt the metallic base or even purchase pre-manufactured legs. When using glue, it is crucial that you wait overnight for the glue to dry before you begin drilling into the wood. This allows the glue to properly settle and create a firm connection between all the parts.
After completing the assembly of the frame, you can move on to the top of the desk. It is most likely that you use wood for this part of the desk. You should take your measurements on the wood and use a marker to designate the areas that you need to cut. You can use a table saw to cut these parts to resemble a high-quality standing desktop. This part of the assembly process is relatively straightforward, especially if you use premium wood. When you make the top, ensure that it is somewhere between 40 and 73 inches in length.
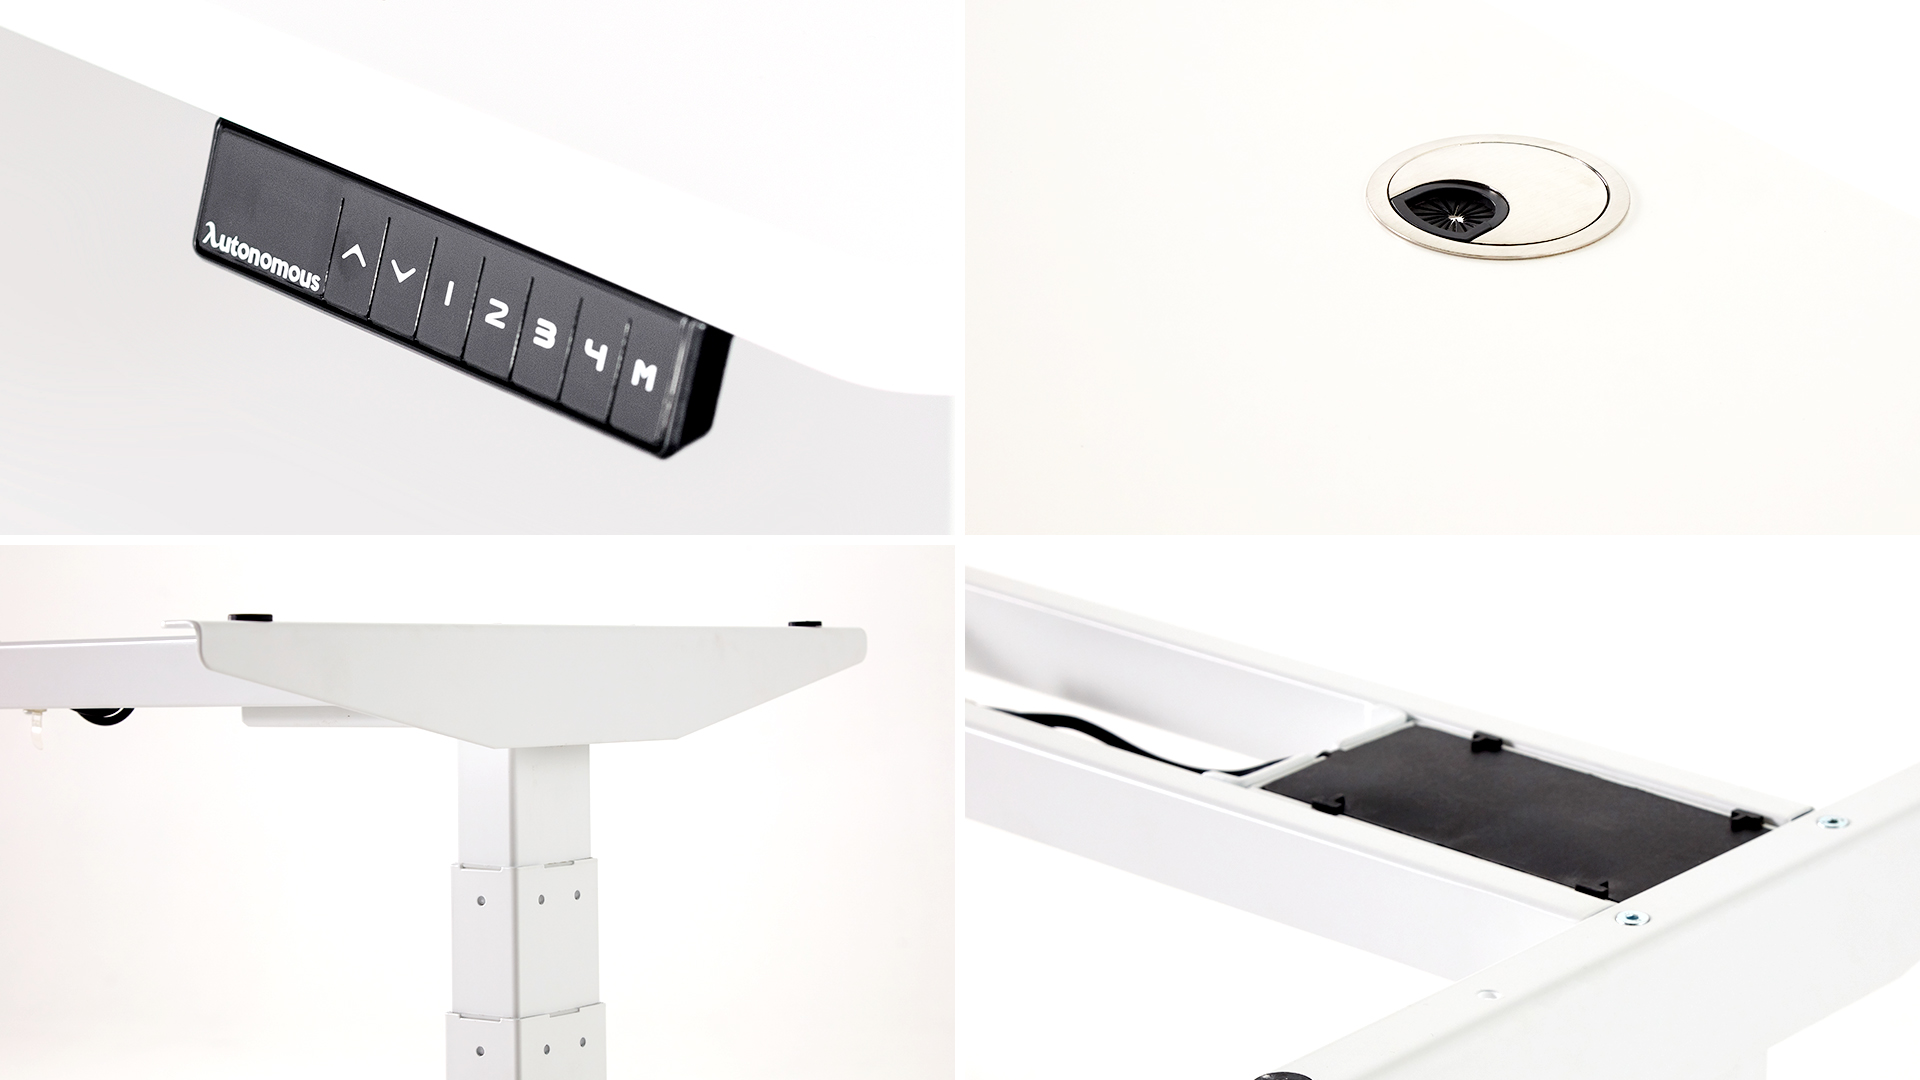
The top connects all the legs to one another, so all of them should be equal in height to avoid a lopsided desk. Should you want to build a motorized standing desk, you should include this into your plans for adjustable standing desks for small spaces. You have to add the motor to the frame of your desk at this point to ensure that it works to adjust the height of the desk correctly.
Step 3: Building
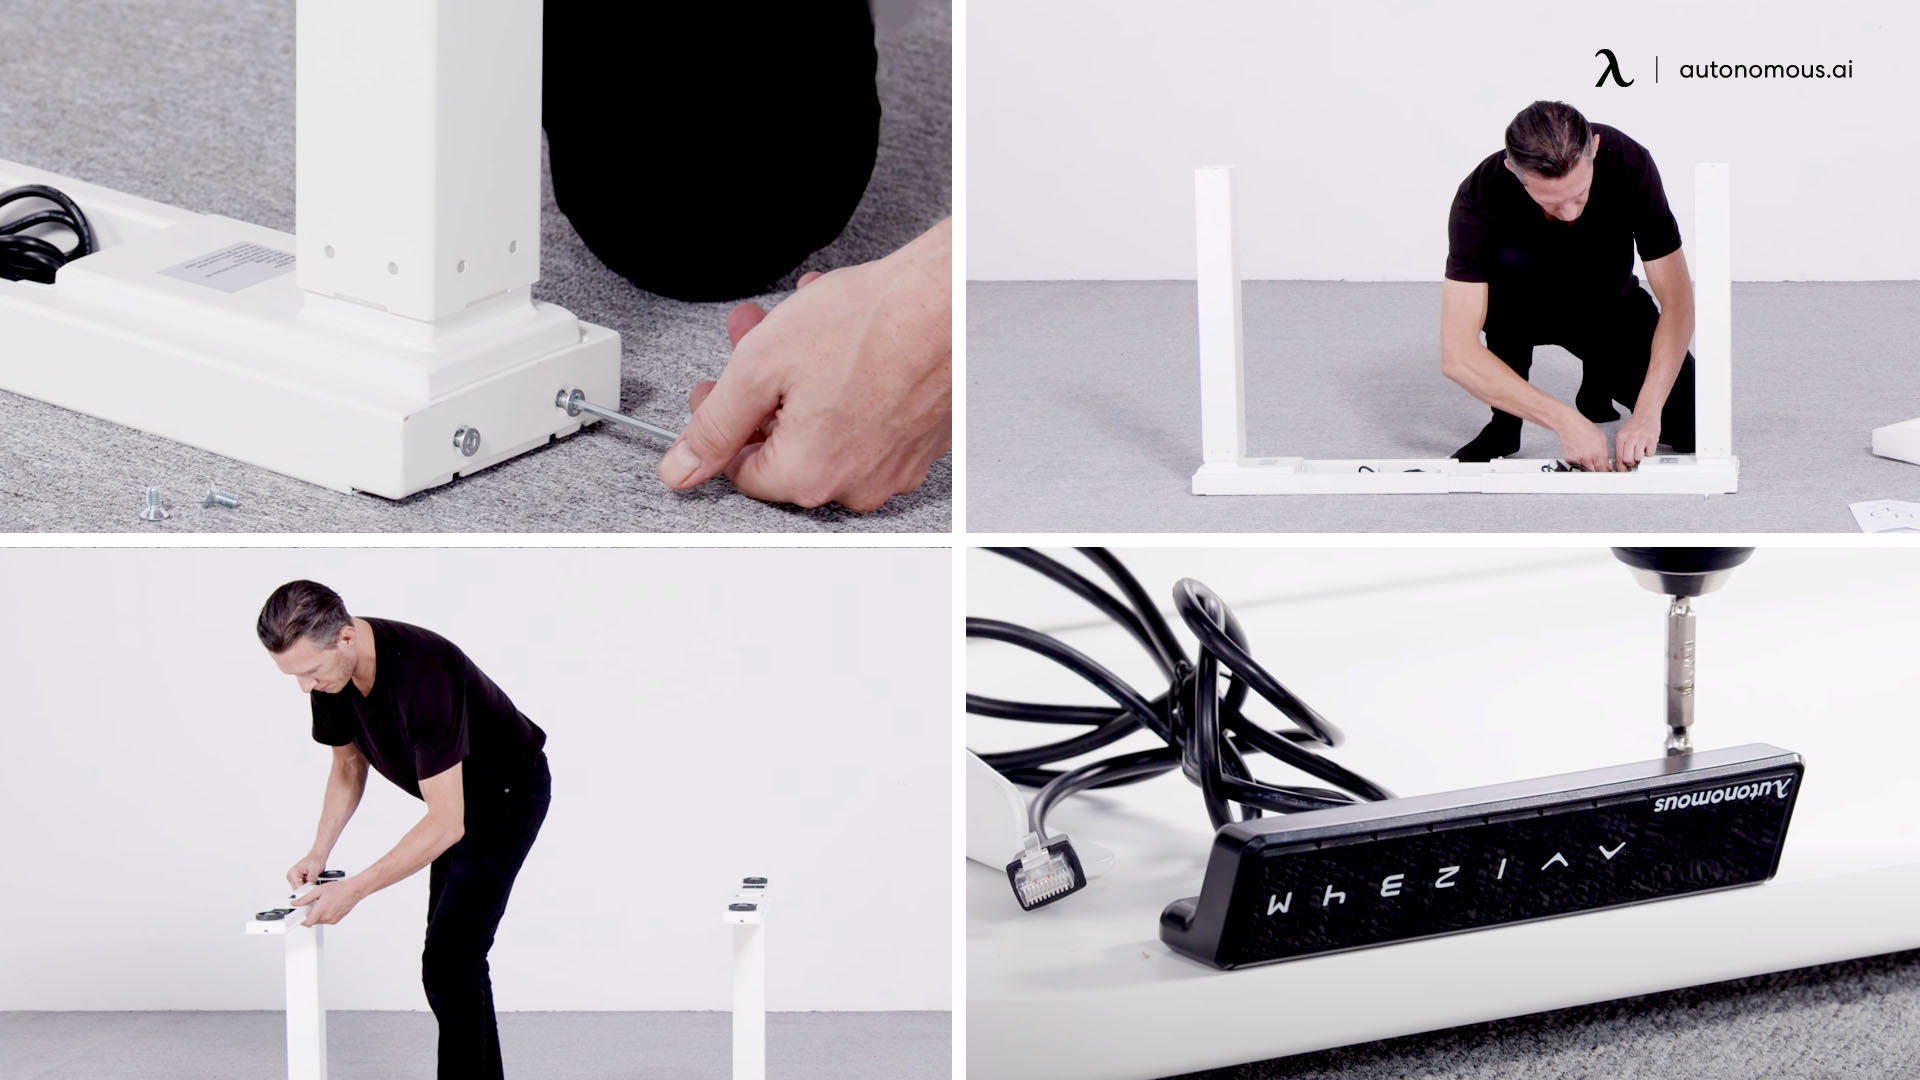
In this step to build a motorized standing desk, you have to put all the separate parts of the desk together to create your standing desk. When creating the frame, it is imperative that you made holes for screws. This allows you to connect the electric standing desk base frame to the top in a sturdy manner. By doing this, you do not have to worry about the adhesive you use wearing out and the top sliding off the frame.
You can complete this step by placing the top of your desk upside down on the floor. Once you have placed it on the floor, you should place the frame on top of the desktop and take care to line everything up properly. Once you are satisfied that everything is properly aligned, you can start adding the screw. This connects the frame to the top, as well as creating a sturdy connection.
Once you have completed adding the screws, you can flip the desk back over. At this point, everything should be properly connected and the process of building your own standing desk should nearly be complete.
It is also important that before you attach the top to the desk frame, that you take time to prepare the top. This involves you sanding the top to remove any splinters or problems with the wood. Sanding the desk also prepares it for the staining process. After you have sanded the wood, you can choose a stain of your choice. Whether you are after a dark stain, or something lighter, there are many options available to you. You should choose a stain that best suits the aesthetic of your workspace so that the desk can seamlessly fit in.
After you have completed staining the desk, you should use a sealant to ensure that the wood does not become damaged easily. Applying the seal is generally straightforward; however, is a crucial part of the process. Failure to do so can result in the wood top becoming prematurely damaged.
Should you choose to purchase a DIY standing desk kit, this process is slightly easier, as the holes for the screws, as well as the frame, are already provided for you. This is recommended for anyone who has never built anything like this before. Should you consider yourself a veteran of the DIY scene, then you do not have to consider a kit. However, for anyone new to DIY, it is recommended that you consider these as they avoid any trivial errors such as mistakes regarding measurements and alignment.
Step 4: Finish
Now that you have completed all the previous steps, it is time to complete the process to build an adjustable standing desk. You have assembled the frame, manufactured and applied the finishing touches to the desktop, and have connected it to the frame. You can now flip everything the correct way up and admire your work. At this point, you can place the desk into its designated area and start adding all your work equipment to it.
Congratulations, you have completed building your own electric standing desk and can now enjoy it for whatever purpose you see fit.

Why Choose to Build Your Own Electric Standing Desk?
So now that you know how to make an adjustable standing desk, you may ask the question, “Why should I bother when I can just buy one?”
Well, the benefits to building your own are that:
- Standing at intervals improves your productivity and brings many health benefits.
- You can incorporate some exercise into your work routine with a standing desk.
- The desk can be completely adjusted for your convenience.
- You can save money by building one yourself, and also do not have to purchase a chair if you only intend on using it for a short period of time.
On the other hand, standing for prolonged periods of time can have negative effects on your health, rather than positive benefits.
The Bottom Line
Knowing how to build an adjustable standing desk for your own can be an enjoyable process and can save you tons of money. So now that you know the steps, get to building your own today.
/https://storage.googleapis.com/s3-autonomous-upgrade-3/production/ecm/240417/april-10-off-offer-2024-1920x540-CTA.jpg)
/https://storage.googleapis.com/s3-autonomous-upgrade-3/production/ecm/240417/april-10-off-offer-2024-720x1200-CTA.jpg)
/https://storage.googleapis.com/s3-autonomous-upgrade-3/production/ecm/240415/bulk-order-apr-2024-offer-720x1200-CTA-min.jpg)
Subscribe for a 10% discount on your first order.
Sign up for our weekly update and be the first to know about our specials & promotions.
/https://storage.googleapis.com/s3-autonomous-upgrade-3/production/ecm/240415/pod-offer-apr-2024-720x1200-CTA.jpg)
Verbreiten Sie es weiter
/https://storage.googleapis.com/s3-autonomous-upgrade-3/static/upload/images/new_post_author/admin-1.png)