How to Build Your Own Personal AI Computer
Your code goes to GitHub Copilot. Your strategy goes to Claude. Your inbox goes to Gemini. You are not using AI, you are feeding it. This article will provide the build of the Personal AI Computer at the Autonomous workshop. Two cards, 64GB of VRAM, room for Qwen3-32B in full precision or DeepSeek-V3 quantized.
.webp)
This is the entry point. If the 8-GPU box is for a team replacing their API bill, this one is for an individual leaving the leash.
Additional Components Required
Not on any parts list, but you'll need them:
- An anti-static wrist strap. The 5090 is a $2,000 card. Don't be brave.
- A magnetic parts tray. Brass standoffs are M3 and they fall into chassis cavities forever.
- A #2 Phillips with a long shaft. The PCIe riser screws sit deep behind the motherboard tray.
The Build at a Glance
- GPUs: 2× RTX 5090, 575W TDP, 32GB GDDR7 each, 64GB total
- GPU power cables: 2× 600W (one per card)
- CPU: 1× Intel Xeon W5-3425, LGA 4677, 12 cores
- CPU cooling: 1× tower heatsink, LGA 4677 mount
- Board: ASUS Pro WS W790-ACE, dual PCIe Gen5 x16
- RAM: 4× DDR5 ECC RDIMM, 48GB total (board supports up to 8 sticks)
- Storage: 1TB NVMe boot drive (configurable; expand for model storage)
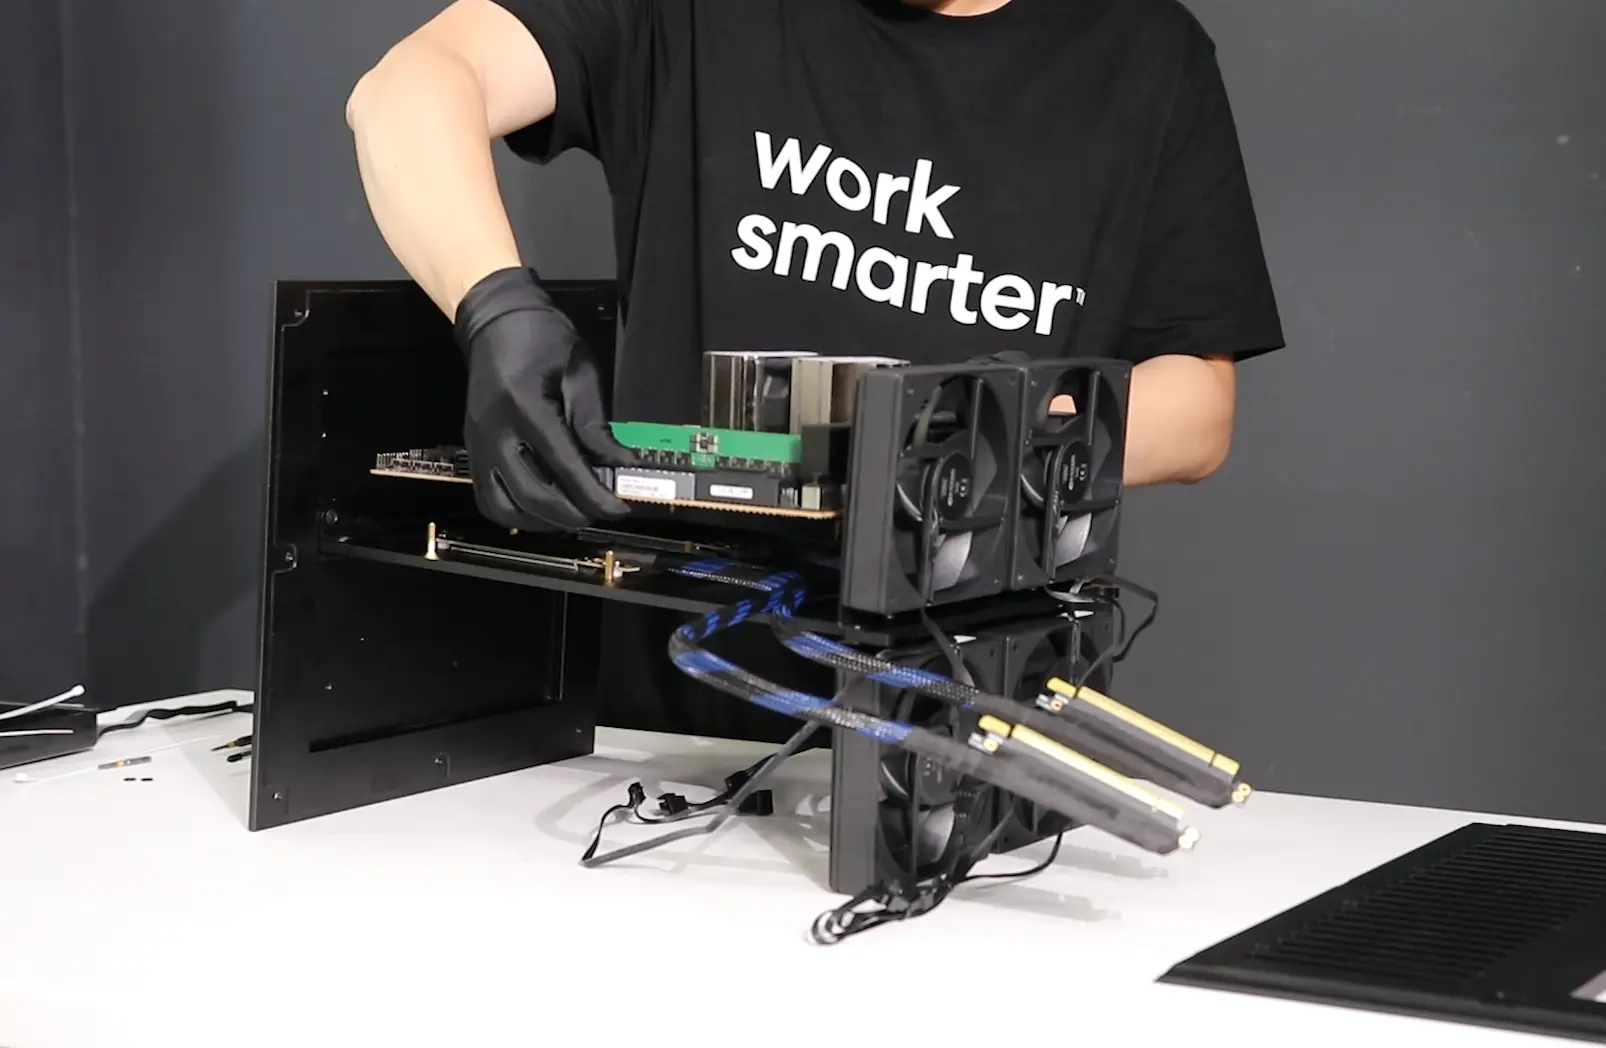
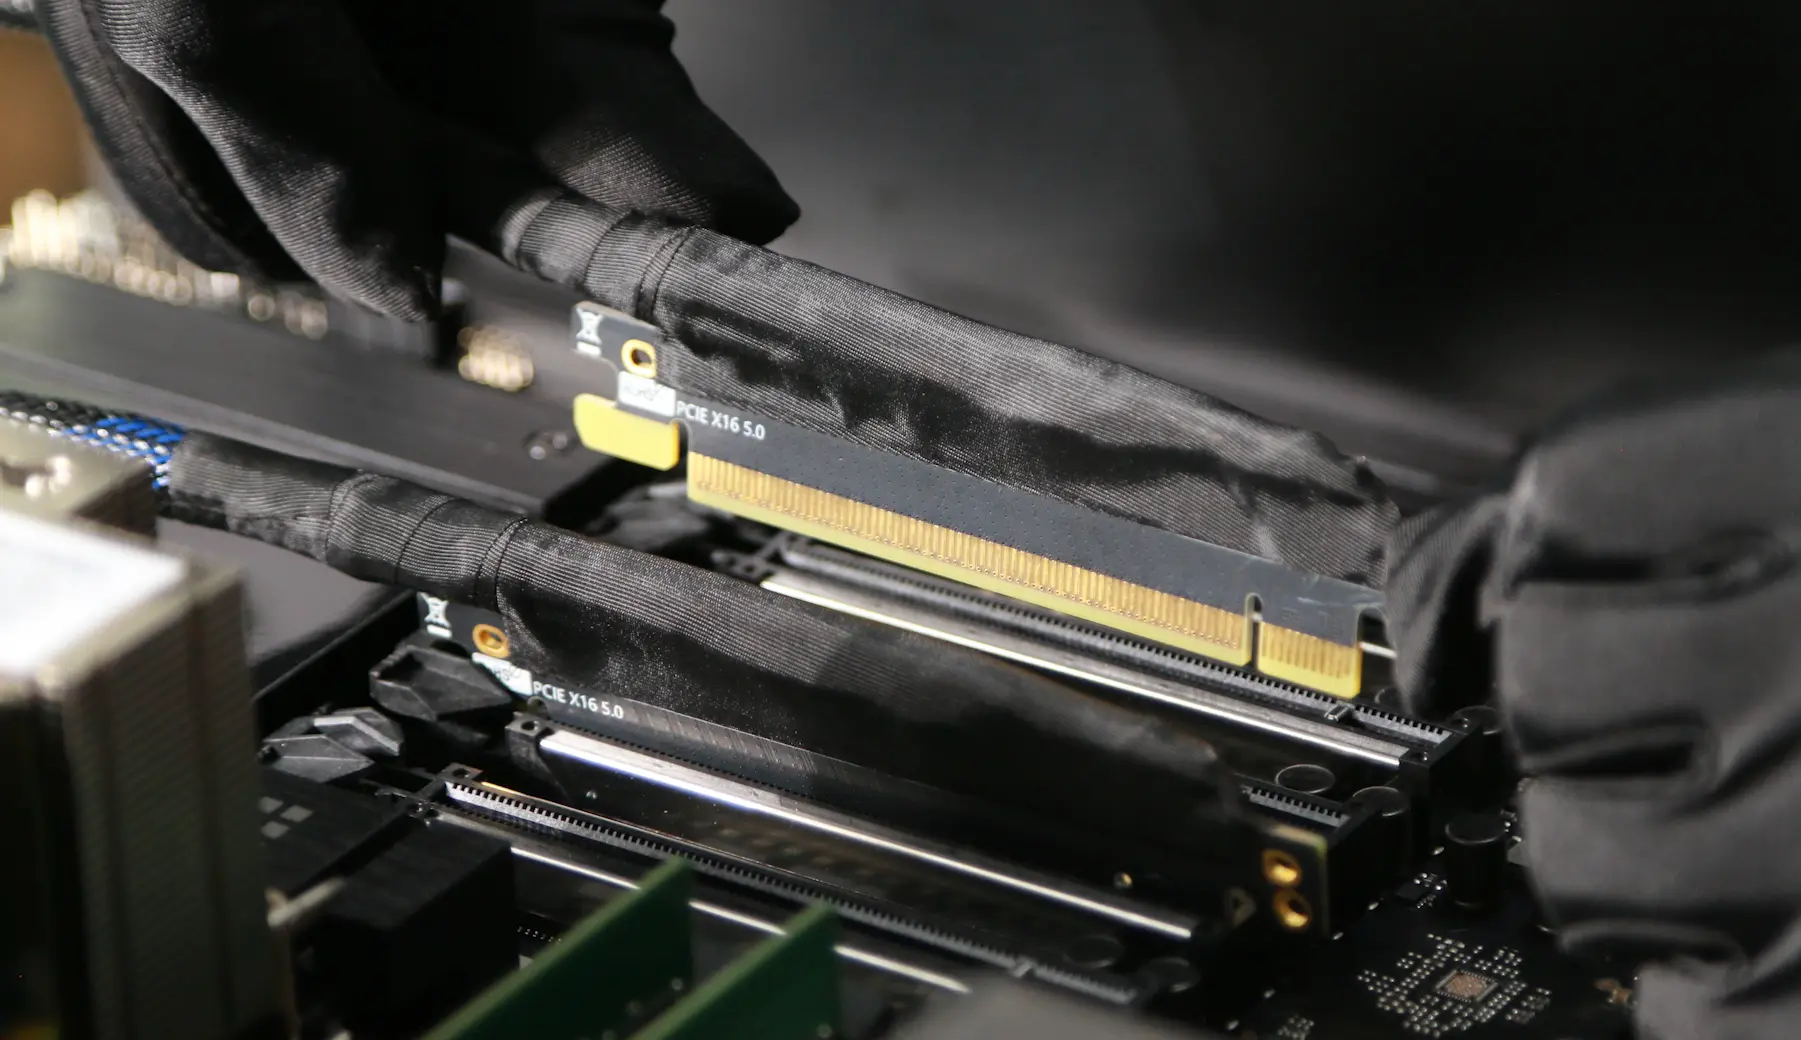
- Risers: 2× PCIe Gen5 x16 riser cables
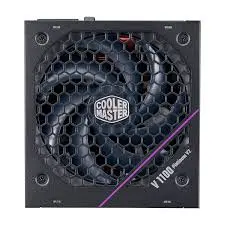
- PSU: 1× Cooler Master V1600, 1600W modular Platinum
- Cooling: 4× 120mm case fans, motherboard PWM control
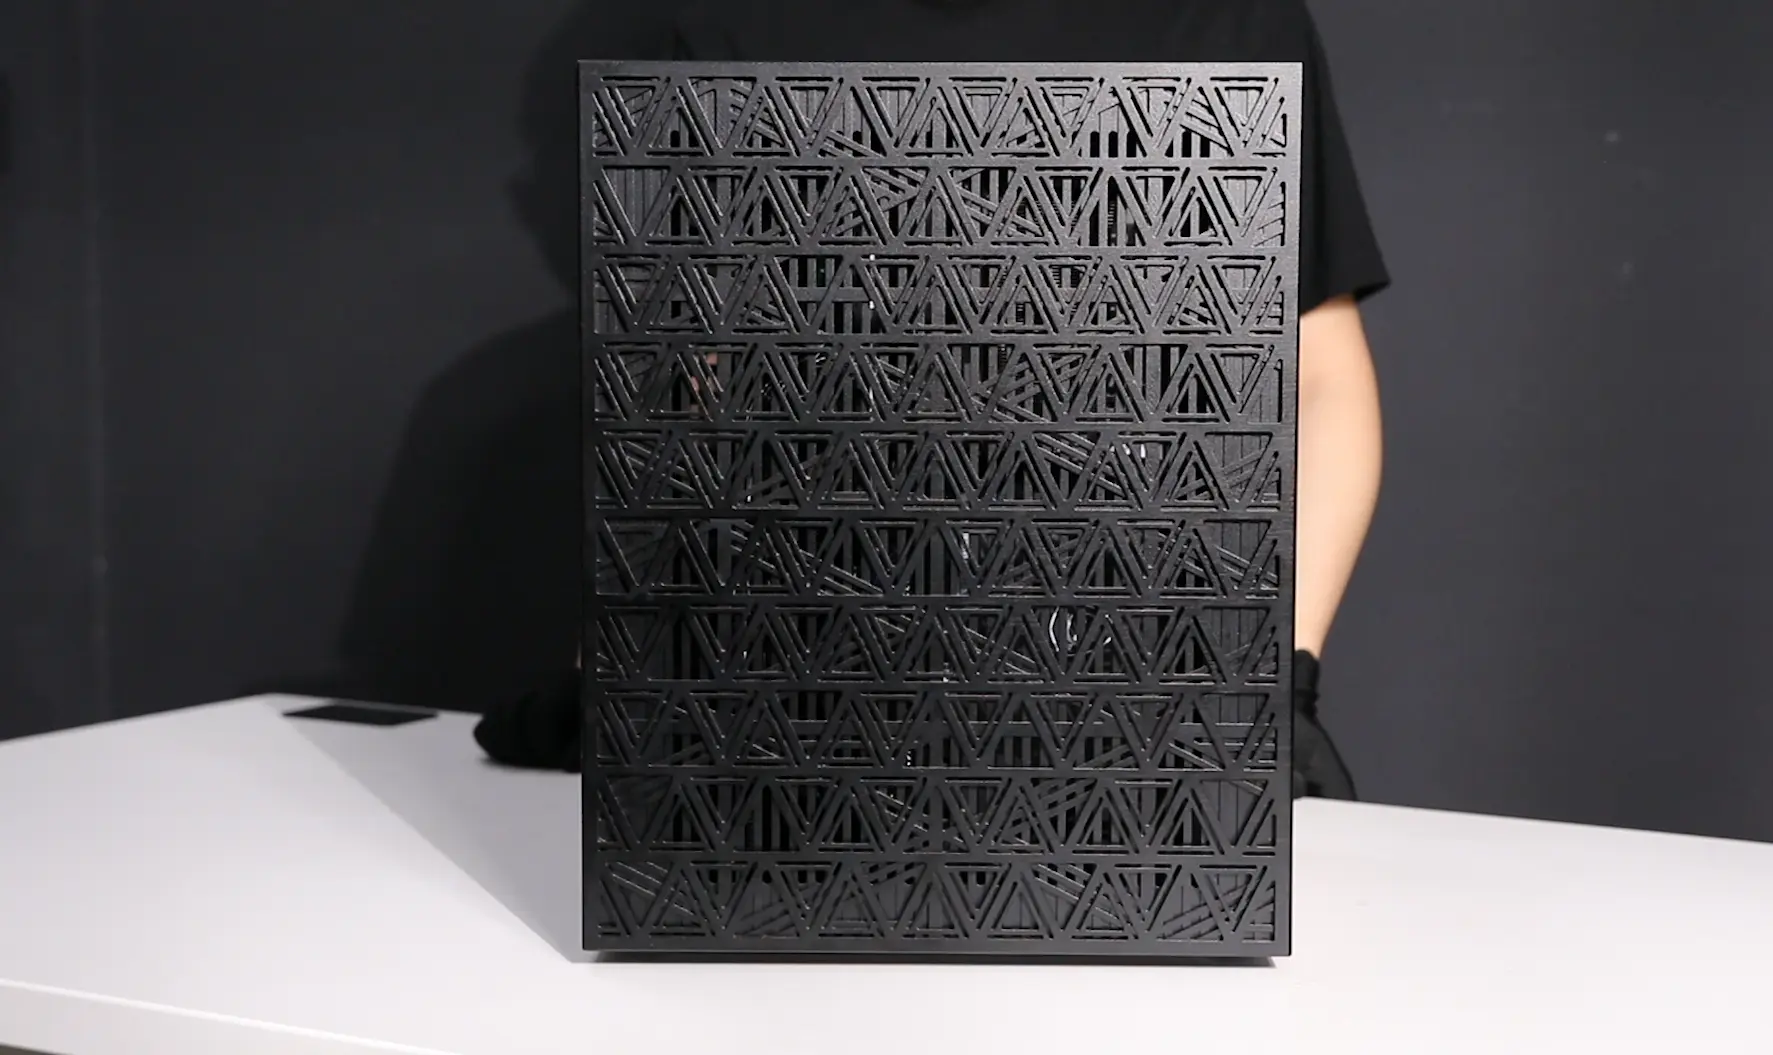
- Chassis: Custom CNC, STEP files in repo
Why The Parts Are What They Are
Workstation board, not gaming. The ASUS Pro WS W790-ACE gives you two PCIe Gen5 x16 slots that actually run at x16 simultaneously. Consumer Z890 boards advertise dual x16 and silently drop to x8/x8 the moment you populate the second slot. Lane count is what matters for multi-GPU, not core count.
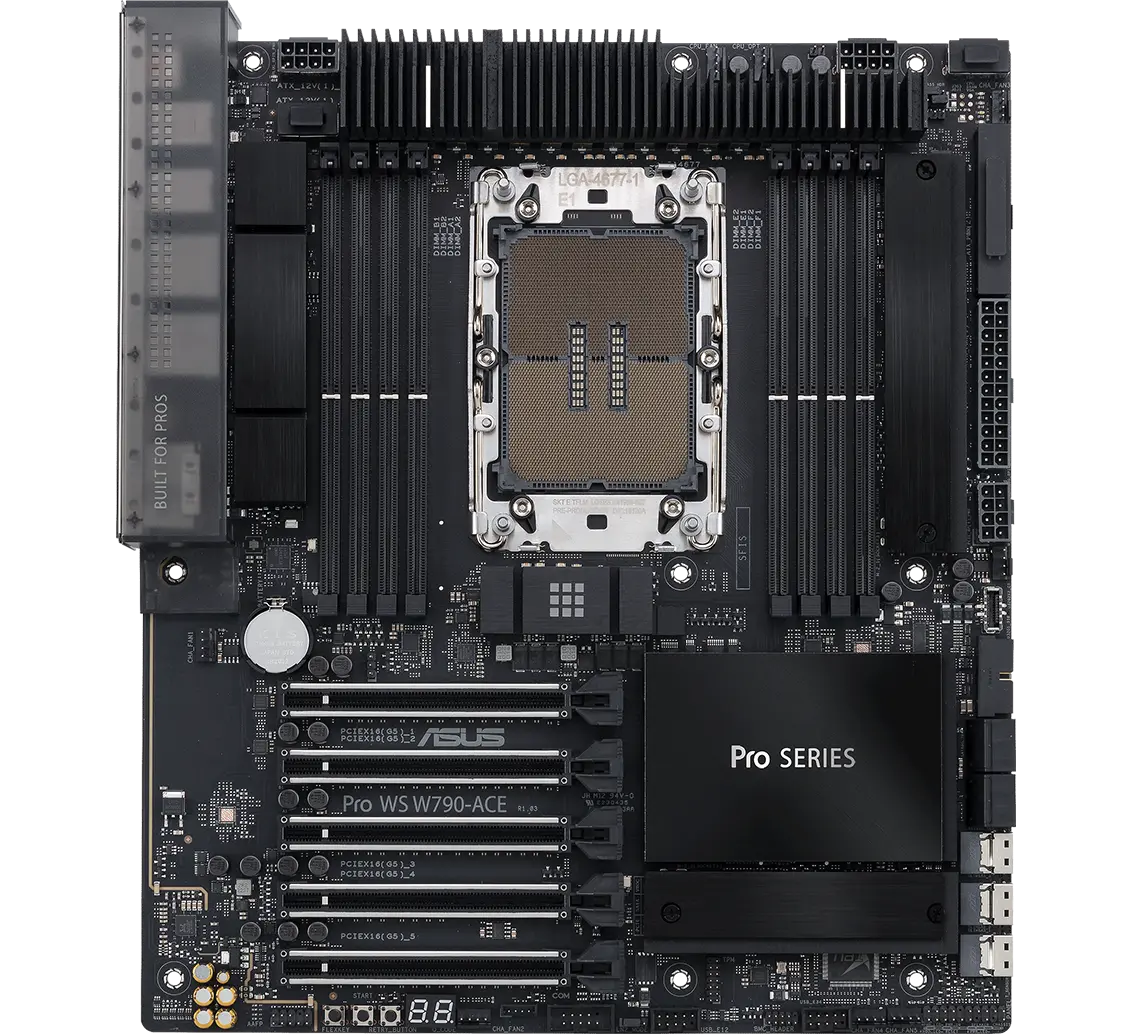
Xeon W for the platform, not the cores. The W5-3425 is 12 cores. You're not picking it for compute; you're picking it for the socket, the memory channels, the PCIe lanes. Inference doesn't starve on 12 Xeon cores when the GPUs are doing the work.
5090 over 4090. Same form factor, 32GB GDDR7 vs 24GB GDDR6X, higher memory bandwidth and on a two-card build, every GB of VRAM matters because there's nowhere else to spill. 4090 still works at lower price if you can find them; you lose 16GB of headroom across the pair.

PCIe risers, not direct slot mounting. Two reasons. First, airflow: the bottom GPU in a stacked configuration cooks if its intake is jammed against the slot below. Risers let you space them properly. Second, cable routing: the chassis design puts both GPUs on the same side of the board, fed by risers from below, leaving the PSU and storage to share the other side cleanly.
1600W PSU is the right size. 2× 575W GPUs = 1,150W from cards alone. Add 200W for the CPU, 150W for platform, leave 100W of headroom. The Cooler Master V1600 delivers 1,600W at 94% efficiency under load. A 1200W unit would technically work and run hot near the rail; 2000W is wasted capacity for this build.
Assembly
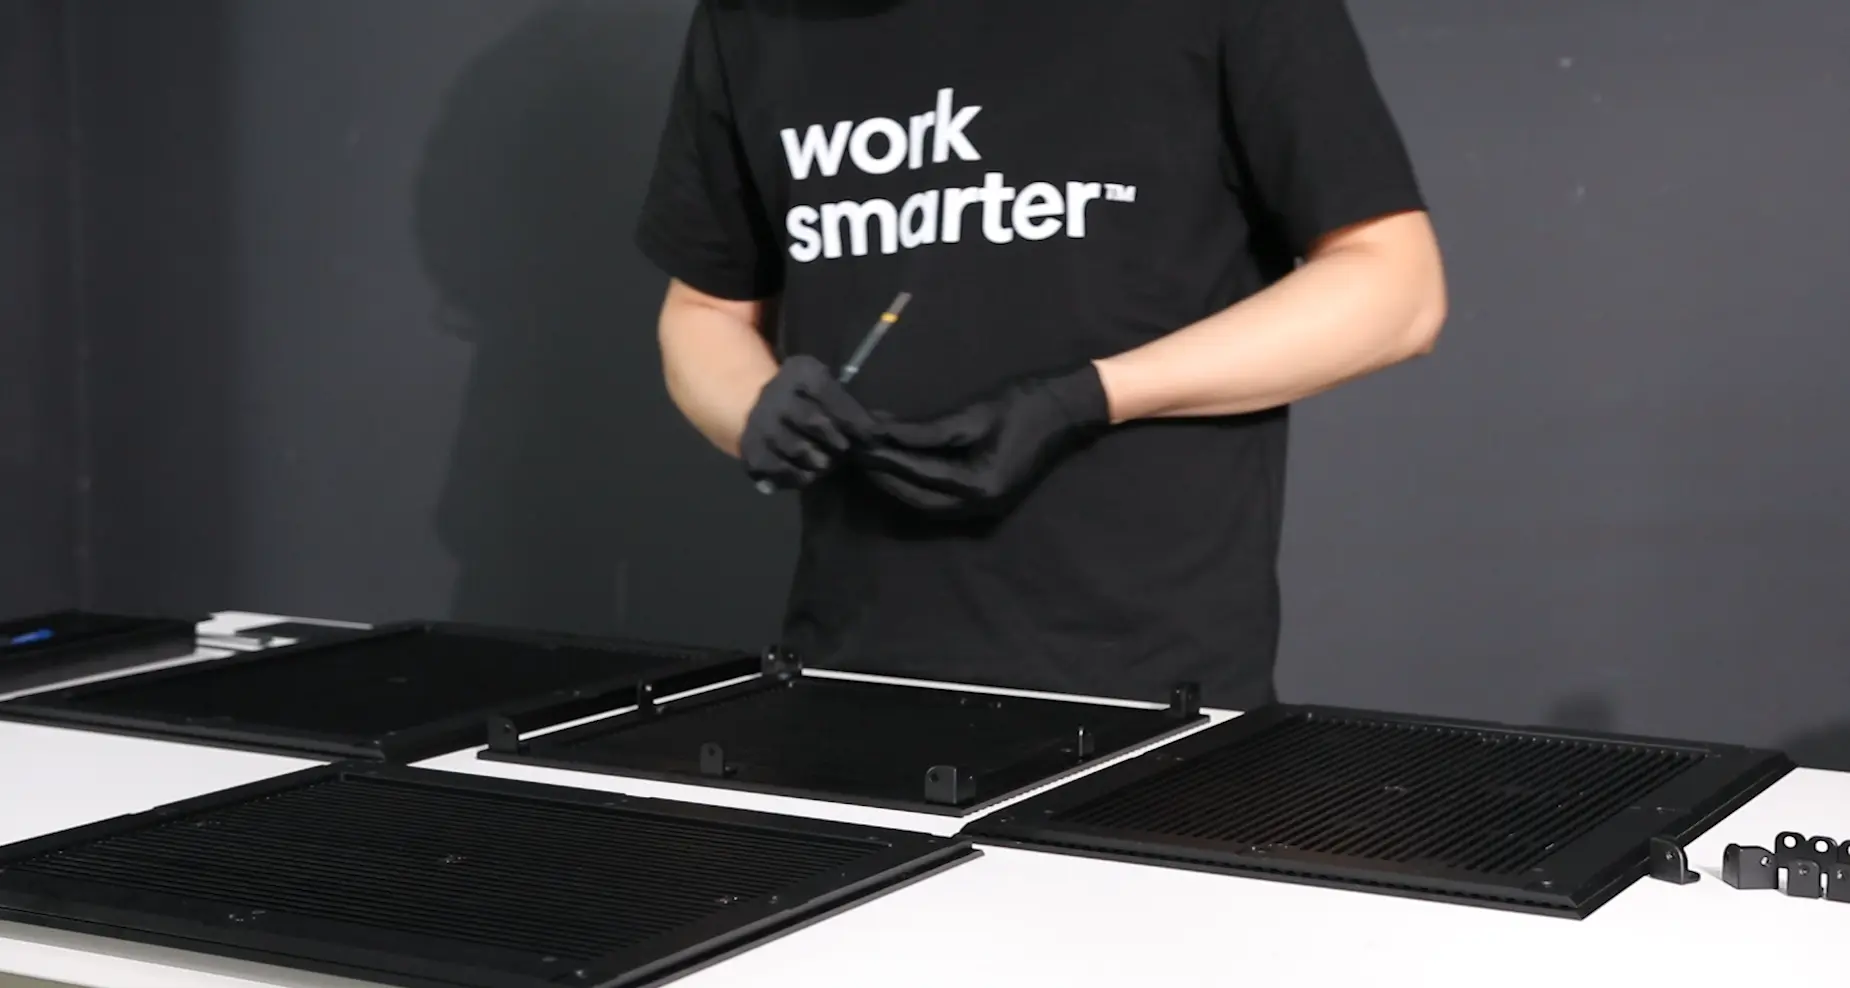
The chassis builds around the open-source CNC frame in the repo. Twenty-three steps total. Took me about three hours. The full step-by-step is in the repo. Where it goes wrong:
Order matters more than torque on this build. The PCIe risers attach to the mount plate before the motherboard goes in. Once the board is down, you cannot reach the riser screws, they sit under the board tray. Skip this step, you'll be pulling the motherboard back out to fix it. I did this on the first build.
Assembly motherboard to the mount.
Riser ends are not interchangeable. Male end goes into the motherboard PCIe slot. Female end accepts the GPU. The connectors look similar at a glance and the cable doesn't care which way you orient it electrically, it will boot. But the latch geometry is wrong if you reverse them, the GPU sits loose, and you'll spend the next week chasing intermittent PCIe correctable errors in dmesg. Read the label on the riser shell. Male to board, female to GPU.
Attach the PCIe riser to motherboard.
GPU sag is real on dual 5090s. Each card weighs about 2.5 kg with the cooler. Mounted vertically off a riser, they cantilever. Both cards must sit co-planar with their support brackets tightened to the chassis rail. Loose mounting + thermal cycling = a slow-motion failure that shows up as one card disappearing from lspci six months later.
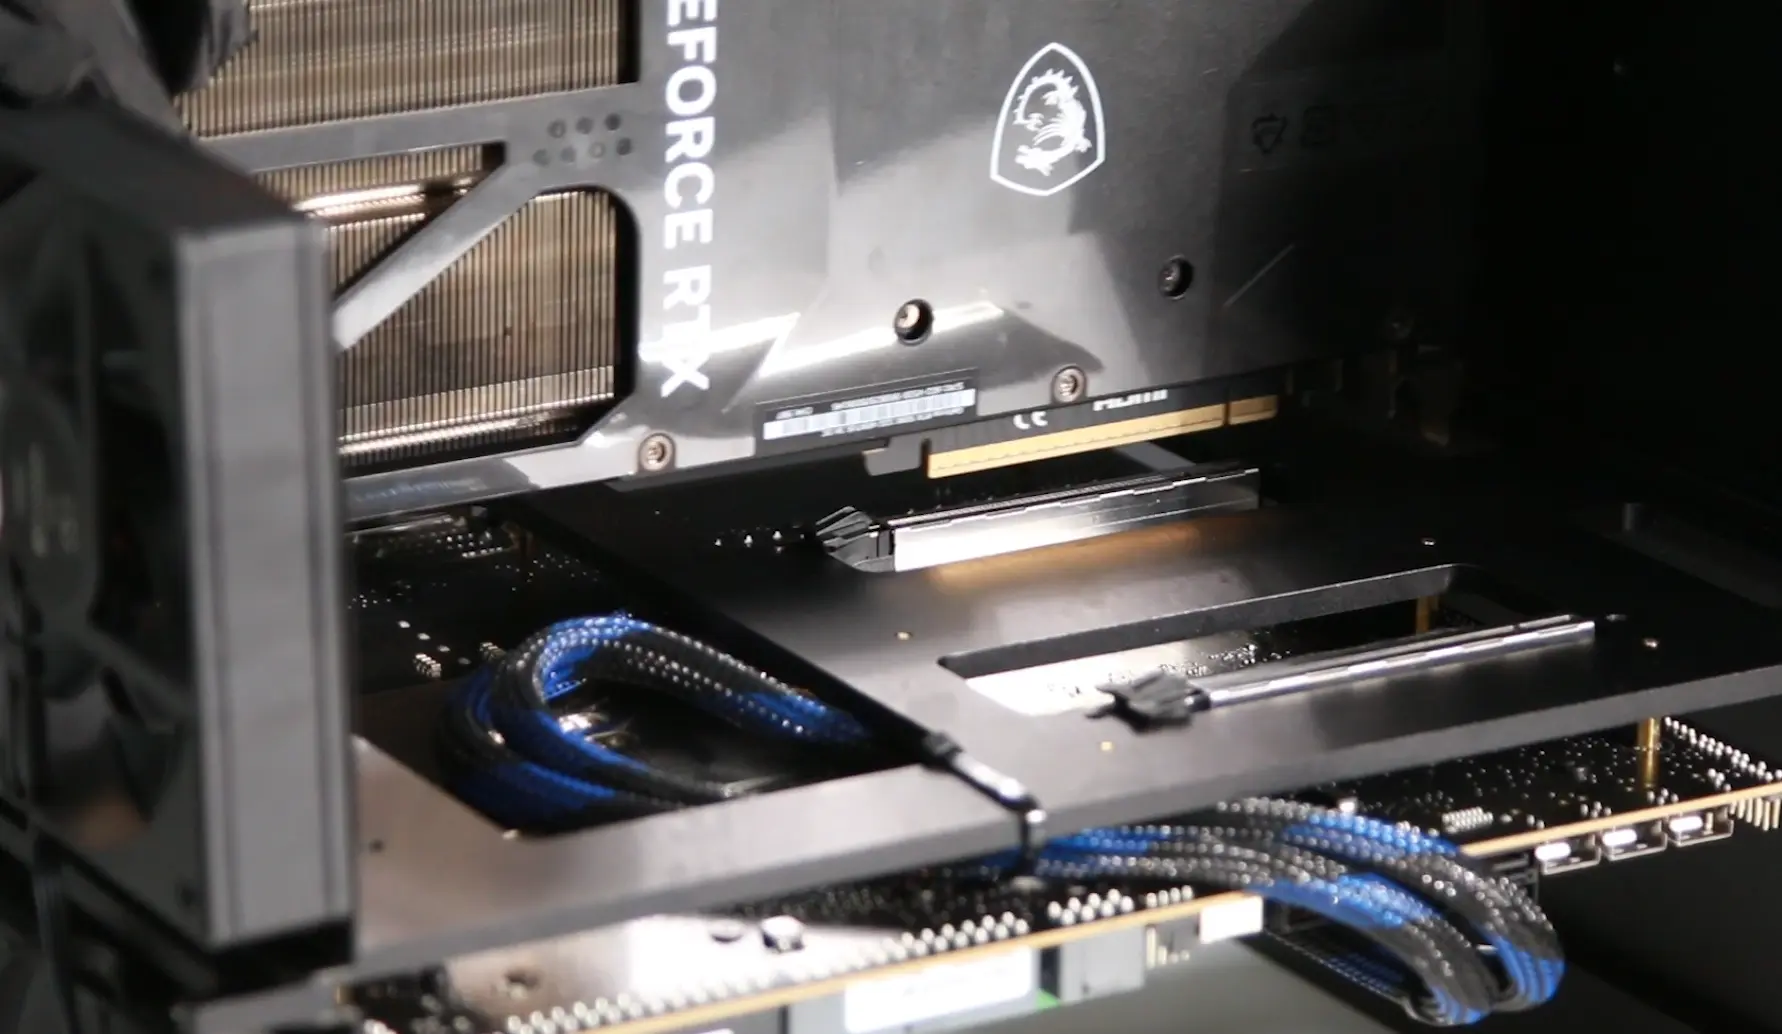
Attach GPUs to the female of PCIe riser.
Seat the GPU power connectors fully. The 5090 draws 575W through a single 600W-rated cable. Partial seating is the documented failure mode that melted 4090 connectors in 2022 and got reframed as user error every time. Push until the click. Verify with a tug. The bracket hides the connector once mounted; you do not want to be debugging this after the chassis is closed.
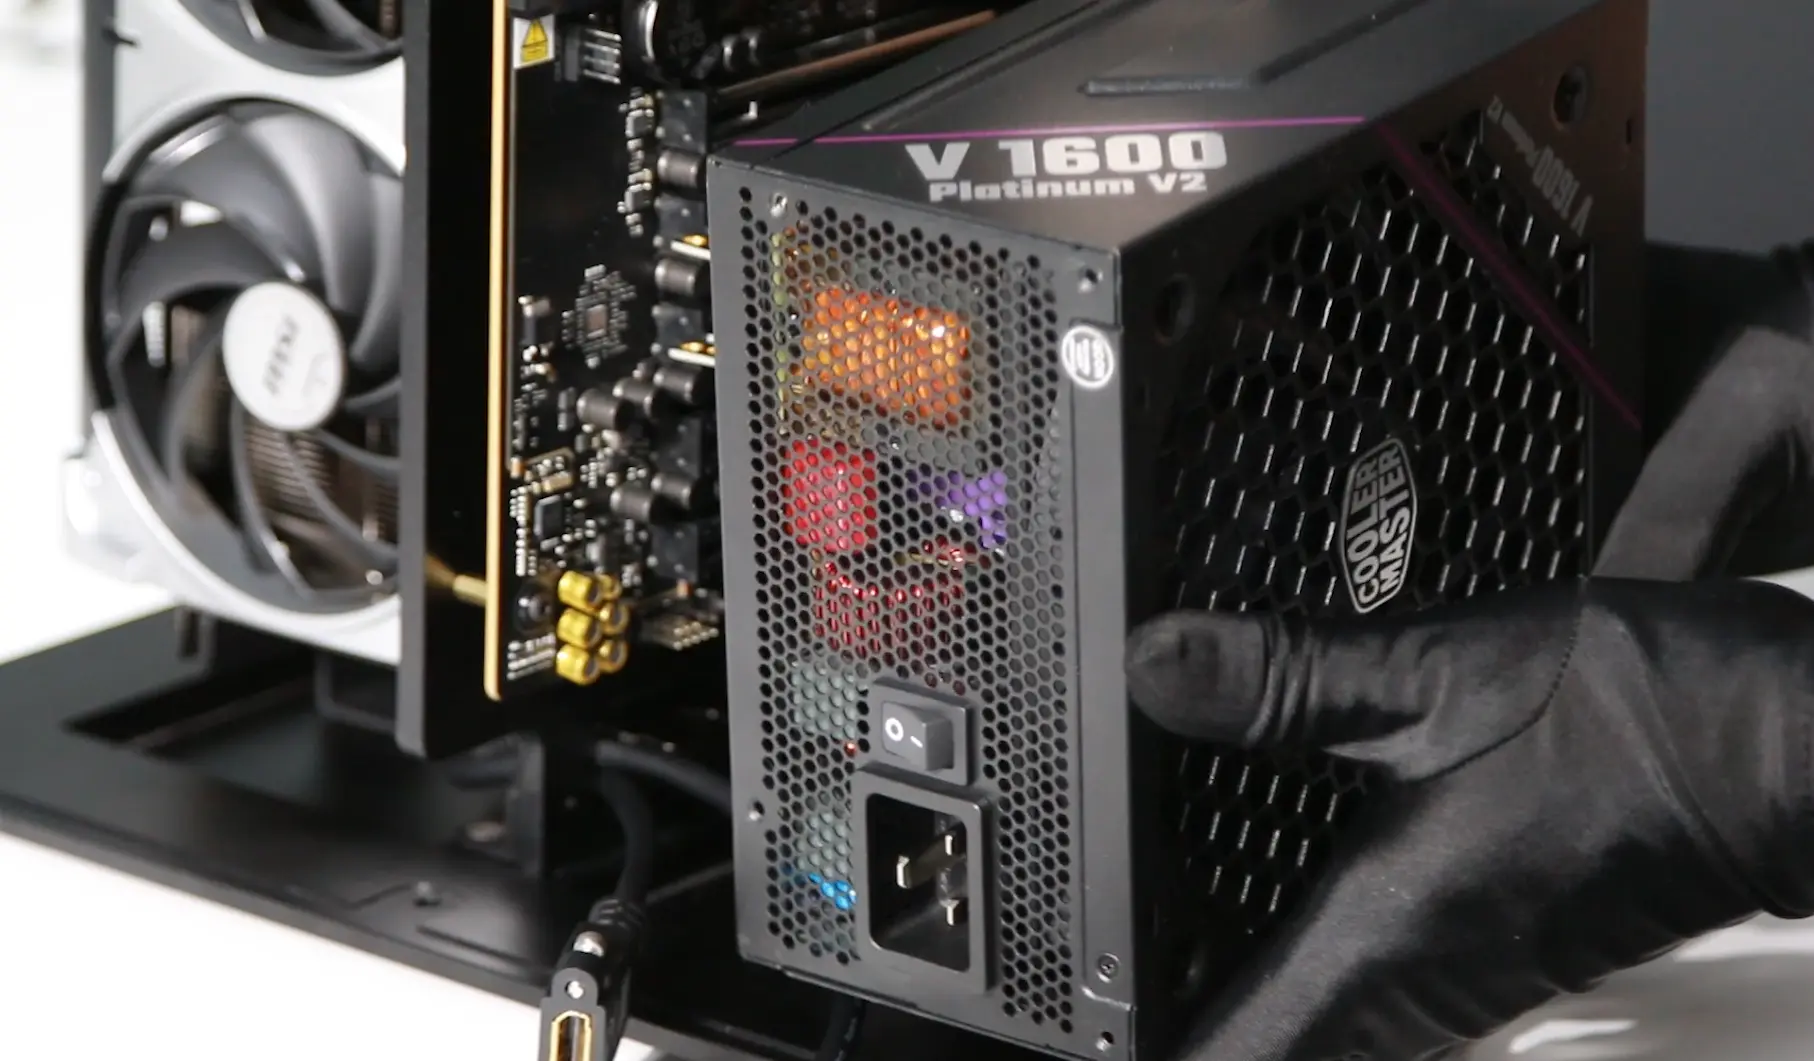
Attach the PSU to the base and connect the cables to the PSU Side
Quick Test
Flip the PSU switch. Push the chassis power button. Motherboard POST LED cycles through CPU, DRAM, VGA, BOOT — final state should be off (or green). POST in 15 seconds. If only one GPU fan spins, the other card didn't enumerate. Power down, check riser orientation first, PCIe slot seating second, GPU power cable third. Likely cause on this build is riser orientation — see the previous section.
Setup — BIOS Optimization
The default BIOS settings on this board do not deliver what you paid for. Two settings have to change; three more are worth touching. Full reference in the repo (Docs/UM_Motherboard.pdf, Docs/UM_BIOS.pdf).
The two that matter:
- Above 4G Decoding. Path: Advanced → PCI Subsystems Settings → Enable Above 4G Decoding. Without it, GPUs with BARs above 4GB don't initialize. The 5090's 32GB framebuffer absolutely needs this. Not optional.
- Resizable BAR. Path: Advanced → PCI Subsystems Settings → Enable Re-size BAR support. Real throughput gain on inference workloads where the CPU is feeding tokens into VRAM-resident weights.
The three that help:
- Power Management. Disable C-states and ASPM. They add wake latency at the start of inference batches.
- Memory Configuration. Set RAM to its rated speed; enable XMP/DOCP if your DIMMs support it. The defaults run conservative.
- Fan and Thermal Controls. Set thermal limits aggressively; let the motherboard manage fan curves through the PWM headers.
Save and reboot.
Testing
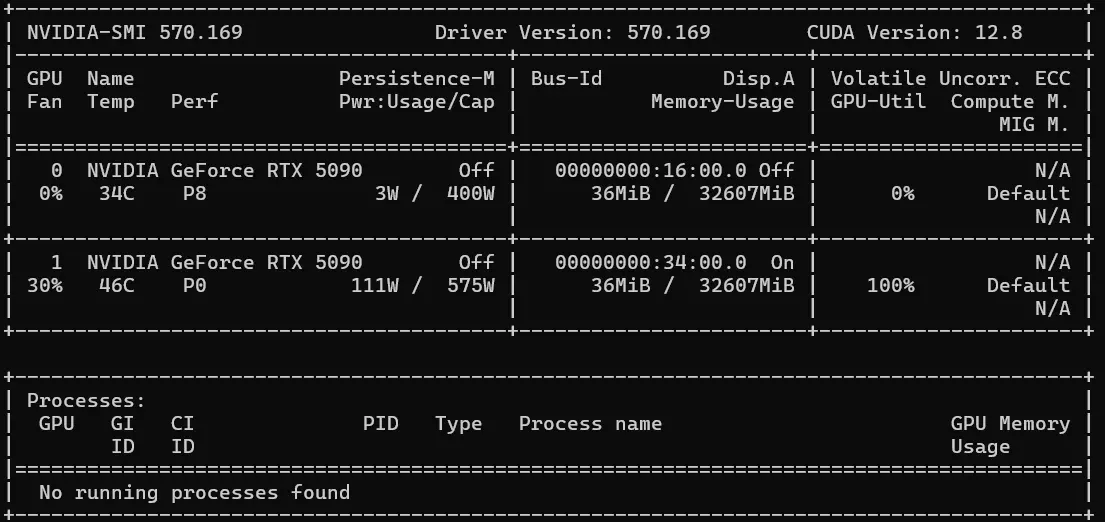
Boot WinPE from USB to verify hardware, or install Linux with NVIDIA drivers and check with nvidia-smi or nvtop. You should see two RTX 5090s at PCIe Gen5 x16, ~25W idle, 32760 MiB each. Any card reporting Gen1 x4 or Gen4 x16 is a riser issue. Any card missing entirely is a re-seat job.
Once nvidia-smi looks right, install your production OS image and start your AI work.
What It Replaces
The 8-GPU build replaces an API bill. The 2-GPU build replaces something else. A heavy Claude Code / Cursor user spends $100–500/month on API calls. Add Copilot, ChatGPT Plus, Gemini Advanced, Perplexity Pro — call it $200/month minimum for a vibe builder running through frontier tools daily. The Personal AI Computer pays for itself in 36–48 months purely on API cost. That's not the point.
The point is that ChatGPT remembers your financial information. Claude knows the product you haven't shipped yet. Gemini sees your inbox. You are not using AI, you are exposing yourself to corporations. The Personal AI Computer keeps your prompts and your weights on hardware you own, in a house you own, on a network you control. That math doesn't show up on a spreadsheet. It shows up the first time a vendor changes their terms.
Preliminary Conclusions
For those looking for a sovereign workstation that runs frontier-class open models, ~$6,500–8,000 in parts is the entry point. A pre-built equivalent from a workstation OEM lands at $14K–18K with worse cable routing. There's a learning curve. Personal computing in 2016 meant a laptop and a Wi-Fi password. Personal AI in 2026 means owning the silicon your weights live on, the BIOS settings that gate your throughput, and the OS that drives your agents. Narrower audience, similar depth.
I've spent a lot of time on workshop floors building computers and chasing PCIe riser orientation bugs to get devices that actually work. This box works and lets you go straight to the hard problems: running models locally, building agents that don't phone home, owning the stack. If that sounds like your idea of fun, build it. We're not selling this build. There's no part of it that's proprietary except the chassis CAD, and that's open-source in the repo.
Open Source
Full BOM, chassis CAD (STEP files), BIOS settings, assembly photos, every gotcha that didn't fit this post: → https://github.com/autonomous-ai/Personal-AI-Computer
If you want help building one, the door is open: @dee_hw