How to Set up a Home Pottery Studio for Small House
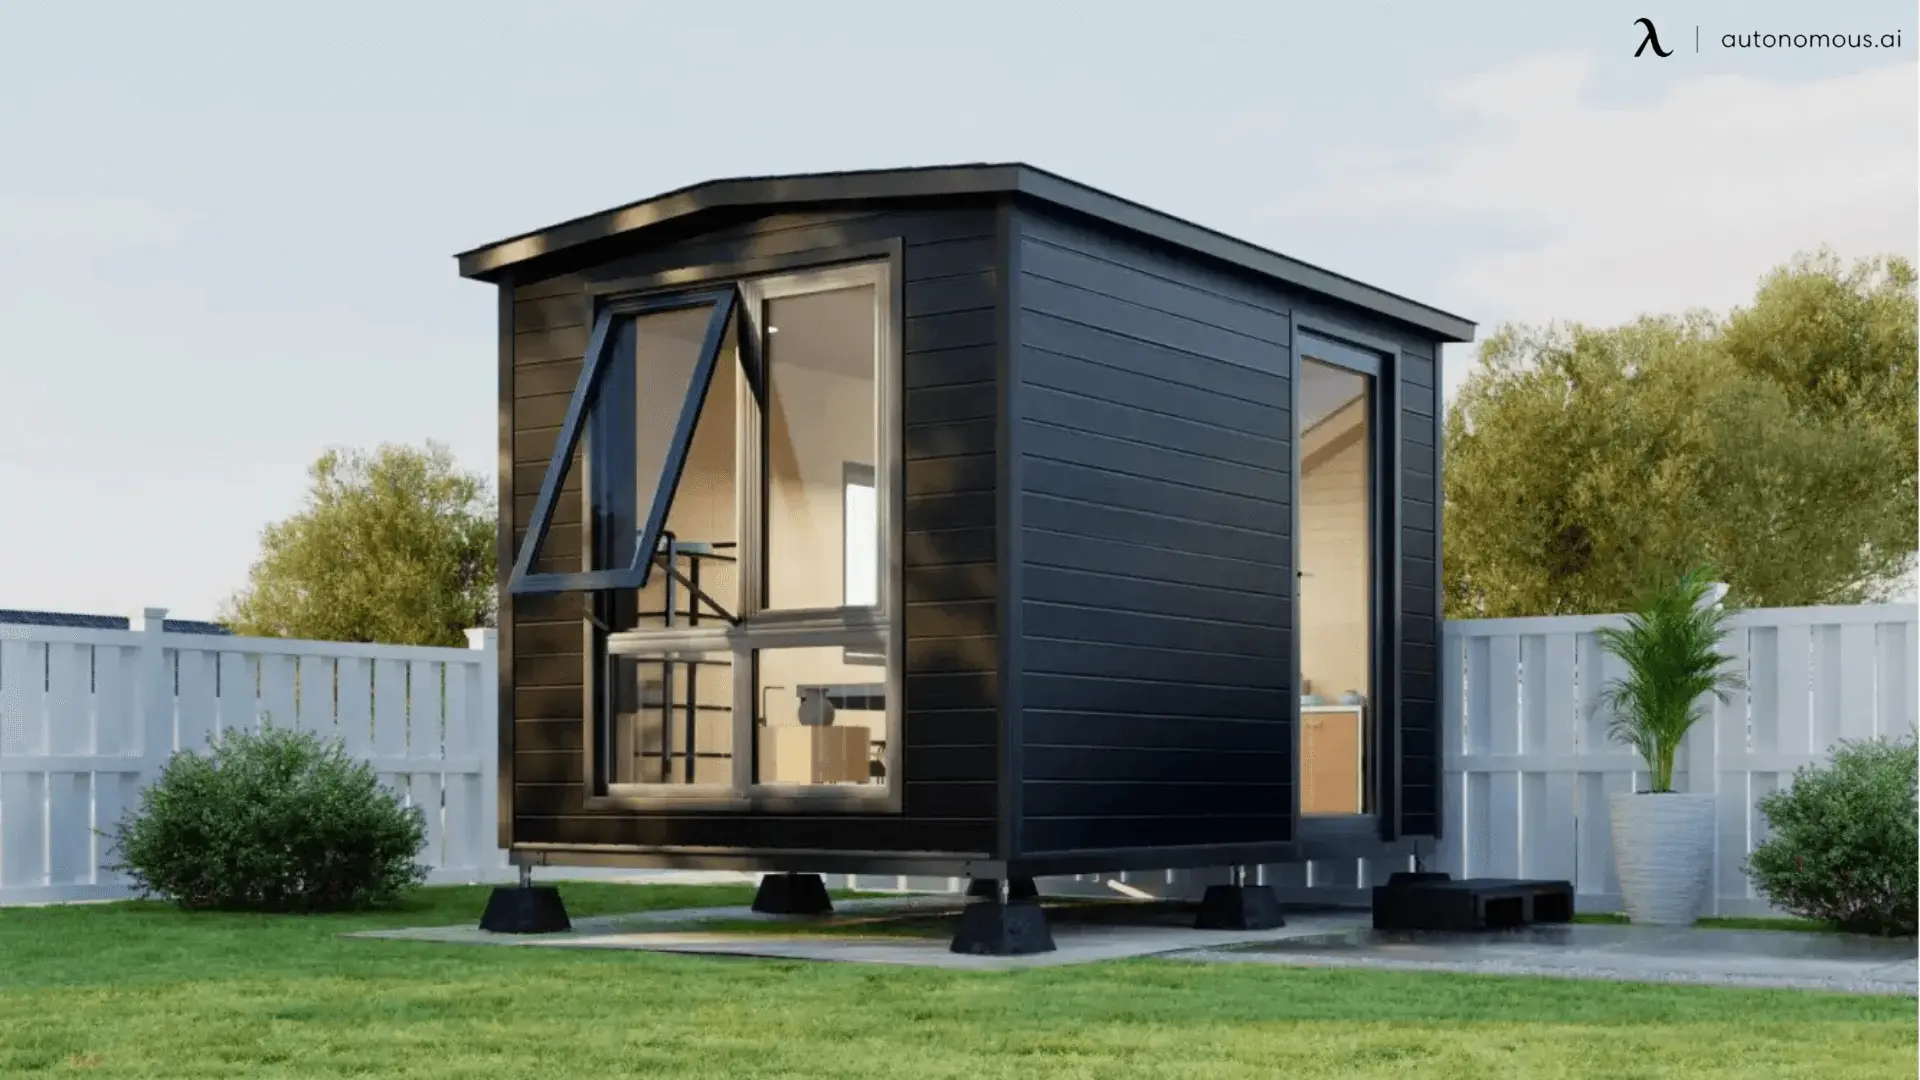
Table of Contents
- 10 Steps to Set up a Home Pottery Studio
- Step 1: Choose a Dedicated Space
- Step 2: Invest in the Right Tools and Equipment
- Step 3: Set up a Drying Area
- Step 4: Create a Glaze Station
- Step 5: Store Your Tools and Equipment
- Step 6: Set Up a Display Area
- Step 7: Incorporate Natural Elements
- Step 8: Use a Color Scheme to Create a Cohesive Look
- Step 9: Incorporate Storage Solutions
- Step 10: Add Some Personal Touches
- FAQs
- Final Words
Anyone would love to take a break from the hustle and bustle of their daily routine and showcase their creativity in a unique way. Setting up a home pottery studio is one way of doing that. You may dedicate a room to a pottery house studio. However, this can become challenging if you have a small home. So, separating your small home pottery studio setup from your home can be a considerable choice. What could be better for a potter than a modern prefab shed where they can create a small home pottery studio for themselves?
Setting up a pottery studio in a small prefab cabin or your house can be a challenging but rewarding task. You must be mindful of the steps that you have to follow to create a pottery house studio. We can understand that this is a difficult task for you, especially if you are a newbie. That’s why today we have shared a step-by-step guide to help you plan your small pottery studio layout and put it into action.
10 Steps to Set up a Home Pottery Studio
Step 1: Choose a Dedicated Space
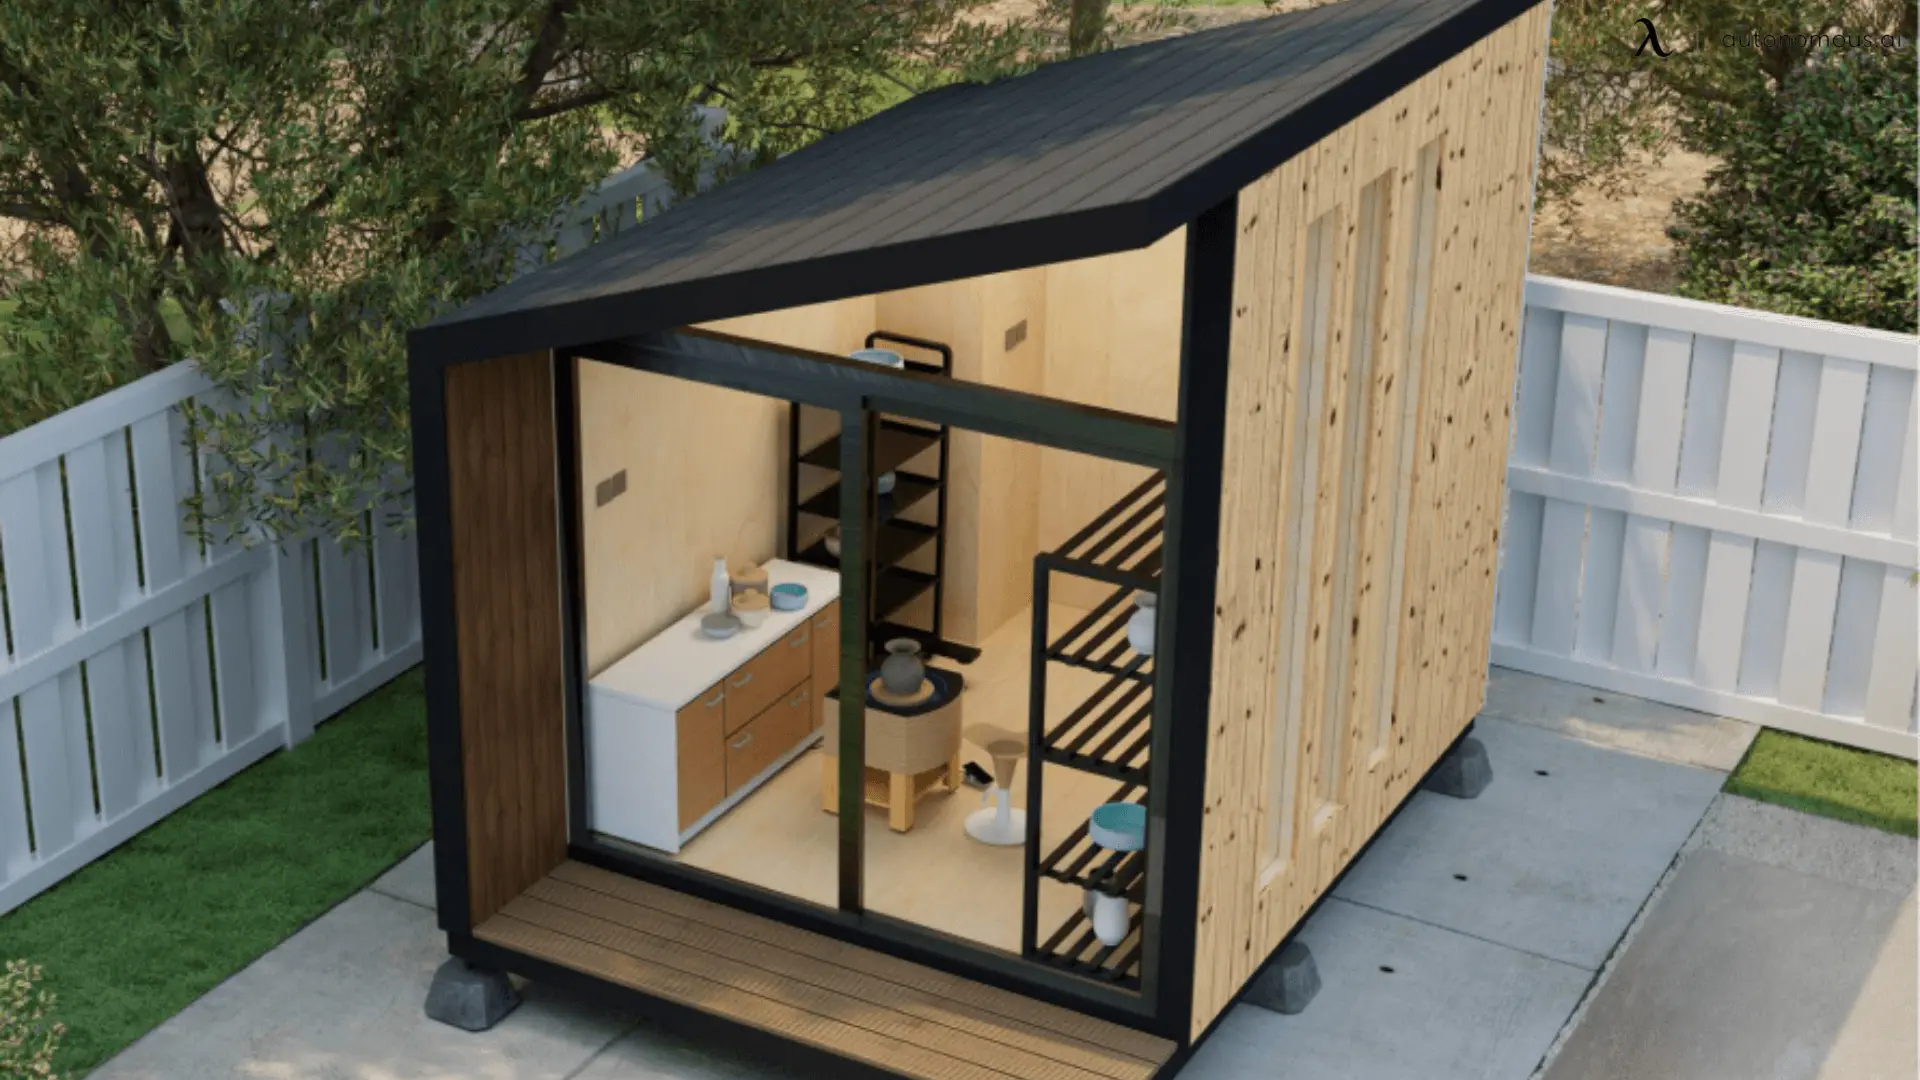
The first step is to find a space in your home that is dedicated to your pottery studio. This can be a small room, a corner of a larger room, or even a small corner of your garage or basement. It's important to choose a space that is well-ventilated and has plenty of natural light.
You'll also want to make sure you have a flat, sturdy surface for your workbench and access to electricity for your pottery wheel and other tools.
It will be smart of you if you buy a WorkPod Versatile or use your home office shed for your pottery studio setup. Such a privacy pod will provide you with a secluded space where you can create your art without any distractions.
Step 2: Invest in the Right Tools and Equipment
To get started, invest in essential tools such as a pottery wheel, clay, glazes, shaping tools, and a kiln. If you're new to pottery, you can buy a starter kit that includes everything needed for a home pottery studio setup.
Step 3: Set up a Drying Area
A drying area is essential for letting your pottery pieces set before shaping and decorating. Use shelves or racks in a well-ventilated space, away from direct sunlight. This will help prevent uneven drying.
Step 4: Create a Glaze Station
Setting up a glaze station is necessary for applying glazes to your pottery. You can repurpose a small table or shelf, or even use an old kitchen counter. Ensure there’s enough space for mixing and applying glazes, and access to electricity for your kiln.
Step 5: Store Your Tools and Equipment
Organization is key. A cluttered space reduces productivity. Invest in storage solutions such as shelves, bins, and drawers to keep your tools and materials organized. This will not only improve your workflow but also extend the lifespan of your tools.
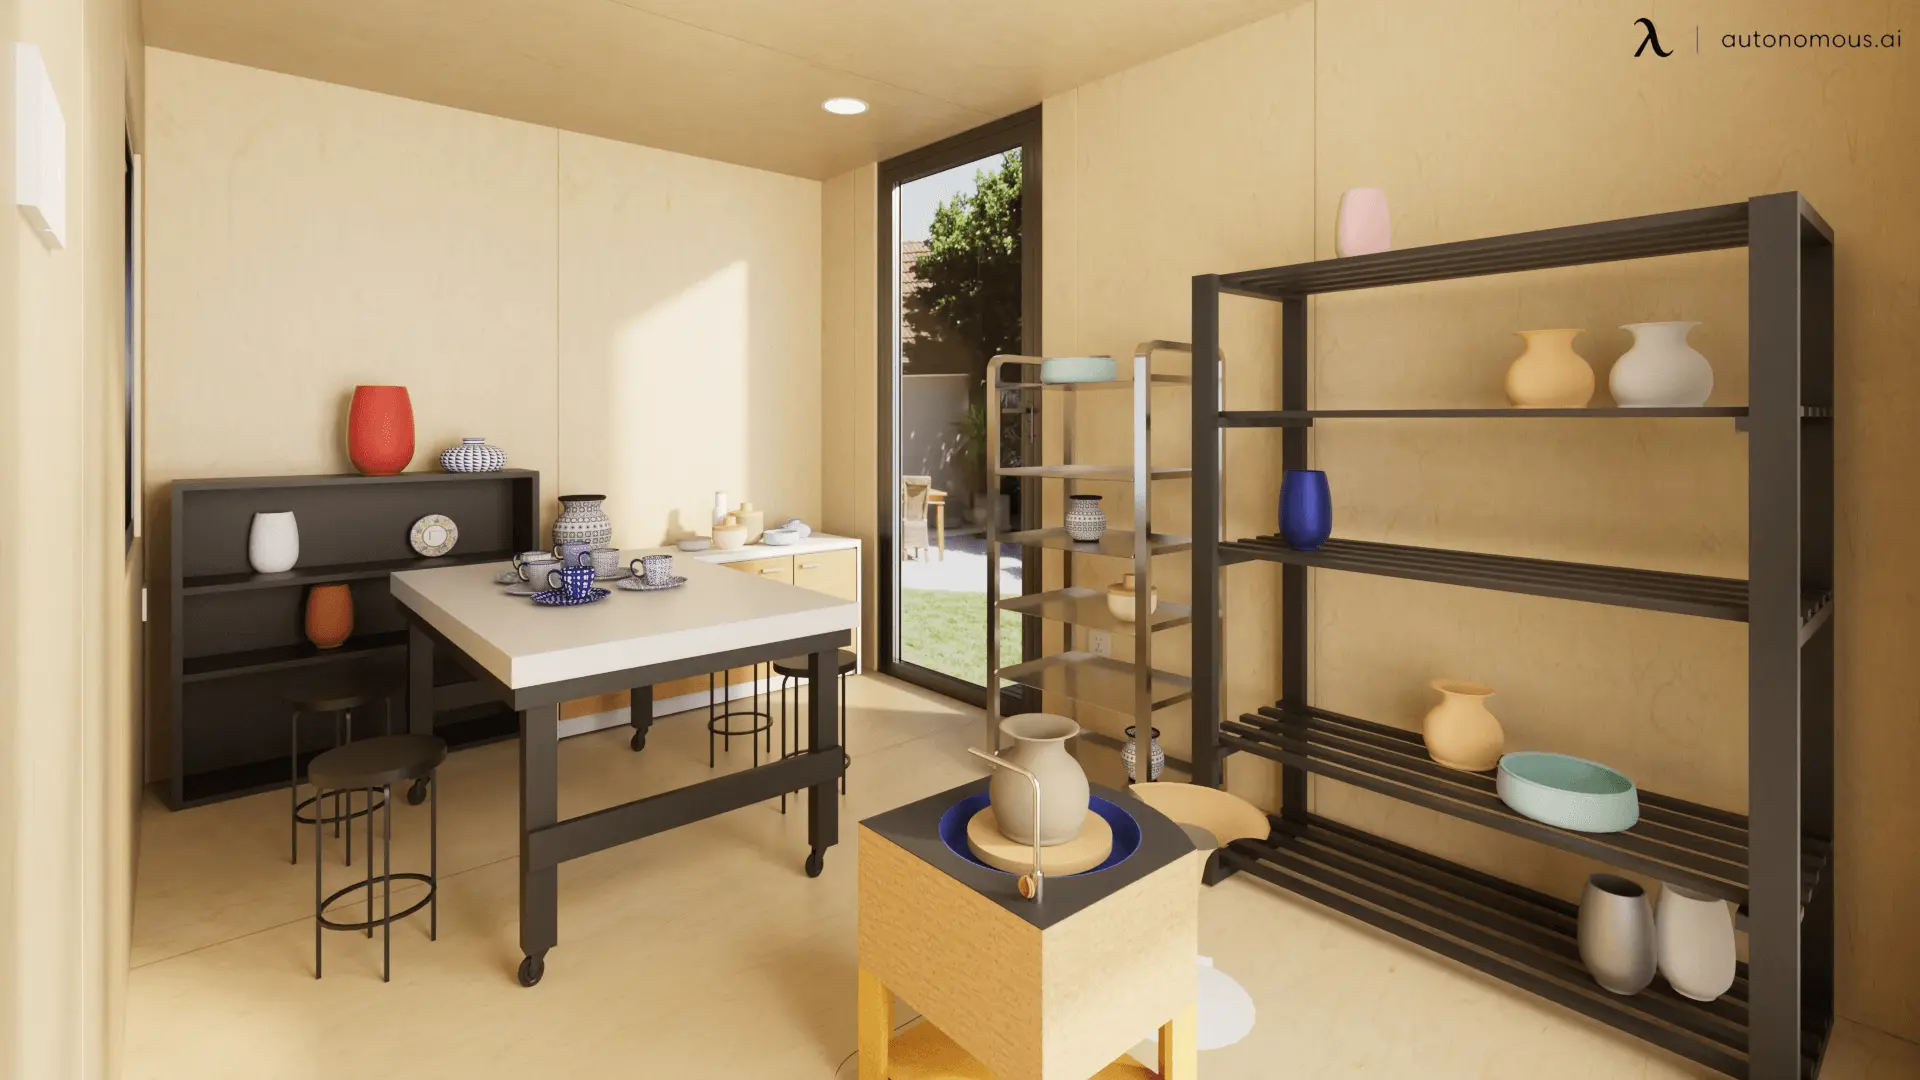
Step 6: Set Up a Display Area
Once you start creating pottery pieces, you’ll want a place to showcase them. A simple shelf or custom display can motivate you to push your creative boundaries. A display area can also help inspire your next project.
Step 7: Incorporate Natural Elements
Incorporating natural elements like plants, sunlight, or wooden accents can create a calm and inspiring atmosphere in your small pottery studio layout. A well-designed space will not only improve your creativity but also make the studio feel more spacious.
Step 8: Use a Color Scheme to Create a Cohesive Look
A well-thought-out color scheme can make your pottery studio feel cohesive and inviting. We recommend light, neutral tones for small home pottery studios, as they make spaces feel larger and brighter. Avoid dark colors to keep the room light and open.
Step 9: Incorporate Storage Solutions
Storage is essential in any small pottery studio layout. Consider adding floating shelves, bins, or drawers to optimize every inch of space. These solutions help keep your studio organized and efficient.
Step 10: Add Some Personal Touches
Personalize your space by hanging artwork, displaying your favorite pottery pieces, or adding decorative elements that reflect your style. These touches will make the studio uniquely yours and keep you inspired every day.
FAQs
How much space do I need for a home pottery studio?
The amount of space you need for a home pottery studio layout depends on the equipment you plan to use and your desired workflow. A small room or a corner of a larger space can work, but make sure it has enough room for your pottery wheel, kiln, drying area, and storage. If you're limited on space, a compact studio shed like the WorkPod Core can provide an ideal solution.
Can I set up a pottery studio in a small home?
Yes! Even in a small home, you can create a functional small pottery studio by utilizing a dedicated corner, a spare room, or a backyard studio shed. With thoughtful layout planning and efficient use of space, it’s possible to create a studio that fits your needs without overcrowding your home.
What are the essential tools for a home pottery studio?
At a minimum, you’ll need a pottery wheel, clay, glazes, sculpting tools, a kiln, and shelving or storage for your pieces. If you're just getting started, many pottery starter kits come with these essentials. Over time, you can expand your collection based on your specific needs.
Can I use a prefab shed for my pottery studio?
Yes, prefab sheds like the WorkPod Versatile make excellent, dedicated spaces for your home pottery studio setup. They provide privacy, isolation from the main home, and are easy to customize for things like electricity, storage, and workstations. It’s a great option if you want a separate space for your craft.
How do I keep my pottery tools organized in a small space?
Organization is key in a small pottery studio. Invest in storage solutions like wall-mounted shelves, bins, or cabinets to keep your tools organized. Using vertical space effectively and choosing multi-purpose furniture like L-shaped desks or floating shelves can help maximize storage while keeping your workspace tidy and functional.
What color scheme is best for a small pottery studio?
For a small pottery studio layout, light and neutral colors like whites, creams, or soft grays work best. These colors reflect natural light, making the space feel bigger and brighter. You can also incorporate accents of your favorite vibrant colors to create a welcoming and inspiring atmosphere.
Final Words
Setting up a home pottery studio can be challenging but incredibly rewarding. Whether you choose a corner in your home or invest in a small prefab studio shed, with careful planning, your home pottery studio layout can be both functional and inspiring. If you're looking for a dedicated, private space to unleash your creativity, consider a pottery shed to create the ideal environment for your craft. Follow these steps, and get creative—your perfect pottery space awaits!