Ideal Standing Desk Height by Height
The ideal standing desk height sits between 37 and 47 inches for most adults, measured from floor to desktop surface. The exact number depends on your standing height with shoes on. As a rule, a person who is 5'8" needs a desk near 39 inches; a person who is 6'2" needs one near 44 inches.
This range comes from anthropometric data on standing elbow height. Standing elbow height is roughly 60-63% of total stature. The desk surface should sit 1 to 2 inches below your standing elbow. This matches the Cornell University Ergonomics Web (CUErgo) guidelines for standing workstation height and the OSHA Computer Workstations eTool reference ranges.
Reference points to keep in mind while reading the chart below:
- Floor to desktop, not floor to keyboard tray
- With work shoes on, not barefoot
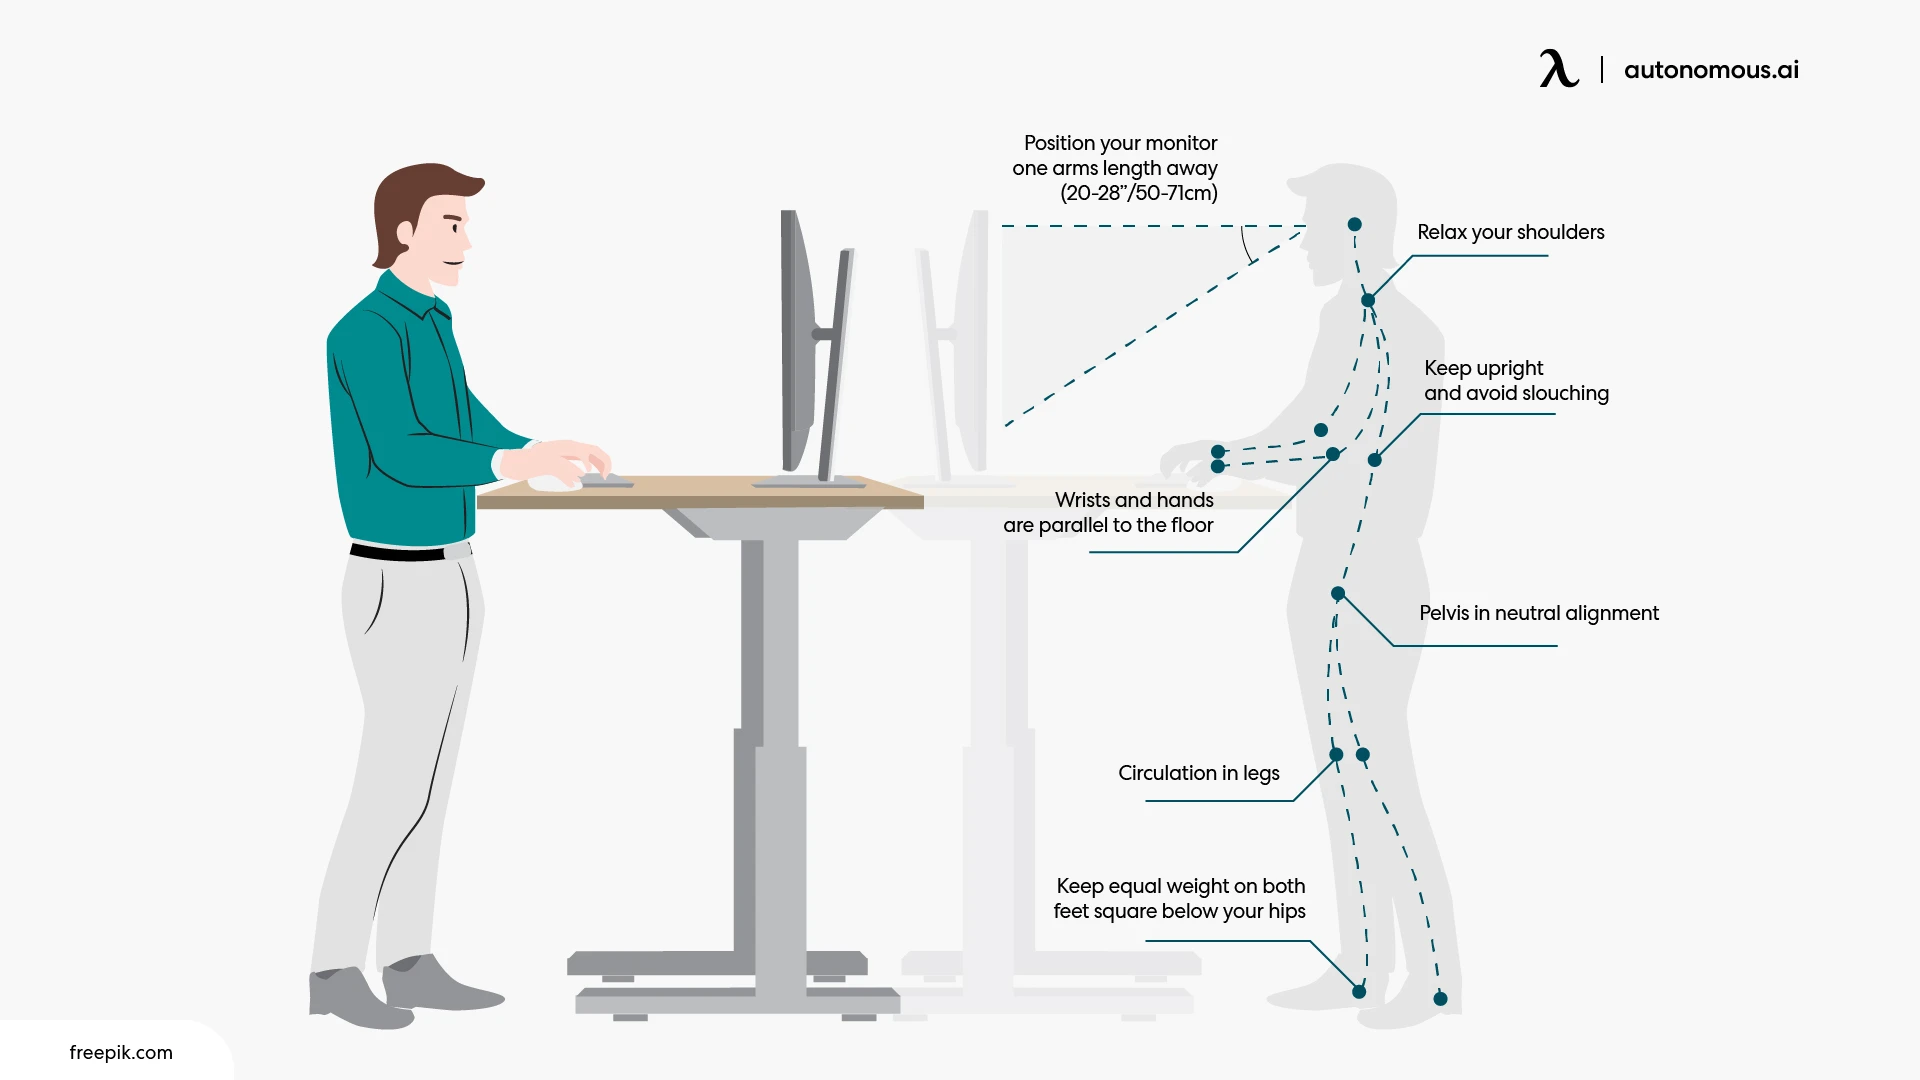
- Monitor top at or just below eye level, 20-30 inches from your face
Standing desk height by your height: the chart
The table below maps standing height (with shoes) to desk height for typing posture. Numbers are the desktop surface height, not chair-relative.
Your height (with shoes) | Ideal desk height | Range to test |
5'0" (60") | 36.0" | 35.5" – 37.0" |
5'2" (62") | 37.0" | 36.5" – 38.0" |
5'4" (64") | 38.0" | 37.5" – 39.0" |
5'6" (66") | 39.0" | 38.5" – 40.0" |
5'8" (68") | 40.5" | 40.0" – 41.5" |
5'10" (70") | 42.0" | 41.0" – 43.0" |
6'0" (72") | 43.5" | 42.5" – 44.5" |
6'2" (74") | 44.5" | 43.5" – 45.5" |
6'4" (76") | 46.0" | 45.0" – 47.0" |
6'6" (78") | 47.0" | 46.0" – 48.0" |
If you fall between two rows, start at the lower number. It is easier to add height with a keyboard tray or monitor riser than to subtract it.
Two adjustments to apply on top of the chart:
- Heels or thick soles: add the heel height to your standing height before reading the chart.
- Mechanical keyboard or wrist rest: subtract 0.5 to 1 inch from the desk height to compensate for the extra stack under your hands.

Why the "elbow at 90°" rule is incomplete
The "elbow at 90°" rule is a posture cue, not a measurement. It tells you what the joint should look like once the desk is set, not how to set the desk. Two flaws make it unreliable on its own.
First, arm length scales with height but not linearly. A 5'4" user and a 6'2" user can both find a desk height where their forearm reaches parallel, but the absolute desk height differs by 6 to 7 inches. A coworker's setting is not your setting.
Second, the rule ignores everything below the elbow. Wrist neutrality, shoulder load, and monitor distance all change with desk height even when the elbow stays at 90°. A desk one inch too high forces shoulder elevation; one inch too low forces wrist extension. The chart accounts for these; the angle alone does not.
Use the elbow rule the right way: as the final check after setting the chart-recommended height, not as the starting point.
What to look for in an adjustable standing desk
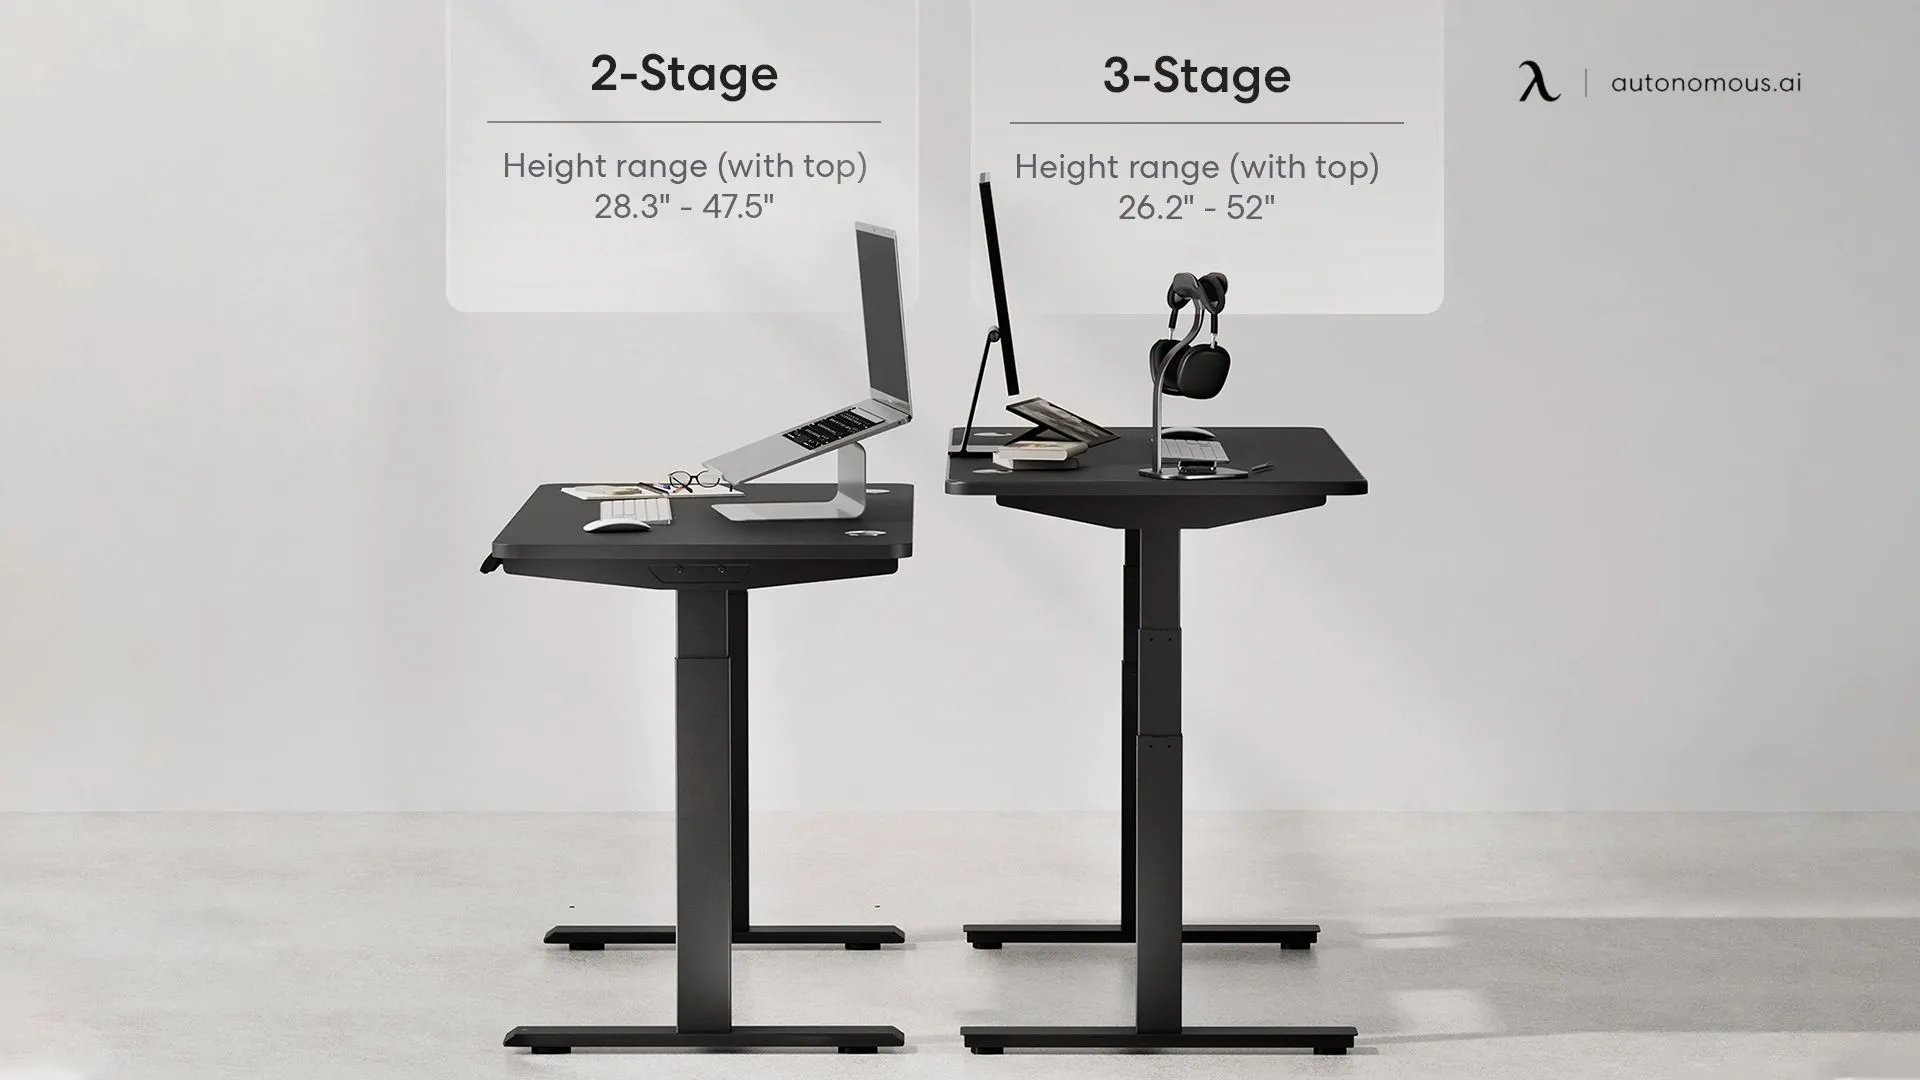
An adjustable desk solves the height problem only if the adjustment range covers your full sit-stand window. Check three specs before buying.
Height range. The desk should reach at least 2 inches below your sitting elbow height at the low end and at least 2 inches above your standing elbow height at the high end. For most adults that means a range starting at or below 24 inches and topping out at or above 48 inches.
Memory presets. Manual adjustment every transition kills the sit-stand habit. Memory presets save your sitting and standing positions so the desk hits the right height in one press.
Stability at full extension. Many desks rate stable up to 40 inches but wobble above 44. If you are over 6 feet, test the stability at your actual standing height, not at mid-range.
The Autonomous Desk adjusts from 25.4 to 51 inches with four memory presets, which covers users from 5'0" to 6'6" without forcing the frame to either extreme. If you want the math worked out for your exact height, the desk height calculator returns the number directly.
FAQs
What is the standard standing desk height?
There is no single standard standing desk height. Most adults work comfortably between 38 and 46 inches, with the exact number set by user height. Desks marketed as "standard" usually default to 42 inches, which fits users around 5'10".
How high should a standing desk be for a 5'10" person?
A 5'10" person should set the standing desk to 42 inches, with a working range of 41 to 43 inches. Add height if wearing shoes with a thicker sole, and subtract half an inch if using a thick mechanical keyboard.
How high should a standing desk be for a 6 foot person?
A 6'0" person should set the standing desk to 43.5 inches, with a working range of 42.5 to 44.5 inches. The number assumes work shoes on and a standard low-profile keyboard.
Is it better to have a standing desk too high or too low?
Slightly too low is the safer error. A desk set too high forces shoulder elevation and causes trapezius and neck strain within hours. A desk slightly too low can be raised with a keyboard tray or by stacking a thin riser, but a too-high desk has no easy fix without lowering the whole surface.
Should I measure my standing desk height with shoes on or off?
Measure with the shoes you wear at work. Shoes add 0.5 to 2 inches to your standing height, and the desk height should reflect how you actually stand during the work day. Barefoot measurements produce a desk setting that becomes too low the moment you put shoes on.
How does monitor height affect standing desk height?
Monitor height is set independently of desk height. The desktop surface should match your typing posture, and a monitor arm or riser brings the screen up to eye level. Lowering the desk to fix a low monitor causes wrist and shoulder problems.
Can two people share an adjustable standing desk?
Yes, but only with memory presets. Save each user's sitting and standing heights to separate preset buttons. Without presets, manual readjustment fails within a week and one user ends up working at the wrong height.
How often should I check my standing desk height?
Recheck the height every six months, and any time you change work shoes, swap your keyboard, or change monitor setup. Body posture and equipment shift over time; the original setting drifts with them.
Do I need a different desk height for sitting versus standing?
Yes. Sitting desk height is typically 28 to 30 inches; standing desk height is typically 38 to 47 inches. An adjustable desk handles both. A fixed-height desk forces a compromise that suits neither position.
What if my desk does not adjust to my ideal height?
If the desk is too low, add a monitor riser and a keyboard tray to bring the working surfaces up. If the desk is too high, lower the chair and add a footrest for sitting work, but standing work at a too-high desk has no good fix - replace the desk.