

- Newest
- Most viewed
Interested in a Link Placement?
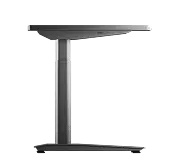
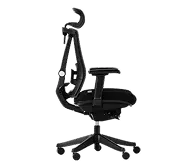
What Is BIFL Furniture? Buy It For Life Office Picks
Learn the meaning of BIFL furniture and why it matters. Find lasting office chairs, standing desks, and storage that keep up with your work.
Latest Updates | Aug 28, 2025 959 views

Why On-Premise AI is the Future, Powered by EdgeAI and Ollama
Latest Updates | Aug 25, 2025 326 views
.webp)
How To Choose The Best Leather High-Back Office Chair?
Smart Products | Aug 20, 2025 924 views
8 Therapist Office Chairs That Set The Tone For Connection
Smart Products | Aug 20, 2025 707 views
.webp)
10 Best Office Chair Alternatives For Comfort & Posture
Smart Products | Aug 19, 2025 700 views
Sewing Chair Reviews: Top 6 Chairs For Your Upgrade
Smart Products | Aug 18, 2025 861 views
.webp)
Endel App Review: Worth $60? My 3-Month Experience
Latest Updates | Aug 15, 2025 1,219 views

Cloaked App Review: Can It Really Keep You Private?
Latest Updates | Aug 12, 2025 1,262 views

AI Cleaner App Review 2025: 3-Month Real User Experience
Latest Updates | Aug 12, 2025 981 views
Best Picks For Office Chair Labor Day Sales 2025
Latest Updates | Aug 10, 2025 628 views
Best Labor Day Gaming Laptop Deals 2025 You Can’t Miss
Gaming Setup | Aug 10, 2025 855 views
.webp)
Labor Day Gaming PC Sale 2025 – Don’t Miss RTX Rig Deals
Gaming Setup | Aug 9, 2025 726 views