


How To Disassemble Office Chair With 5 Easy Steps
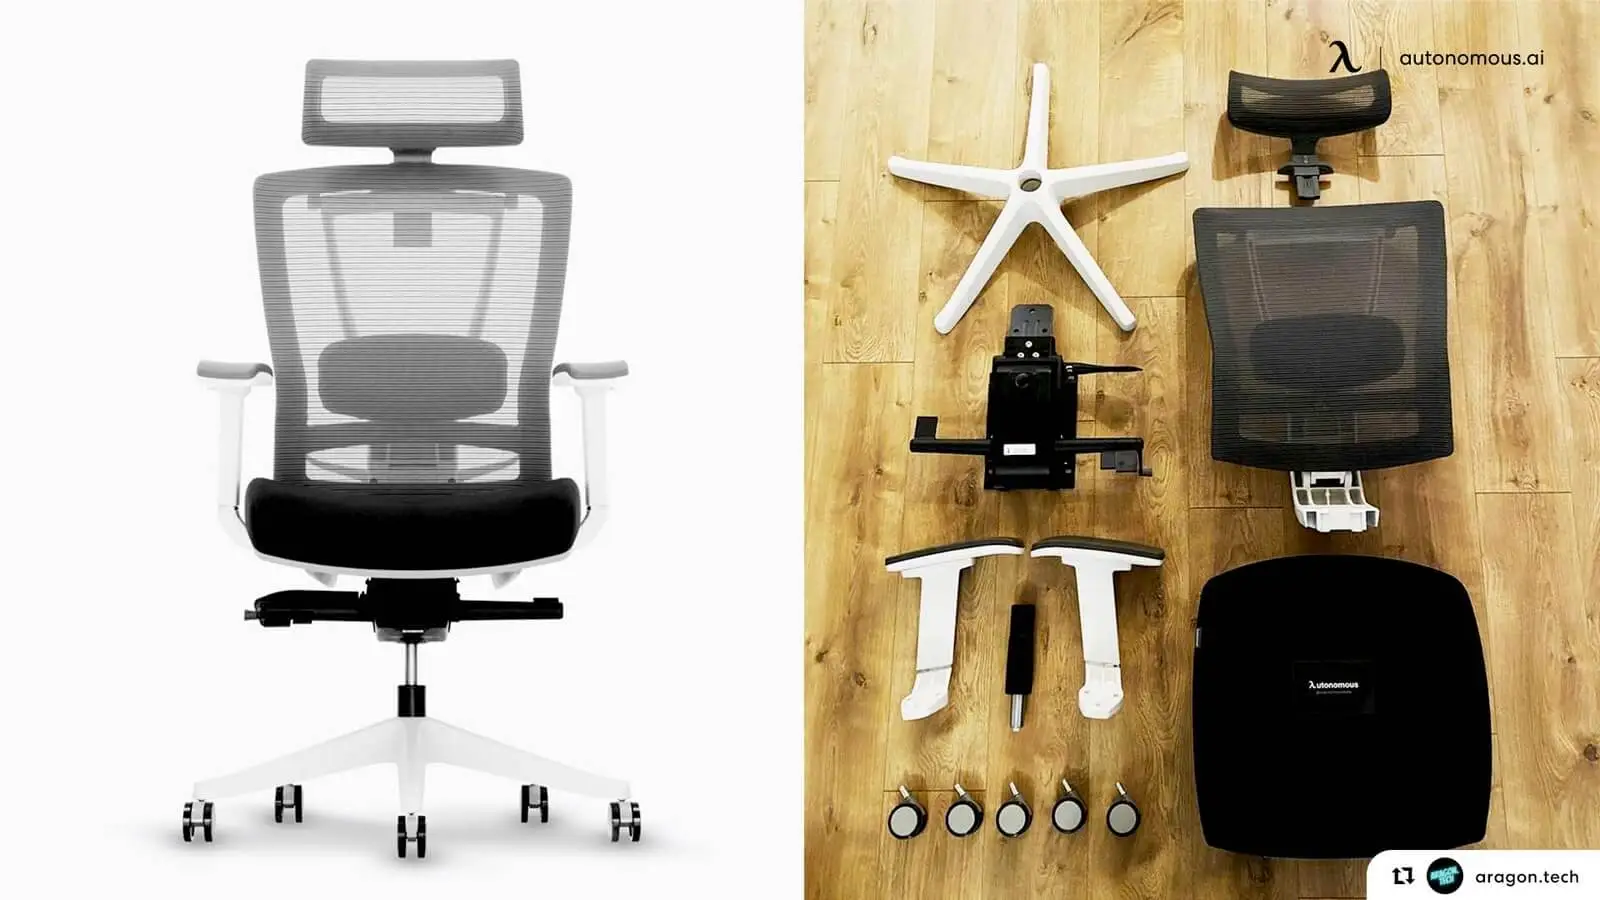
Table of Contents
Most office chairs look complicated, but taking them apart isn’t nearly as tricky as it seems. Whether you're moving, replacing a part, or giving your chair a deep clean, learning how to disassemble an office chair makes the whole process easier and safer. With the right tools and a clear plan, you can break it down into just a few simple steps. This guide walks you through exactly what to prepare and how to take each piece apart without damaging anything.
What You’ll Need Before Starting
Before you jump into how to disassemble an office chair, it helps to get your tools ready. Most chairs are designed with simple connection points, so a well-organized setup can make the entire office chair disassembly process quicker and cleaner.
Whether you're doing this for a move, a repair, or a replacement, a few basic tools are usually all it takes to disassemble an office chair without hassle.
Essential tools:
- Phillips and flathead screwdrivers – to remove screws from the seat, backrest, or armrests.
- Allen wrench (hex key) – for chairs that use hex bolts, especially around the base and arm support.
- Rubber mallet or soft hammer – helps loosen parts gently without leaving marks.
- Lubricant or WD-40 – useful when removing a stuck gas lift or tight joints.
- Small container or zip bag – to keep screws and bolts organized during office chair disassembly.
Pro Tip: Check the manual or manufacturer’s site before you start to see if there are any specific steps for your model. A few minutes of prep can prevent cracking plastic, stripped screws, or damaged parts.

Step-By-Step Guide: How To Disassemble An Office Chair
Ready to roll up your sleeves? This is where we break down exactly how to take apart an office chair with clear, simple steps. Whether you’re moving or replacing parts of a chair, this step-by-step guide will walk you through the entire office chair disassembly process smoothly and safely.
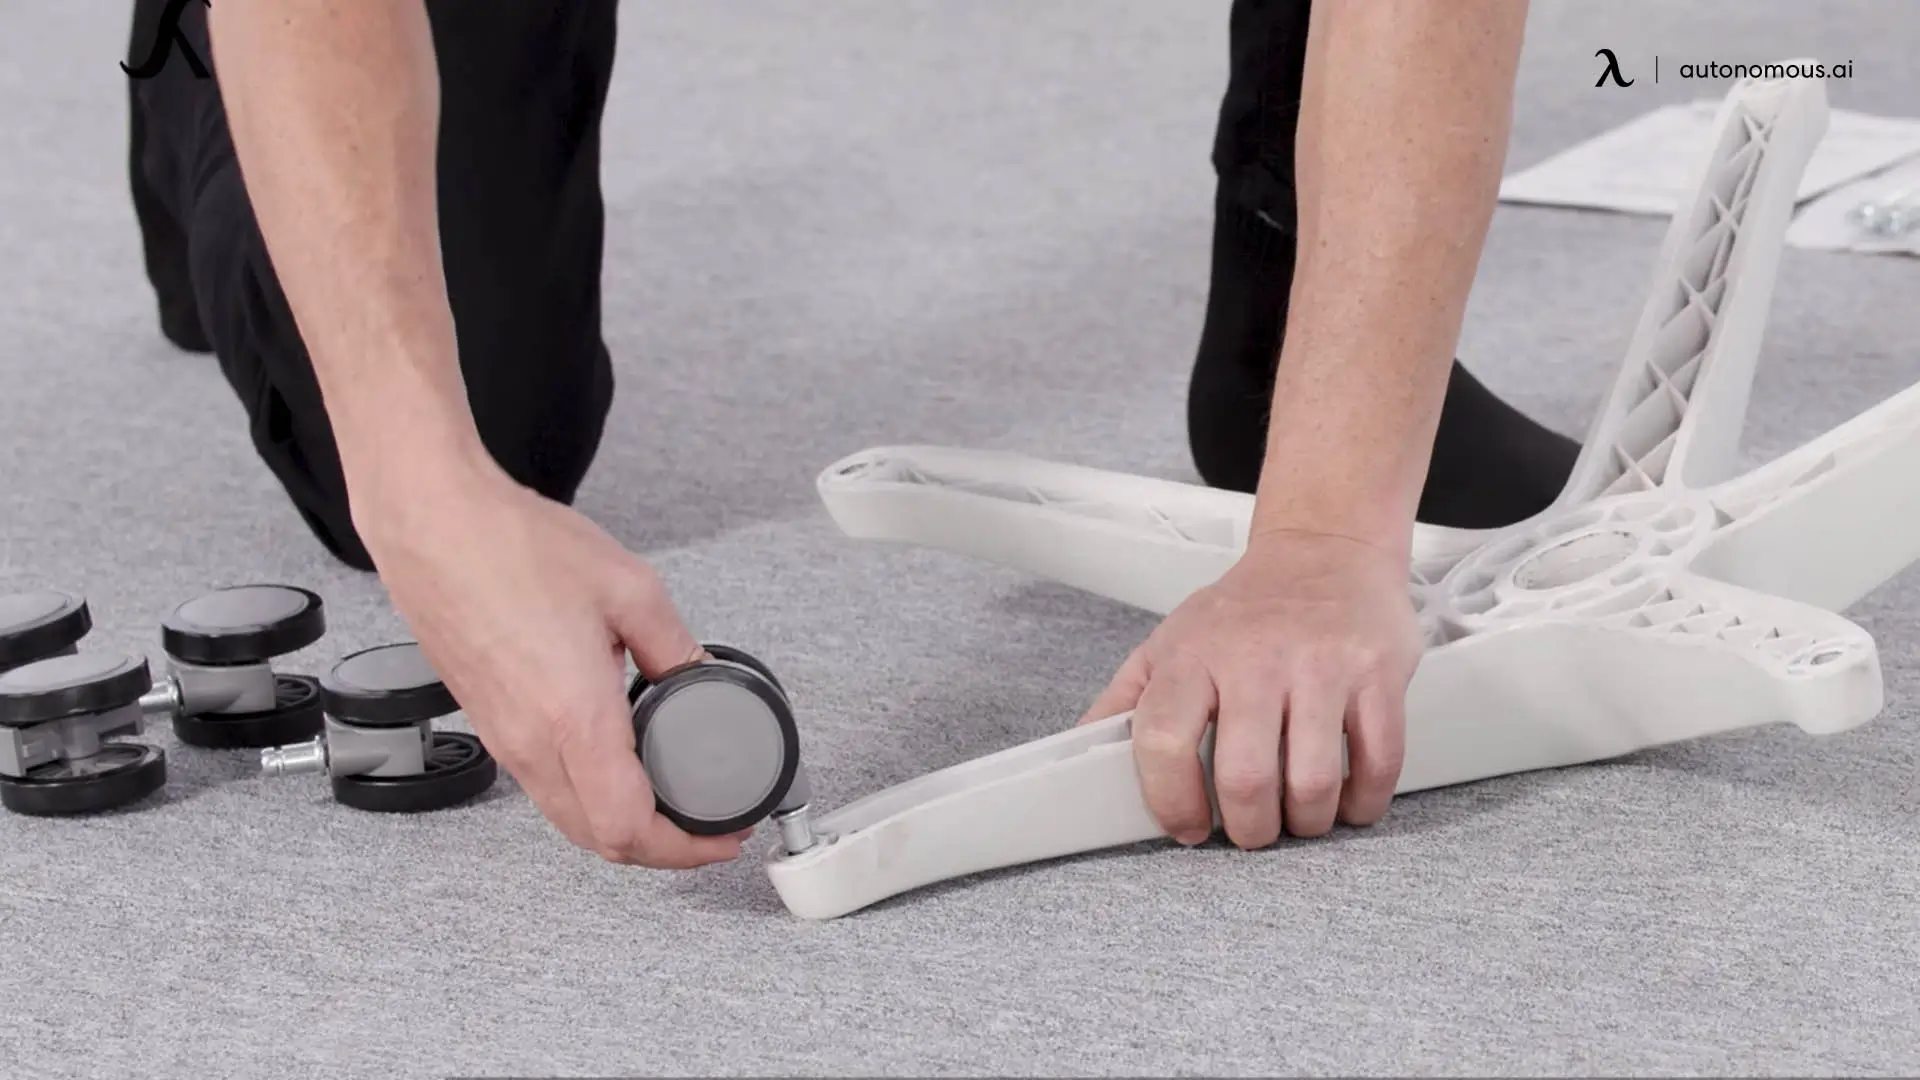
Step 1: Remove The Wheels (Casters)
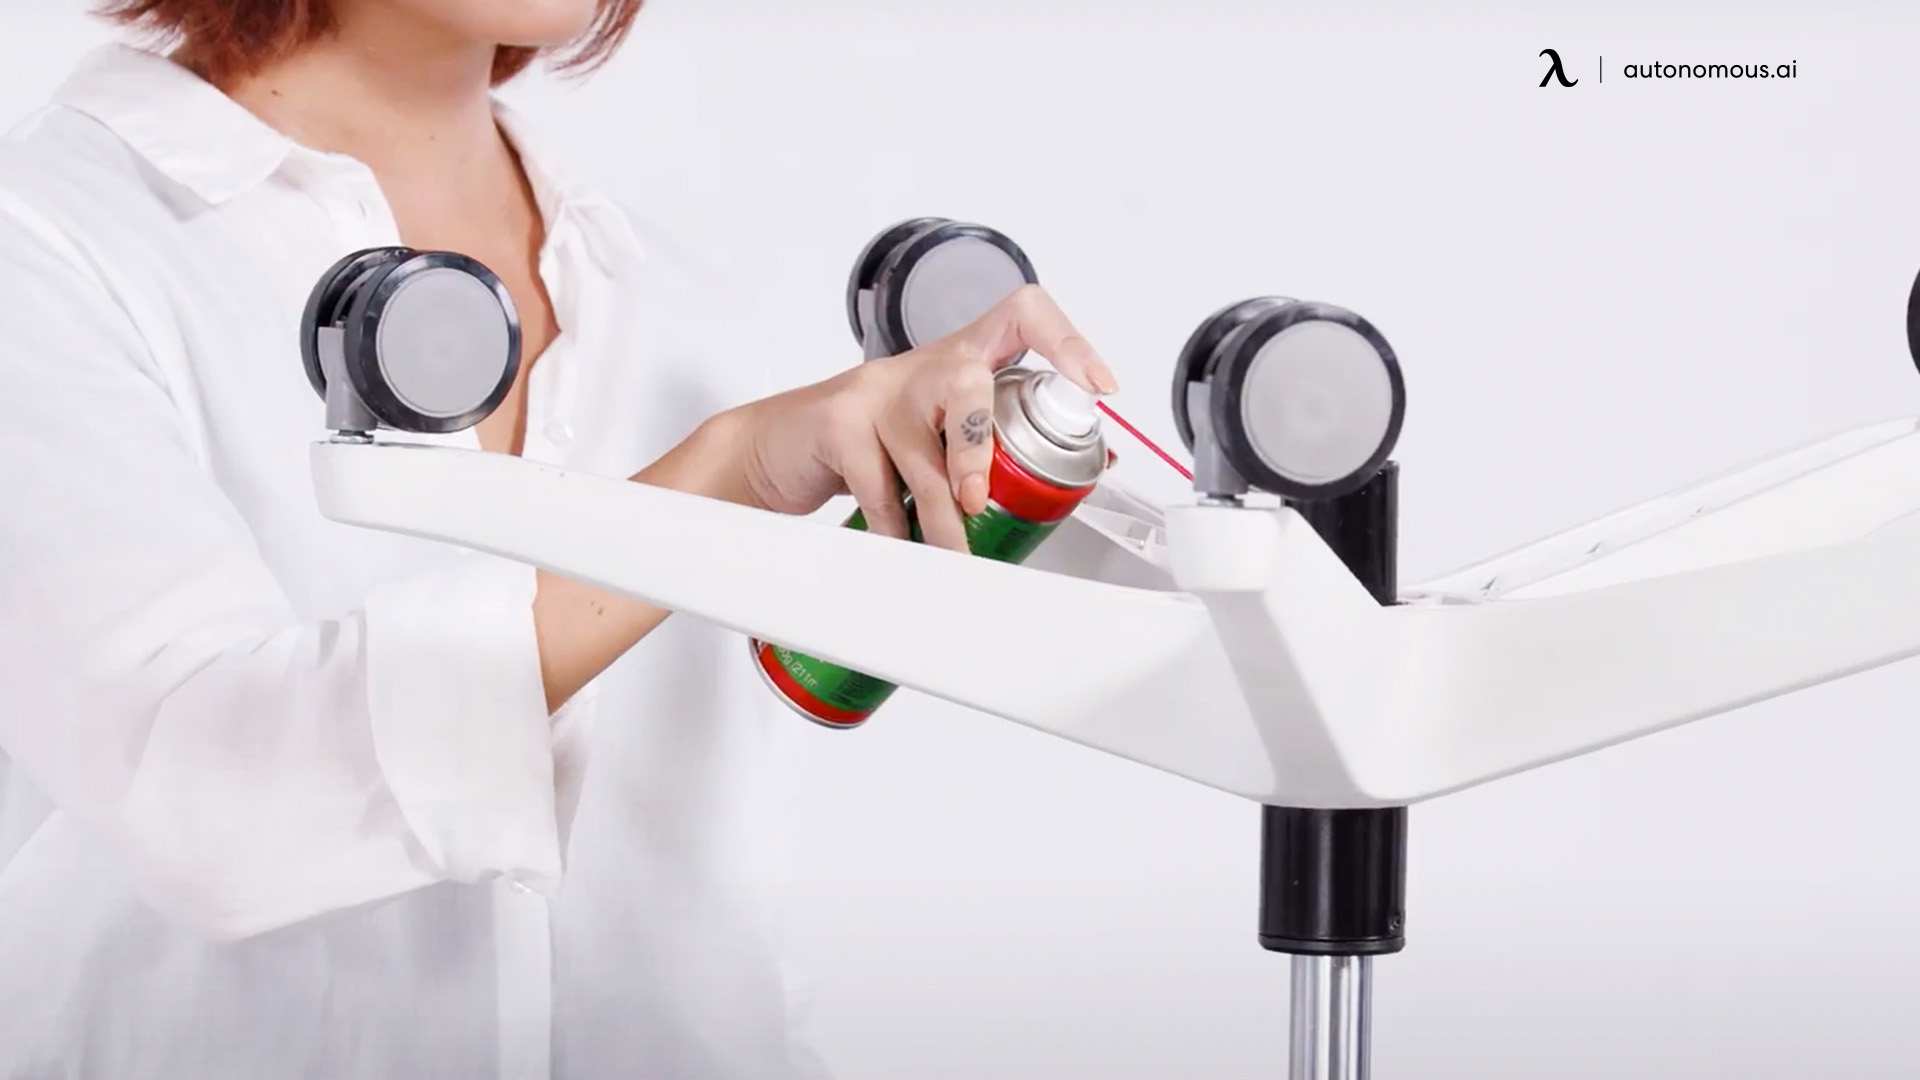
Flip the chair upside down on a towel for stability. Grip each caster firmly and pull straight out from the socket; some twist slightly before releasing. If a wheel is stuck, pry gently under the caster stem with a flathead screwdriver, or spritz a little lubricant where the stem meets the base.
Since the wheel mechanism can vary depending on the chair model, a how to remove office chair wheels guide can offer a clear look at how different caster types detach. Removing the casters first keeps the chair steady and easier to handle during disassembly.
Tip: This is a great time to clear hair and dust from the casters. Clean wheels glide better when you reassemble.
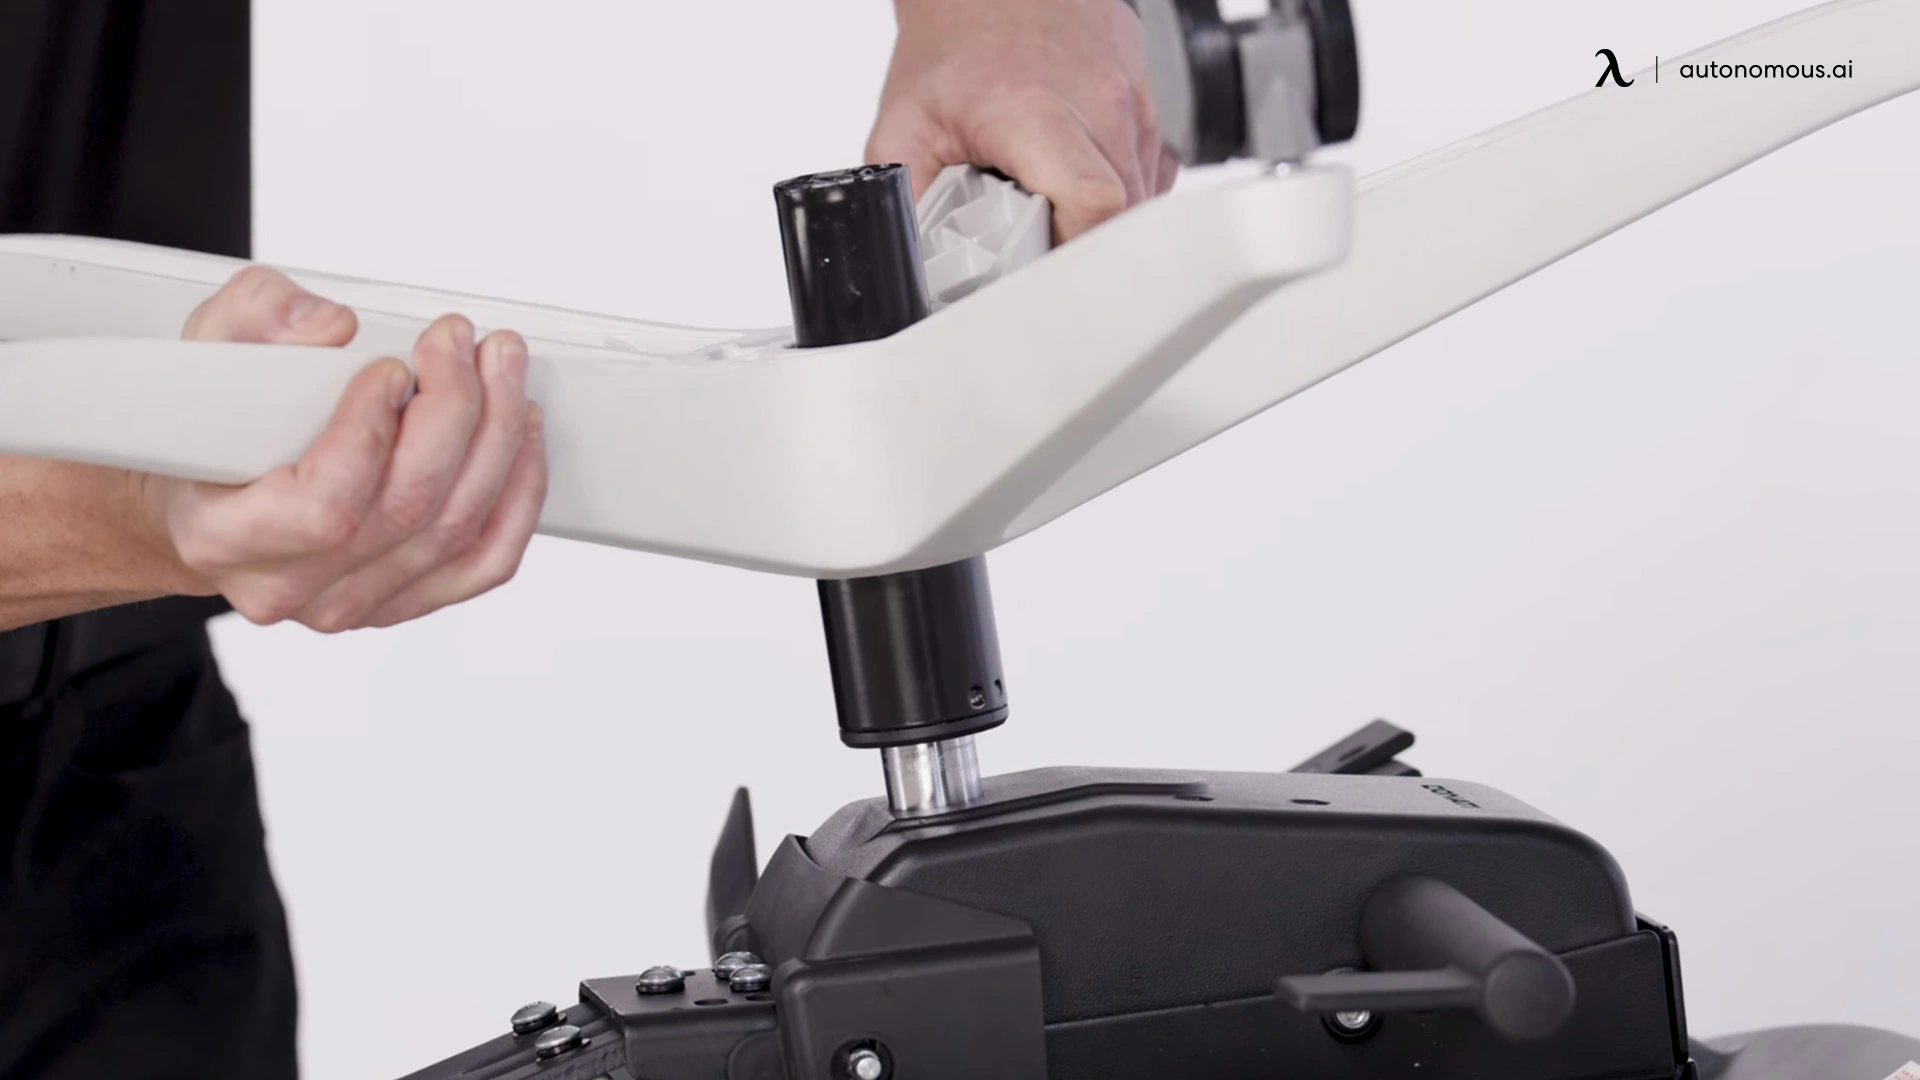
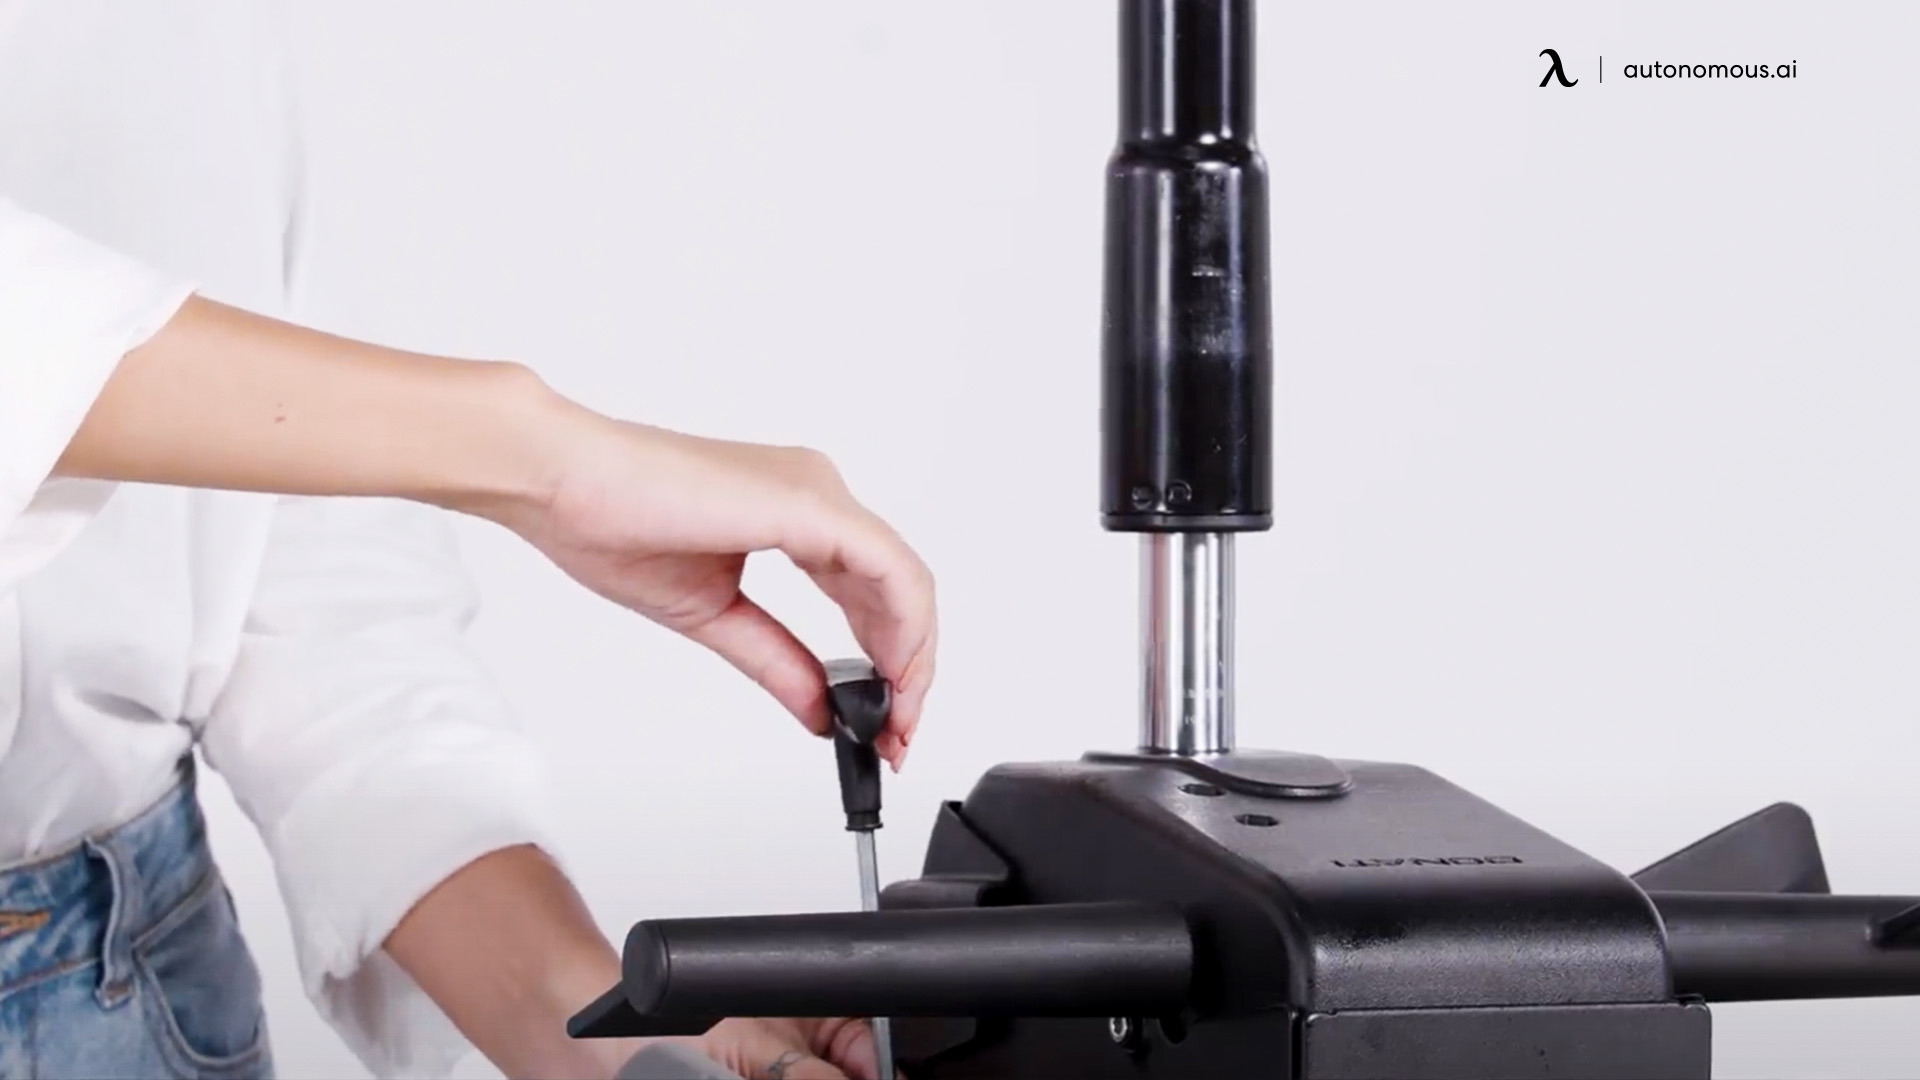
Step 2: Detach The Base And Gas Lift (Hydraulic Cylinder)
Hold the five-star base with one hand and tap around the cylinder’s metal collar (where it meets the base) with a rubber mallet. Work your way around in small, controlled strikes until the base drops away.
Next, separate the gas lift from the seat mechanism: support the seat, then tap the underside of the mechanism (not the cylinder body) to loosen the taper fit.
Warning: Never hammer the chair hydraulic cylinder directly or attempt to open it—it’s pressurized. If it won’t budge, apply lubricant, wait a few minutes, and try again. This is the trickiest part of office chair disassembly.
Tip: If the cylinder is severely seized, a dedicated cylinder removal tool can help. Otherwise, replacing the gas lift is often faster than saving an old one. For more detailed guidance on working with chair bases, see our comprehensive guide on how to remove office chair base.
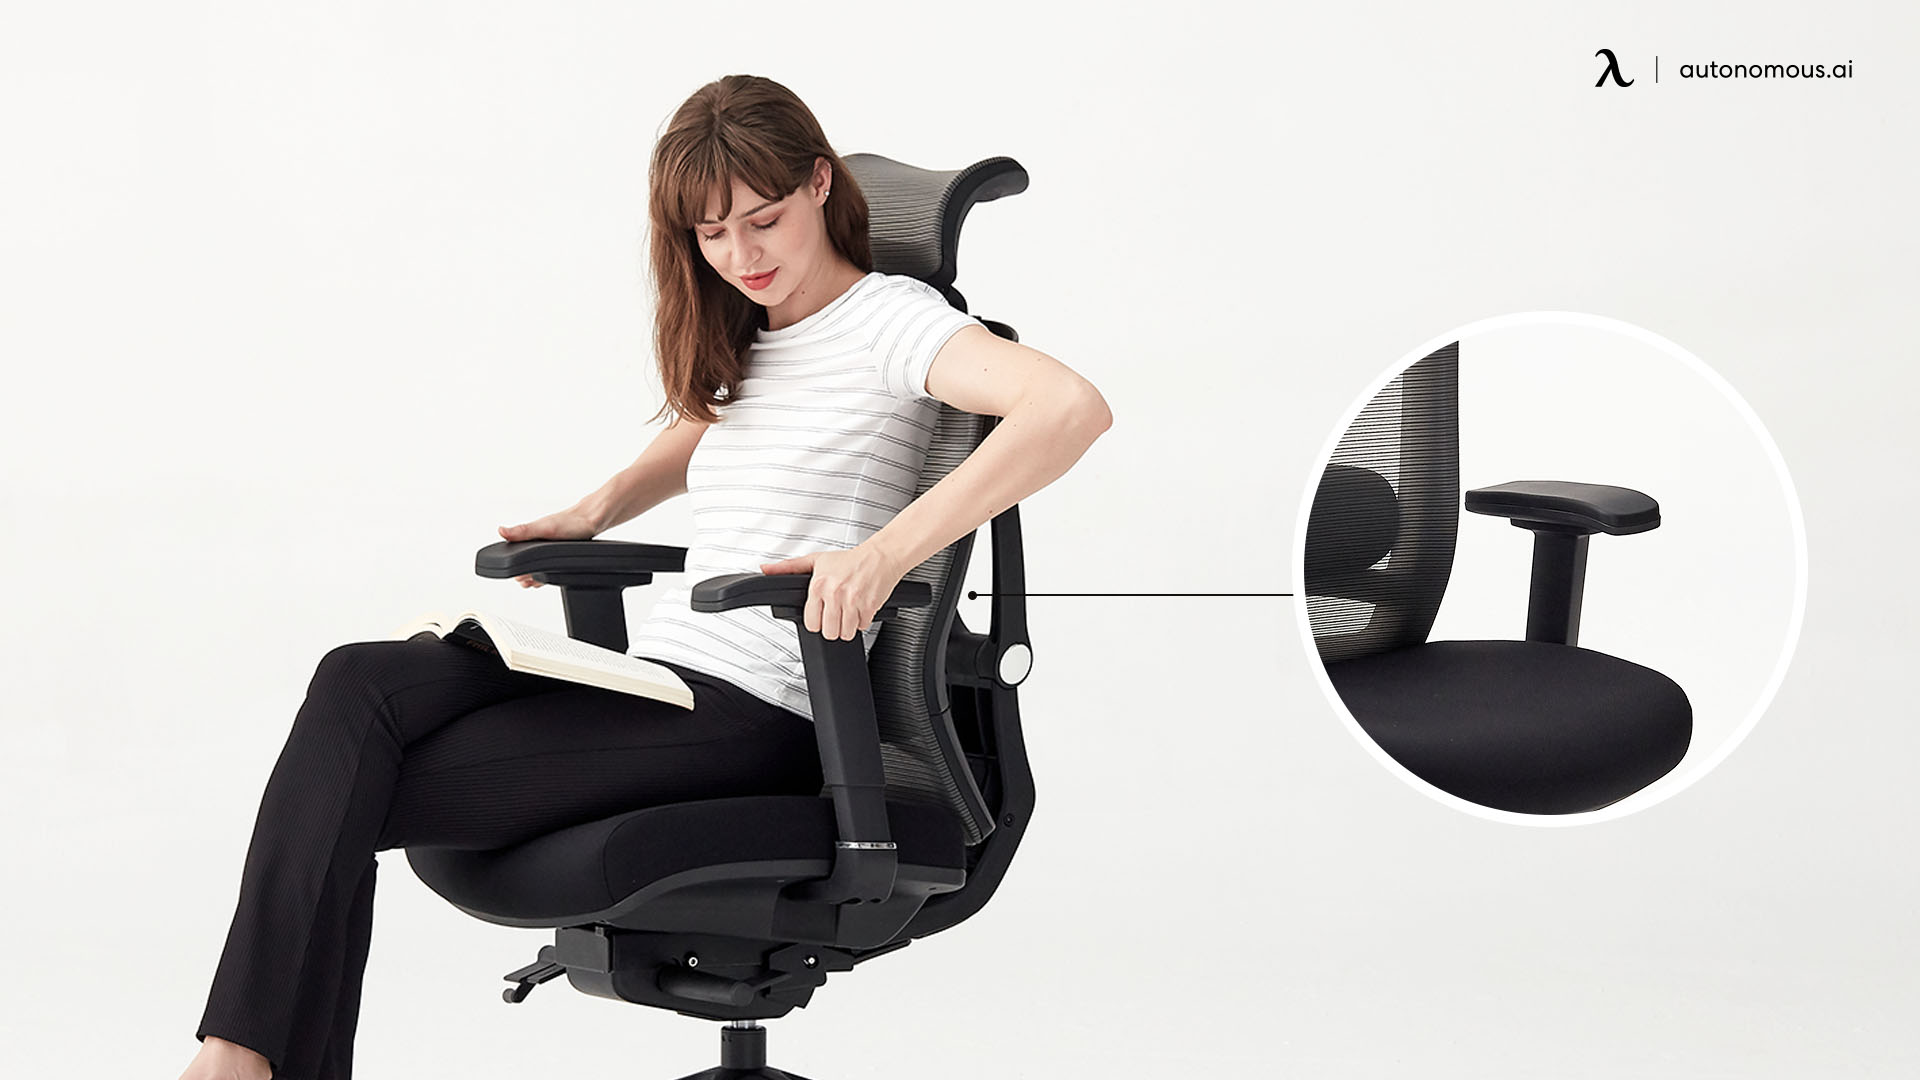
Step 3: Unscrew And Remove The Armrests
Locate the armrest screws under the seat or behind small plastic covers. Use the correct Phillips screwdriver or Allen key to avoid stripping. Support each arm as you remove the last screw so it doesn’t lever against the seat or back.
Some models connect arms to both the seat and back—remove screws evenly from each side to keep the frame balanced while you take apart a desk chair. If you're working with an office chair with adjustable arms, there may be additional adjustment mechanisms to disengage before removal.
Tip: Drop hardware from each side into separate labeled bags (e.g., “Left Arm,” “Right Arm”) to make reassembly painless.
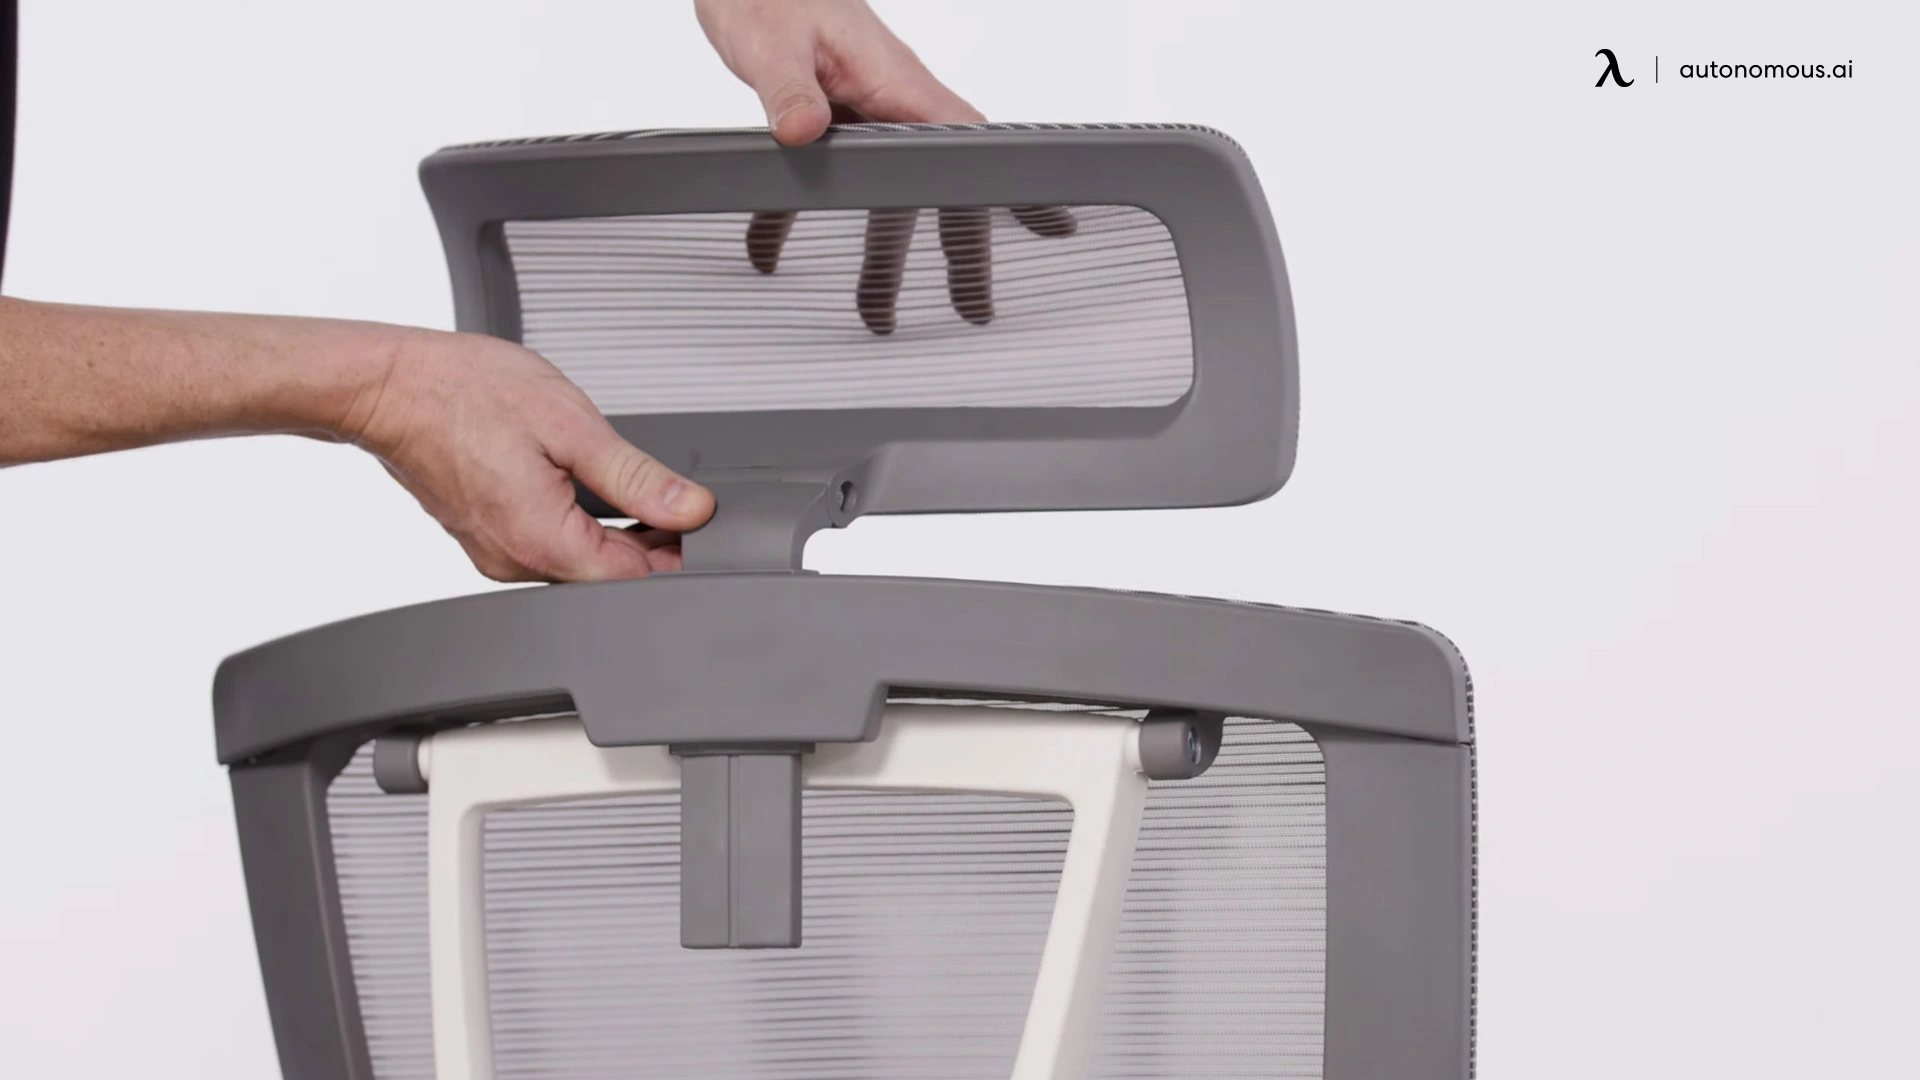
Step 4: Take Off The Headrest (If Applicable)
Check how the headrest is attached. Many slide-and-lock into the backrest; others use two to four screws. If it’s a snap-fit, pull upward with steady pressure while supporting the backrest. If screws are used, remove them and lift the headrest straight up to avoid stressing the mount holes.
Tip: If the headrest height track is gritty, wipe it clean and add a tiny bit of dry lube so adjustments feel smooth later.
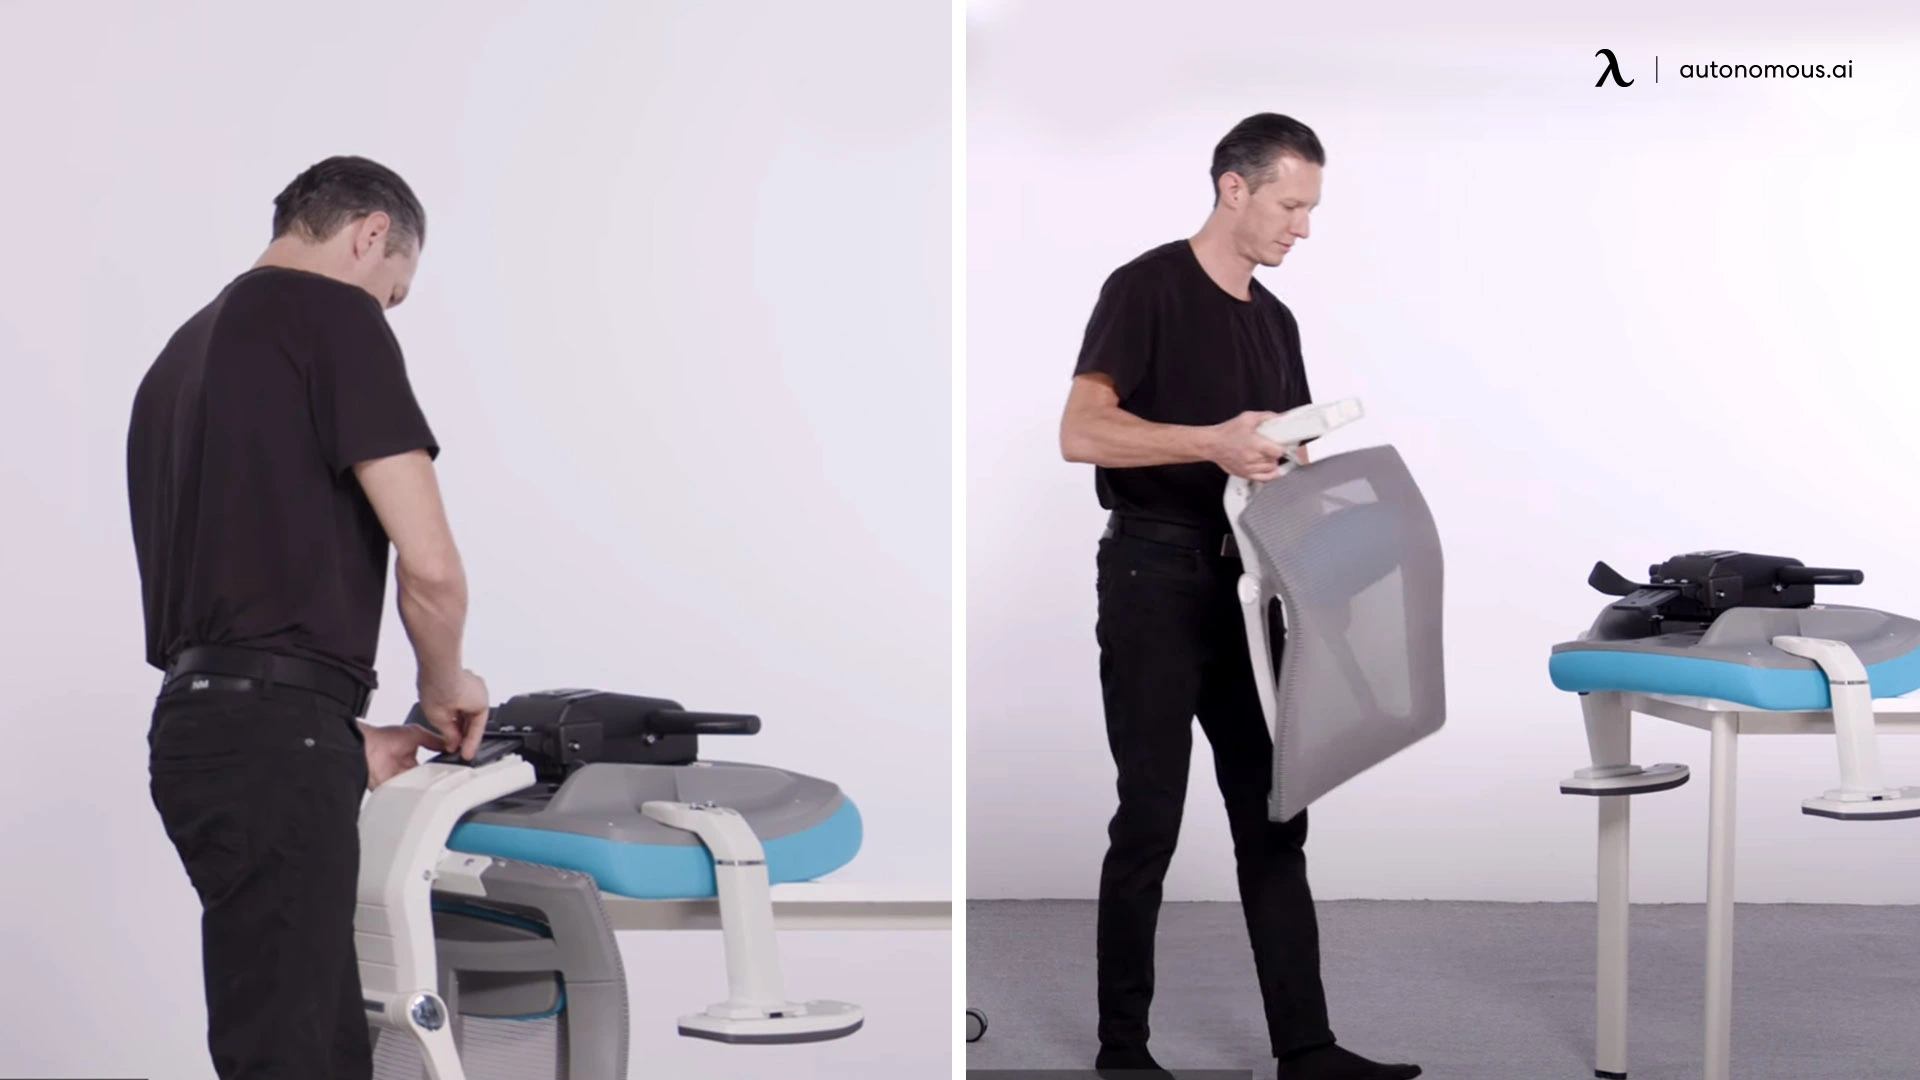
Step 5: Separate The Backrest From The Seat
Find the junction where the backrest frame meets the seat mechanism. Remove the visible bolts (often hex bolts) while supporting the back to prevent sudden drops. Once the fasteners are out, lift the backrest away from the seat. Lay both pieces flat on your towel to prevent scratches. At this point, you’ve completed the core steps of how to disassemble an office chair—base, cylinder, arms, headrest, and the back/seat split.
Tip: Snap a quick photo of the seat mechanism before removal. That reference makes reassembly quicker and ensures tilt-tension parts return to the right orientation.
Safety & Best Practices During Disassembly
Taking a chair apart may look simple, but a little preparation and the right approach can save you from cracked plastic, stripped bolts, or worse—a broken gas lift. Before continuing with how to disassemble an office chair, here are the essential safety and handling steps to make the process cleaner, faster, and safer.
- Work on a Secure, Padded Surface
Always place your chair on a stable, flat area with a towel, mat, or rug beneath it. This cushions the components, protects your flooring, and keeps the chair from shifting while you work. A wobbly or uneven surface increases the risk of damaging parts during office chair disassembly.
- Keep Hardware Organized and Labeled
Office chairs typically use multiple screw sizes for different sections—arms, seat base, backrest, and headrest. As you remove each component, separate the screws and bolts into labeled containers or zip bags.
This simple step prevents confusion later and makes reassembly smooth, especially if you’re learning how to take apart a desk chair for the first time.
- Loosen Components in a Balanced Way
When dealing with armrests, backrests, or seats that are fixed on both sides, avoid removing all screws from one side first. Loosen them gradually and alternate between sides. This prevents uneven pressure that could warp the frame or damage threads.
- Handle the Gas Cylinder with Extra Care
The gas lift is one of the most sensitive parts of the chair. It’s pressurized, which means hitting or puncturing it can be dangerous. When separating it from the base, always tap around the joint, never on the cylinder itself. If it won’t come loose, apply lubricant and give it time to release.
- Identify Non-Removable or High-Risk Parts
Not every component is meant to be removed. Some tilt mechanisms, internal levers, and certain molded back panels are factory-fixed. Forcing these parts can permanently damage the chair. If your model includes these sections, stop and consult the manual before continuing.
- Document as You Go
A quick photo at each stage is worth the extra few seconds. It helps you remember the orientation of bolts, brackets, and levers, especially when reassembling or upgrading parts later.
Pro Tip: If your chair has been in use for years, take this moment to inspect parts for wear—especially wheels, the gas lift, and screws. Replacing worn components during disassembly saves time in the long run.
Tips For Reassembling Or Packing Your Office Chair
Once you’ve completed the office chair disassembly, the next stage is just as important. How you pack and reassemble the components determines whether your chair remains stable, comfortable, and functional. Whether you’re relocating, storing, or putting it back together, a structured approach prevents unnecessary wear and ensures everything fits the way it should.
- Organize And Clean Before Reassembly
Before reattaching any parts, give each component a quick wipe-down. Remove dust and debris from connection points, wheels, and under-seat mechanisms. Clean parts not only fit together more smoothly but also reduce friction that causes squeaks later.
If your chair has adjustable components like armrests or tilt mechanisms, this is also the best time to apply light lubricant to joints and moving parts. For deeper cleaning methods, including how to safely handle fabric, mesh, and leather finishes, you can see our guide on how to clean an office chair.
- Rebuild In Reverse Order
The simplest way to reassemble is to follow the disassembly steps backward. Start by reconnecting the backrest and seat, then move on to the headrest, armrests, gas lift, and finally the wheelbase. This sequence stabilizes the frame first and helps avoid misalignment, which can happen if you install the base too early.
Pro Tip: Keep all screws slightly loose while reattaching major parts, then tighten everything together at the end. This allows for small alignment adjustments and prevents forced connections that can warp the frame.
- Align Components Carefully
The most common mistake people make after learning how to disassemble an office chair is rushing through reassembly. Misaligned screw holes or skewed frames can cause uneven pressure on the base or wobbling over time.
If something doesn’t line up smoothly, back out the screws, reposition the parts, and try again. When wobbling persists, understanding how to fix a wobbly office chair can help pinpoint the weak connection.
- Protect And Pack For Moving
If you’re transporting the chair rather than reassembling it immediately, protect each part properly. Wrap larger components like the backrest and seat in bubble wrap or towels. Place hardware bags inside a labeled box or tape them securely to the underside of the seat frame so nothing goes missing.
Warning: Gas cylinders should never be punctured or packed under heavy weight. If your chair uses a removable gas lift, store it separately and upright to prevent damage.
- Test The Chair After Reassembly
Once everything’s back together, give the chair a gentle shake to ensure stability. Sit down, adjust the height, tilt, and armrests, and listen for creaks or resistance. If something feels off, loosen the relevant area and readjust before tightening again.
A chair that sinks or loses height can also be linked to common issues such as an office chair won't stay up or why does my office chair keep going down, which often relate to wear in the gas lift.
- Consider Replacing Old Parts
Disassembly can reveal issues you might not have noticed during everyday use—worn wheels, a sinking gas lift, or bolts that no longer hold firmly. Instead of reinstalling compromised parts, consider replacing them now. Many office chairs use standardized parts, making replacements simple and affordable.
Pro Tip: Upgrading parts during reassembly (such as switching to rollerblade casters or a stronger gas lift) can improve mobility and extend your chair’s lifespan without buying a new one.
Packing or reassembling a chair properly isn’t just about putting it back together — it’s about restoring its function, comfort, and stability for long-term use.
FAQs
1. Can office chairs be disassembled?
Yes. Most office chairs are designed to be taken apart for moving, repairs, or part replacements. The wheels, gas lift, armrests, headrest, backrest, and seat can usually be separated using basic tools like a screwdriver, Allen key, and a rubber mallet.
2. How to disassemble an office chair gas cylinder?
Flip the chair over, remove the base, and gently tap around the collar where the cylinder connects to the mechanism. Apply a small amount of lubricant if it’s stuck. Avoid striking the cylinder directly since it’s pressurized and can be damaged or become unsafe if hit with force.
3. How do I remove the back of an office chair?
Secure the chair upside down, then tap around the metal collar with a rubber mallet to break the taper fit between the base and gas lift. Work evenly around the joint to avoid bending the base or harming the cylinder. Patience and gentle tapping are key—never hammer the cylinder itself.
4. How to remove the office chair base without damaging the cylinder?
Locate and unscrew the bolts or fasteners at the junction between the backrest and seat. Support the back as you remove the final screw to prevent it from dropping suddenly. Some models may also have locking clips or brackets, so check for hidden fasteners before applying force.
5. How do I disassemble an office chair armrest assembly?
Locate the screws or bolts securing the armrests—often under the seat or behind plastic covers. Remove them systematically, supporting the armrest as the final fastener comes out so you don’t damage the seat or backrest when you take apart a desk chair.
6. How do I disassemble an office chair armrest assembly?
Locate the screws or bolts securing the armrests—often under the seat or behind plastic covers. Remove them systematically, supporting the armrest as the final fastener comes out so you don’t damage the seat or backrest when you take apart a desk chair.
7. Are there any parts I should not disassemble when learning how to disassemble an office chair?
Yes. Avoid opening sealed components like the gas cylinder internals or complex tilt-mechanism housings unless you’re experienced. Tampering with these parts can damage the chair or void warranties, so focus on removable components like wheels, armrests, backrest and seat.
Conclusion
Learning how to disassemble an office chair isn’t just about taking it apart—it’s about doing it carefully, step by step, so the structure stays intact and the components can be used or packed without damage. A clean disassembly process protects sensitive parts like the gas cylinder and tilt mechanism, reduces the risk of issues such as an office chair leaning back too far, and makes future reassembly more precise.
Understanding how different components interact also helps prevent safety concerns. For example, while rare, incidents like office chair explosions can occur if the gas cylinder is mishandled. Treating pressurized parts with caution and following proper steps is key to keeping everything safe.
Whether you’re preparing to move, upgrading parts, or giving your chair a thorough refresh, the right approach turns what seems like a tedious task into a smooth, controlled process—one that extends the life of your chair and maintains its comfort and stability.