How to Build a Shed Door? Detailed Guide for Shed Door Projects

Having a shed in your backyard has many benefits, as you can use it to store your belongings or make a custom studio. While you can buy a prefab log home to avoid doing it yourself, many people prefer building their sheds themselves. If you are one of the latter, you need to know how to build a shed door correctly.
There are many different types of shed door plans you can go for, and each of them works better for a specific type of project. You won’t use a sliding door for a shed that needs a single-hinged one, for example. We are here for you if you are looking forward to building shed doors.
Read this detailed guide to building a shed door at home. Here, you will know the materials and steps to complete your project with no issues. If you want to read more blog posts like this one, visit our website! You will also find information about ergonomic products.
What Are the Most Common Types of Shed Doors?
The first thing you should do before starting shed door plans is to choose the type of door you want for your backyard studio. You will do some hard work to get the door done, so try to make a choice you won’t regret in the future. We recommend that you ask people who have built sheds before for advice on which one may work best for you.
These are the main types of shed doors you can pick for your project:
Single-Hinged Door
Single-hinged doors are the standard option most people go for. This is the classic door that swings to open on one side. You should pick this type of door if you don’t want to spend all day making a custom project.
This type of door is also perfect for people who don’t want their shed door design to stand out from other things in their backyard. However, many single-hinged door designs look highly appealing online.
Double-Hinged Door
The thing about single-hinged doors is that most people use them for small projects, as they may not be big enough for bigger sheds. If that’s your case, you should make a double-hinged door. This larger version of the previous door swings open on two sides.
Sliding Door
As its name suggests, a sliding door is a door that slides open and closed. They do this with the help of tracks. People often get this type of door if they have limited space in their shed.
Roll-Up Door
While they are more common for garages, you could get a roll-up door for a shed or backyard home studio. This door rolls up and down when you need to open or close it. You could even get a remote control for your shed if you want a smart door.
Dutch Door
Dutch doors are a variation of the standard single-hinged and double-hinged doors. Instead of swinging open on two sides, these doors have a split design that opens in two different parts. We recommend that you get it to keep animals out of the shed and improve the shed's ventilation.
Barn-Style Doors
The last type of shed door design on this page is barn-style doors. People often use these doors for barns. They slide open in and out of the barn or shed. They do this horizontally, which makes them a good option for large sheds or ADUs.
What Materials Do I Need to Make a Shed Door?
When people don’t know how to build a shed door, they often have the misconception that they need to spend a fortune on the materials. Although everything depends on the type of door you need, you don’t need that many materials for the project. If you want to build a standard shed door, you’ll need the following materials:
- Hinges
- Screws/nails
- Wood Boards/plywood sheets
- Door handles
- Locks
- Saw
- Measuring tape
- Drill/screwdriver
Those are the basic materials for a door, but you can get some add-ons to customize your project. It’s optional, but we recommend that you also buy paint or stain to paint the door.
Step-by-Step Guide to Make a Shed Door
Now that you know all the materials you need to build a door, it’s time to teach you how to do it. These steps will only help you build a standard shed door design, so if you’re looking for more complex projects, you may have to look elsewhere.
These are the steps you need to follow to build a shed door:
1. Determine the Size of Your Shed
Once you know the type of door you want, you need to know the size you want for it. You can get the shed door size you need by measuring the opening of your shed.
You can also go for the average shed door size if you want to go for a safe bet. However, try to consult with an expert before starting the project. If you take the wrong measurements for the door, you will need to make everything over again. That would mean buying more materials and wasting more time, so try to not rush things.
2. Cut Two Pieces of Lumber
Once you have the right size for the doors, cut two pieces of lumber to the height of the door space you just measured. After that, cut two other pieces to the width. We recommend that you use a 1x4 lumber for the matter. Using a saw should make the job easier, so don’t try to use other tools.
3. Cut Diagonal Braces
Get the width pieces you just cut and use the saw to cut a diagonal brace from each corner to each corner. Try to be as accurate as you can, as making one mistake could ruin the project.
Using a saw is dangerous if you’ve never used one in the past or are not experienced at it. Try to get help from someone who has experience using saws to keep any accidents from happening.
4. Lay Out the Pieces of Lumber
Now that you have made all the cuts you need for the first pieces of lumber, lay them out on a flat surface and start assembling them to form a rectangular frame. You want the diagonal braces to be attached at opposite corners. This part of the process is like assembling a puzzle, so try to be patient.
5. Secure the Corners
It’s time to secure the corners of the door. You can use wood screws or nails for the matter, but we think that wood screws are better for the job. Do this with a drill or a hammer, but consider that using a hammer is dangerous for people not used to it.
Regardless of whether you are experienced with hammers or not, make sure you are not doing this step of the process close to children. They are prone to put their hands close to you, so you could end up hitting their fingers with the hammer by accident.
6. Get Plywood and Cut It
Get plywood and cut a piece of it to fit it inside the frame of the door. The plywood will work as the door panel, but you can use any other material that you think will suit the door as the plywood does. MDF is a good alternative to plywood.
7. Attach Hinges to the Door Frame
You now have the door frame, which means more than half of the job is done. The next step is to attach the hinges to one side of the door frame and then attach them to the door opening of the shed. This is the final step to assemble the door, as the following are complementary features.
8. Install a Lock
The door shed is ready once you attach the hinges to the door frame and shed opening, but you don’t want others opening your shed randomly without permission. We recommend that you install a lock or latch on the inside of the door. This will make it safer.
What Should You Do If You Want a Pre Built Shed with an Elegant Door?
Although building shed doors is not that complex once you’ve done it a few times, we understand if you don’t want to go through all that hassle or don’t have the time for it. You can buy a prebuilt shed that already has an elegant door if you have the budget for it.
Autonomous is one of the best ergonomics companies online, but it also offers home office pods for office workers and people looking for extra space. These ADUs are excellent for people looking for tiny homes under $20K.
Here is an overview of the ADUs on the Autonomous website.
Autonomous WorkPod Versatile
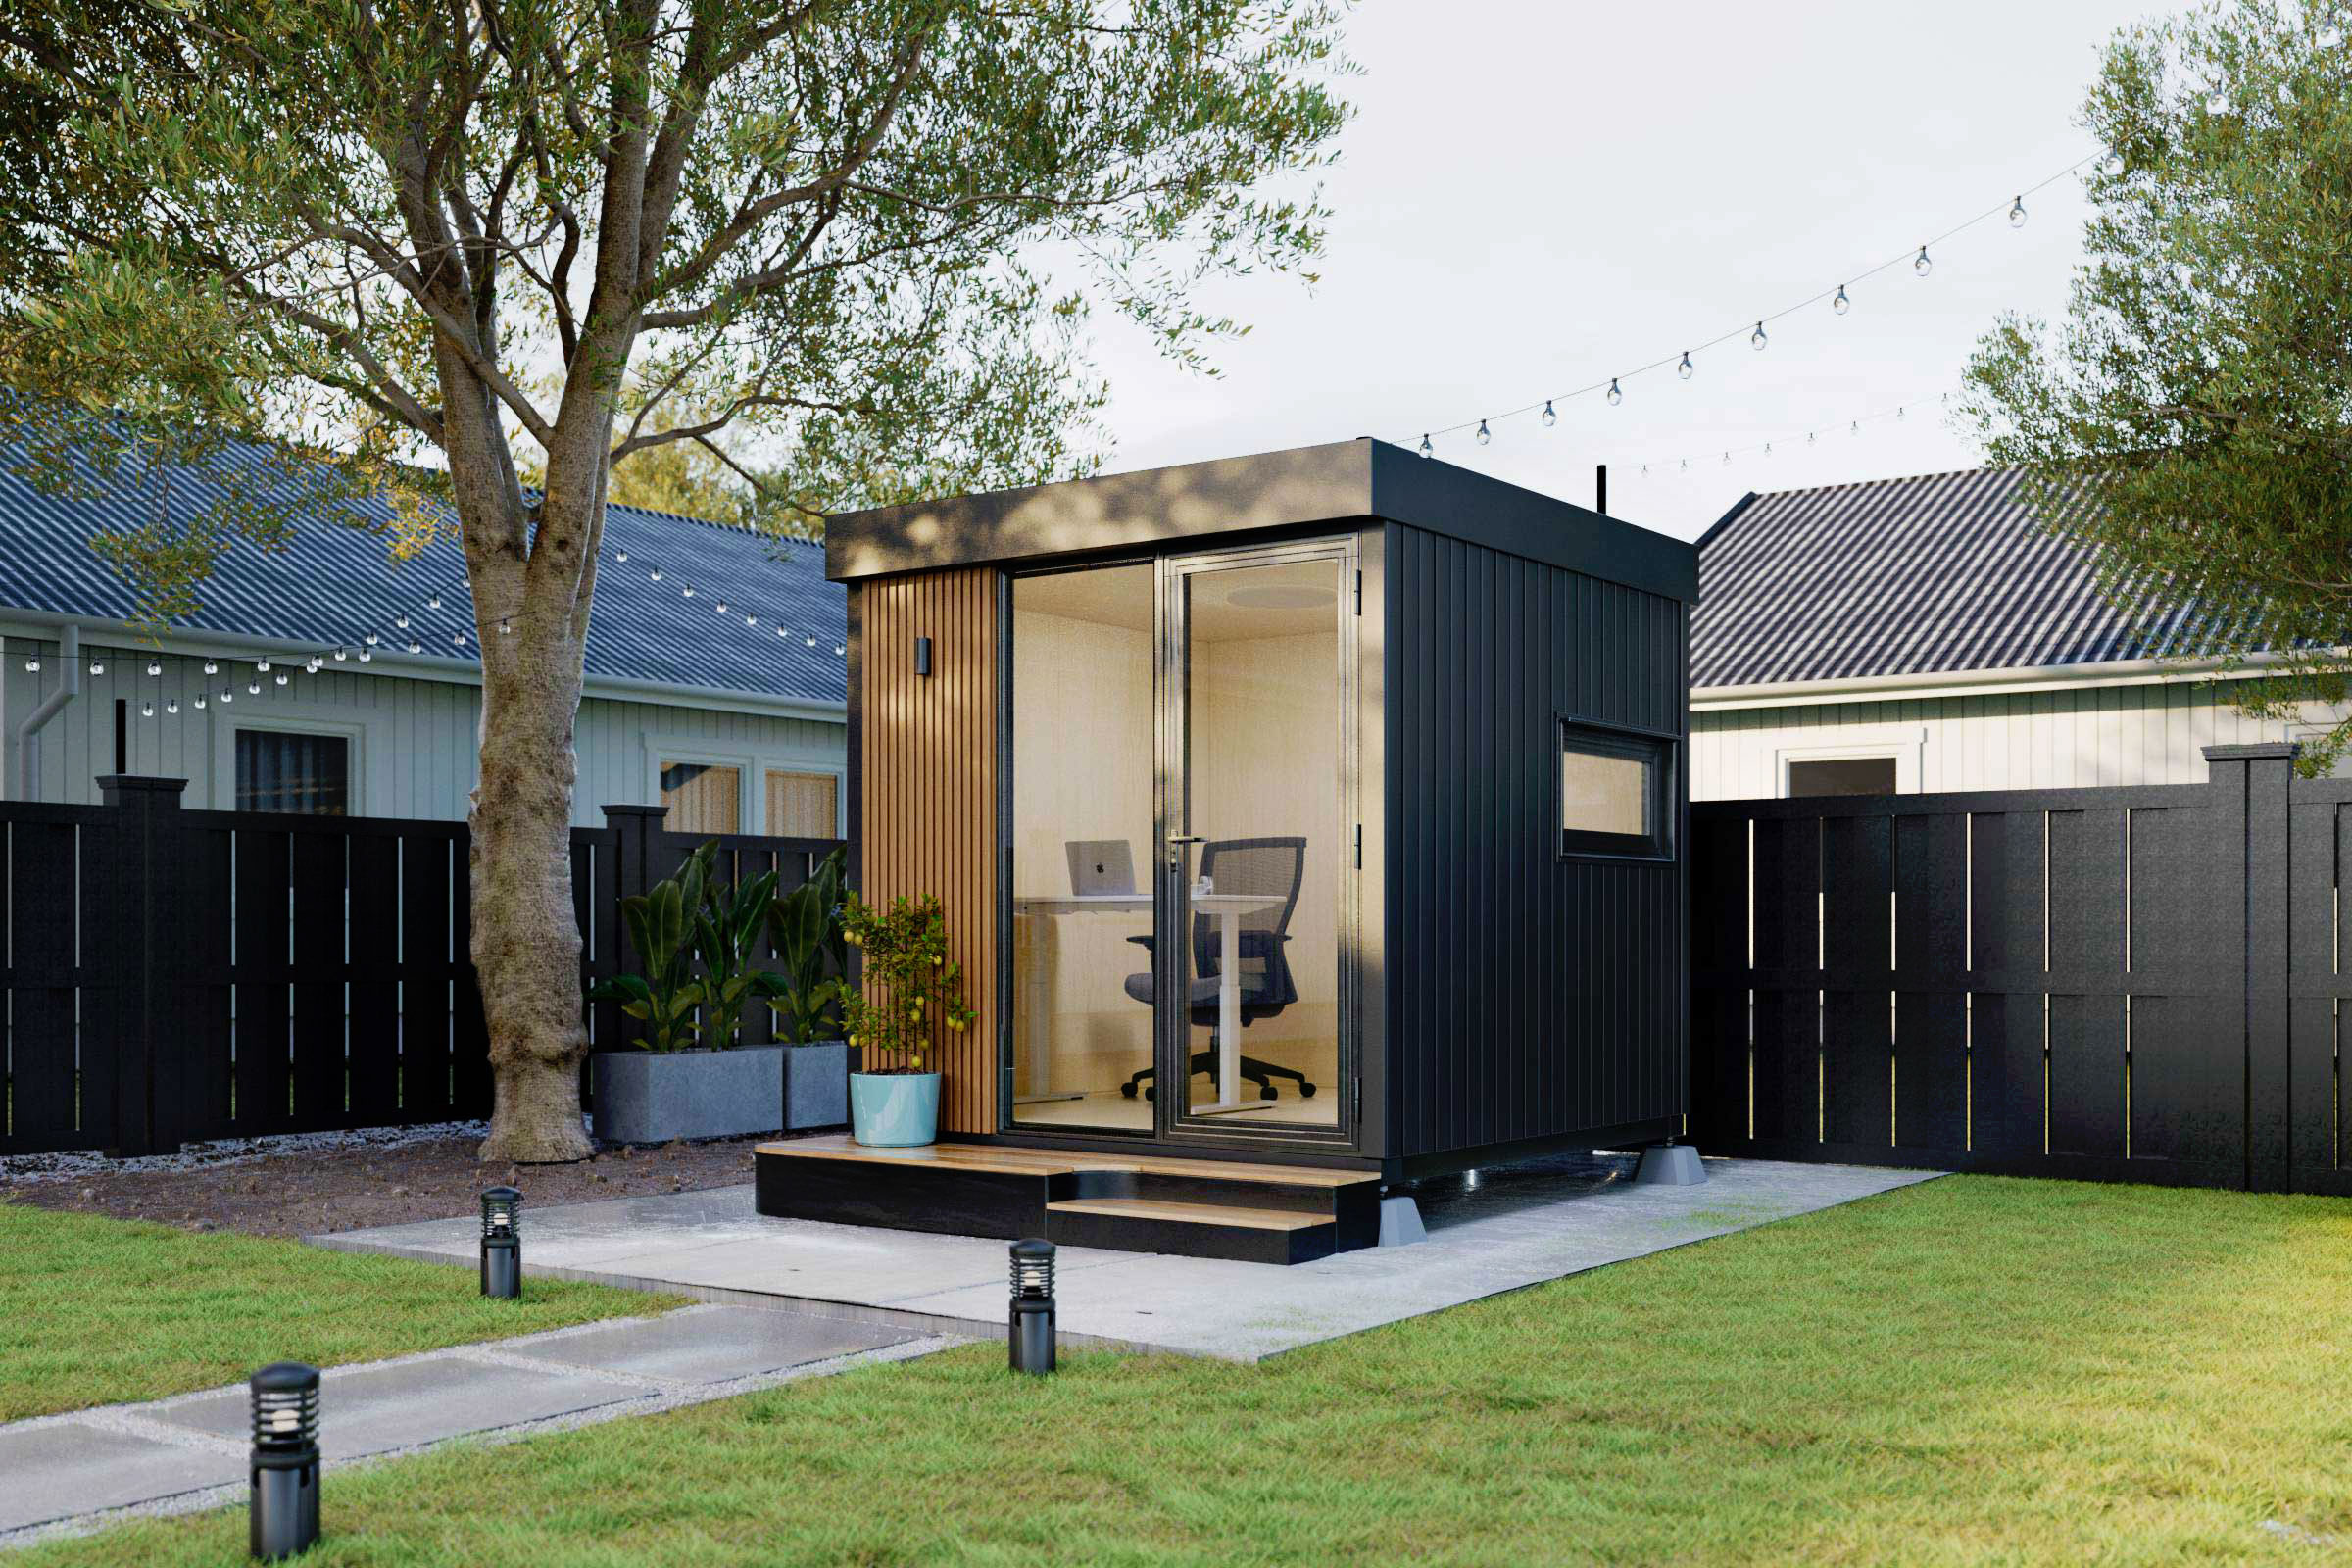
The first prebuilt ADU we will review on this list is the Autonomous WorkPod Versatile. While the other options on the Autonomous website focus on helping office workers, this one has a multipurpose design you can adapt for several activities.
One of the things that make these ADUs stand out from others on the market is how stylish they are on the outside and the inside. This prefab studio is elegant and luxurious-looking without costing you a fortune. Besides that, when you buy it, you also receive several furniture pieces with it.
The WorkPod Versatile comes with an electric cabinet, a sofa table, a sofa, a desk, and more. Since it comes pre-wired, you can plug it in and use it once it gets to you. It’s fit for any kind of terrain, so don’t worry about not being able to install it in your yard.
However, if you don’t want to get all those furniture pieces, you can order the pod without them. That will make it more affordable, although it’s already not that expensive compared to other tiny houses. You can buy this option if you are looking for cheap prefab homes.
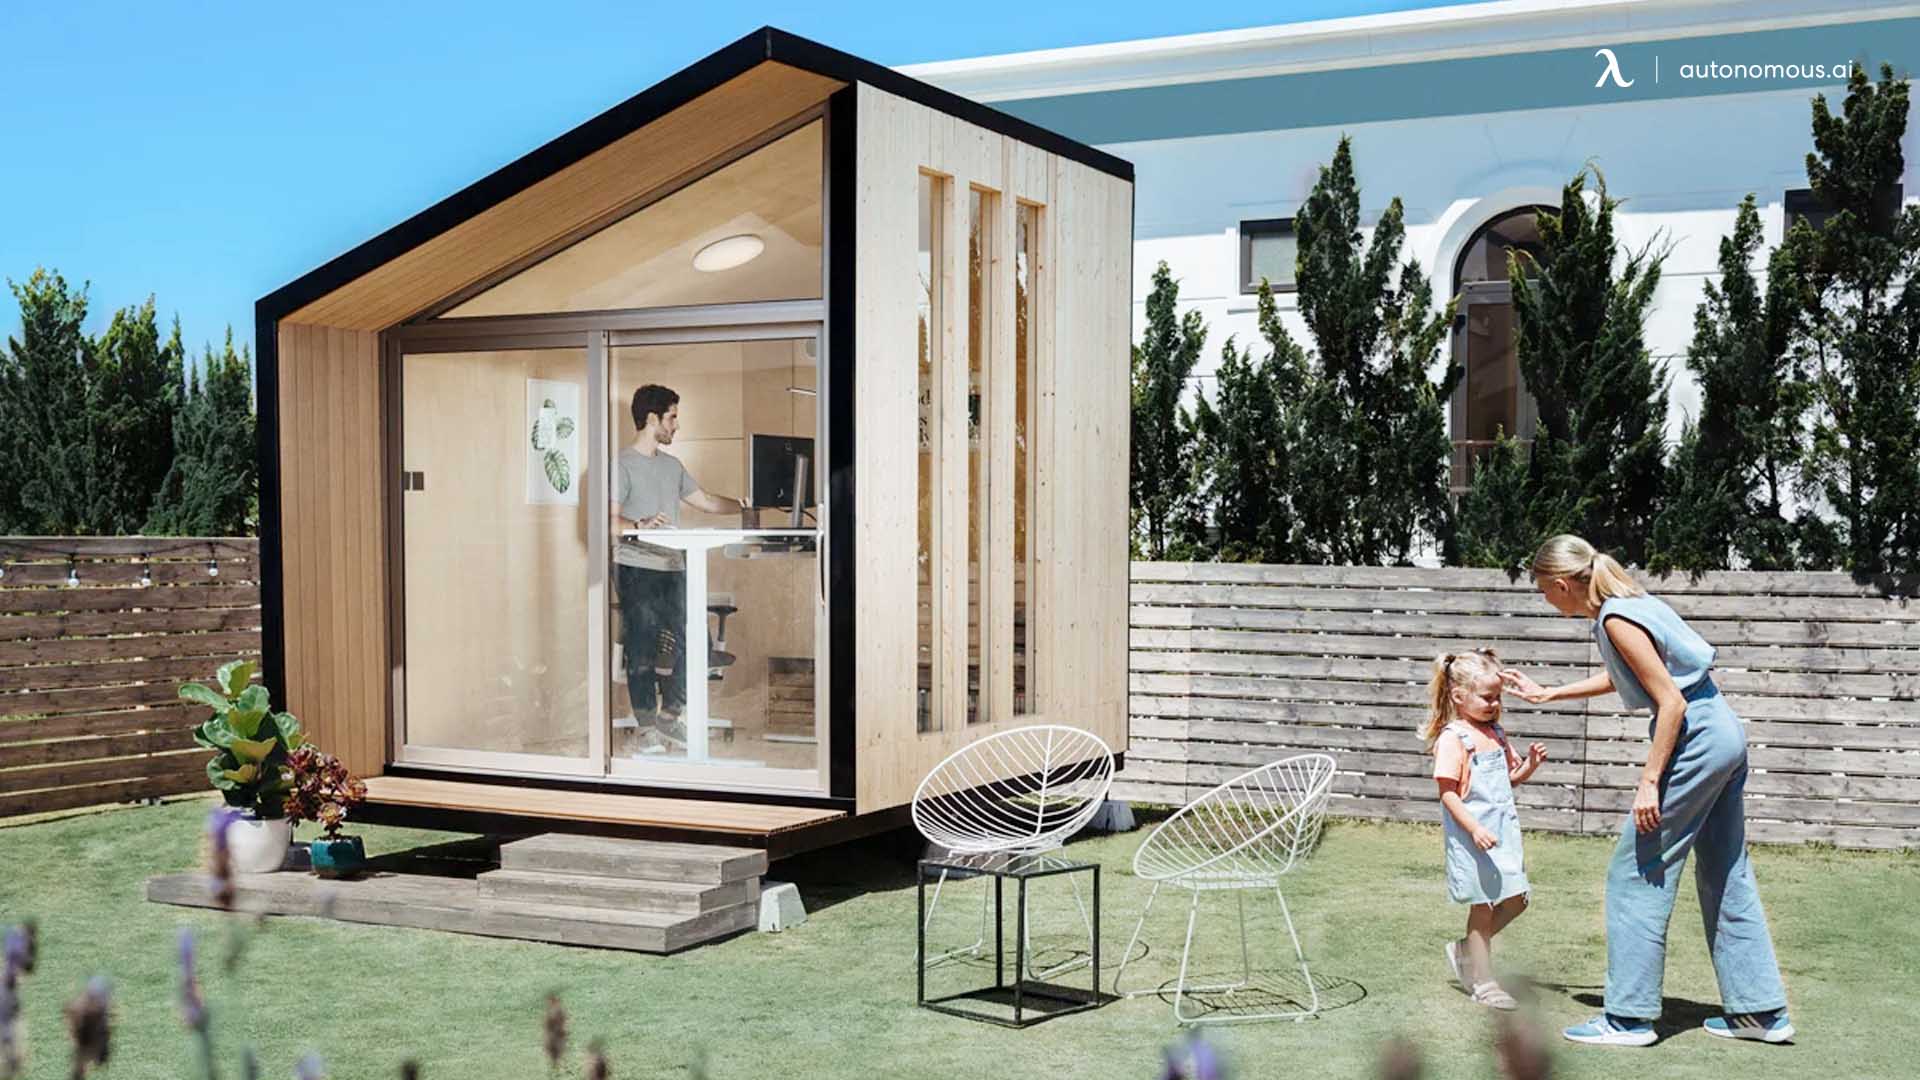
Autonomous WorkPod
As we mentioned before, the Autonomous WorkPod focuses on giving office workers the perfect space to work without any external distractions. Therefore, this garden office pod has soundproof walls. That doesn’t mean you won’t have any contact with the exterior world, as it comes with several windows to let sunlight in.
The Autonomous WorkPod also comes with furniture pieces. In this case, you can enjoy an ergonomic chair, a standing desk, a cabinet, a cable tray, an anti-fatigue mat, a bookshelf, an electrical cabinet, and a dual monitor arm. All of those are top-notch Autonomous products, which means you won’t have to spend additional money on office furniture.
This product is more affordable than the prefab backyard studio we just reviewed, but you can order it without office furniture pieces to save money. You should do that if you already have ergonomic products for your office at home.
Having a special place to work can improve your productivity and creativity, which will enhance your work quality. That makes this pod a profitable investment in the long run. Besides that, we all need a little privacy at times.
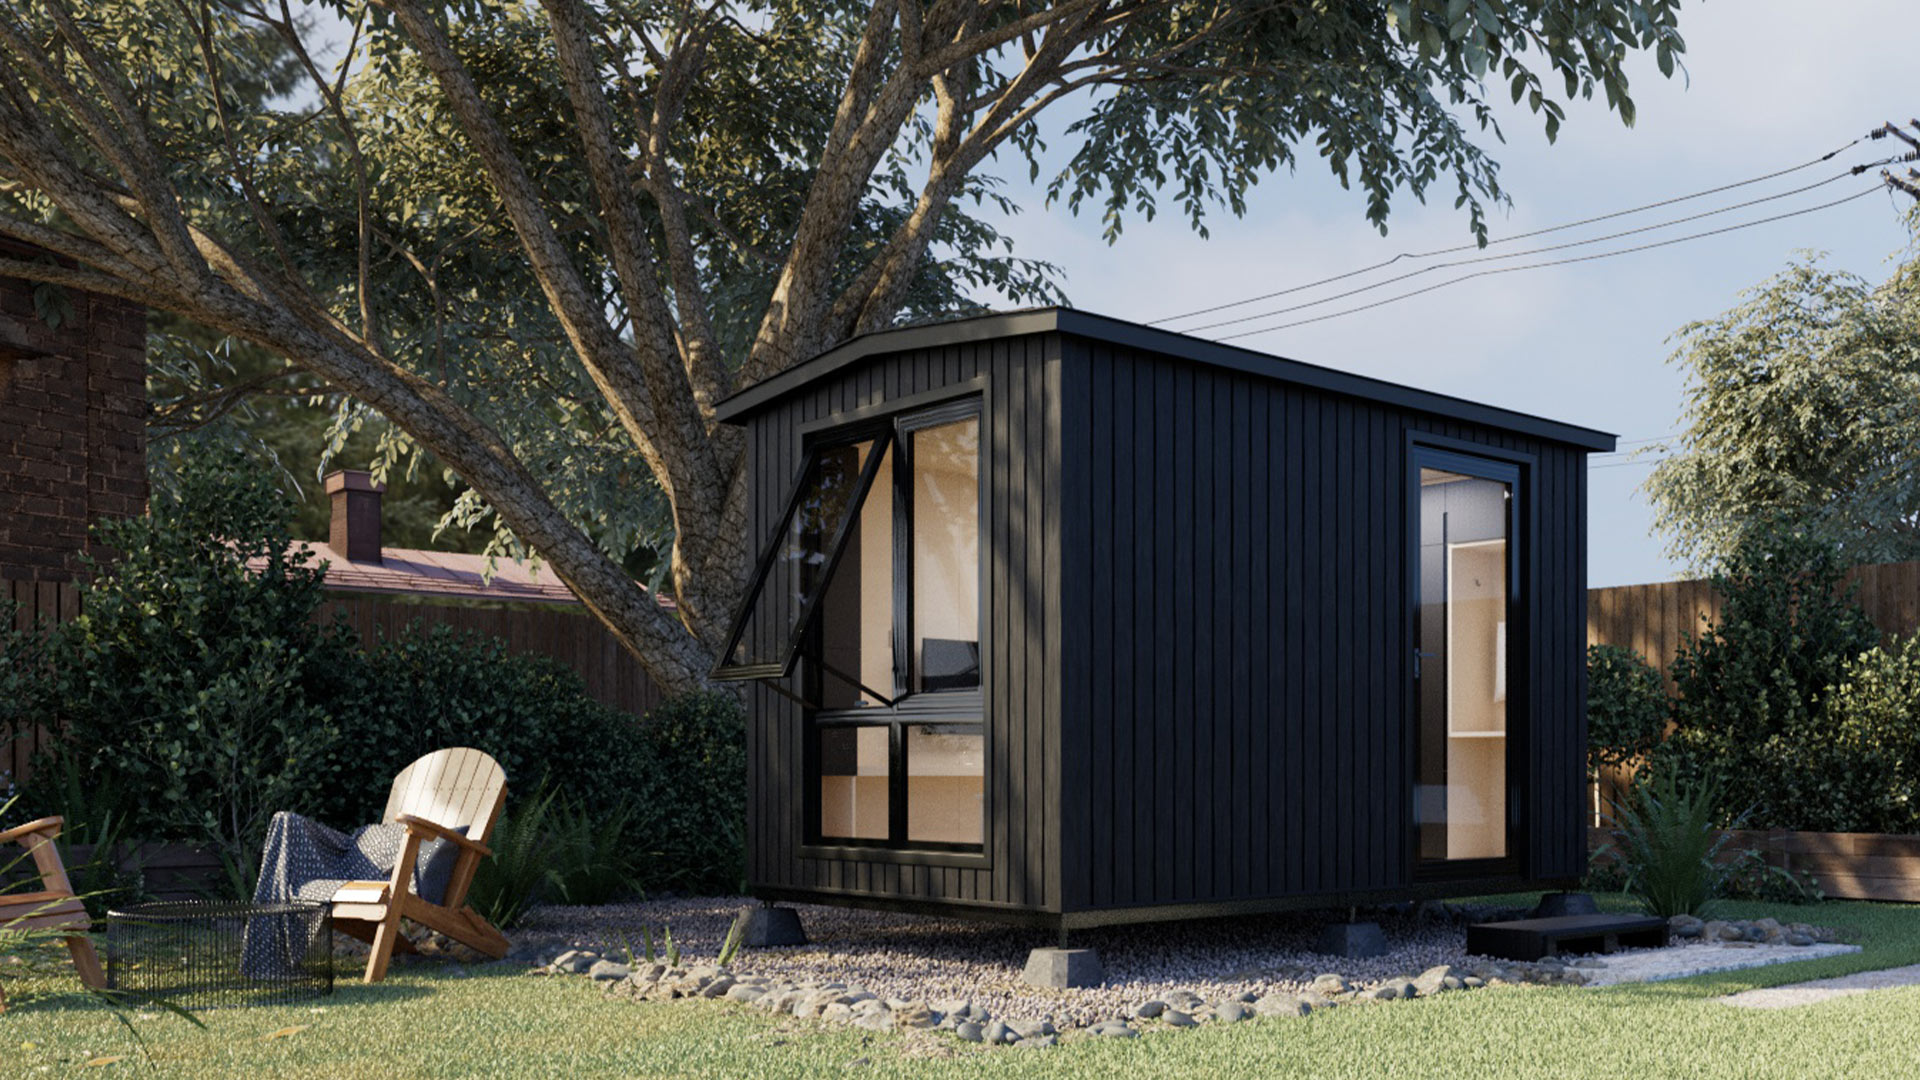
Autonomous WorkPod mini
The Autonomous WorkPod mini is a more affordable and smaller version of the original WorkPod, which makes it a perfect choice for people looking for an affordable backyard ADU with the benefits of an Autonomous product.
Although it’s a small ADU, it offers more than enough space for one person to work comfortably. You can fit a bed or sofa in it if you feel like it. Like the other sheds Autonomous offers, this product is weather-resistant, so you can still get it if you live in a place with severe weather conditions.
Final Thoughts
As you could see, building shed doors is not as difficult as many people would think, but you need to put your mind to it and have some experience with the tools you need to use. You won’t have trouble making the perfect door for your shed if you follow the steps on this page.
We know that making the door yourself is the most affordable option you can choose, but if you are not working on a budget, you should consider getting one of the ADUs that Autonomous offers. They have everything people need in a backyard shed, so you won’t have to invest any more money in them after you make your purchase.
You can get more information on the products this company offers on its website. Visit it now!