Connect Laptop to Monitor: Step-by-Step Guide & Top 6 Tools
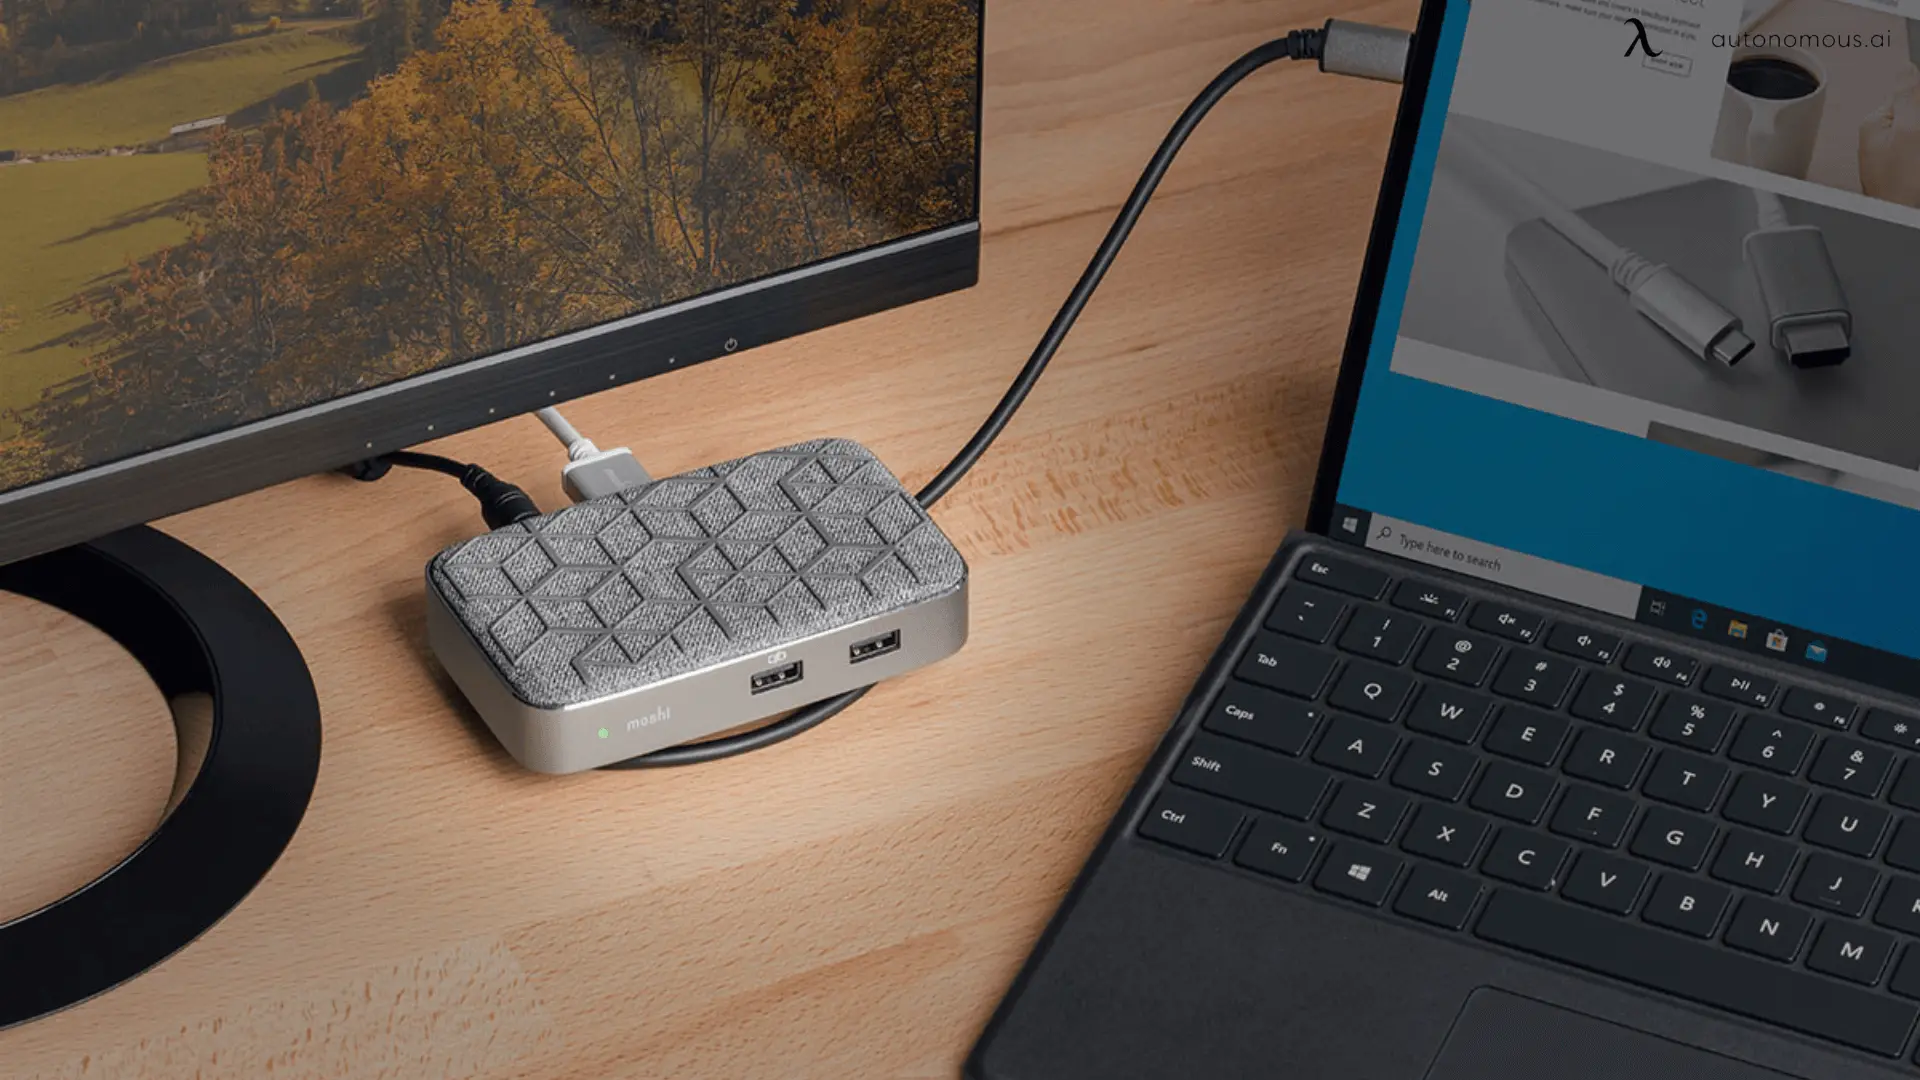
Table of Contents
The gamers love having a multiple monitor setup that lets them improve their gaming experience by connecting their laptops with a monitor. Connecting your monitor to a laptop can be very helpful for your productivity as it gives some breather and helps you multitask while gaming. Nevertheless, this can be challenging for newbies who are unaware of how to connect the monitor to the laptop the right way.
More screens provide a more immersive experience, so people even use a docking station to connect multiple monitors to the laptop. The procedures for connecting a monitor to Mac are completely different from that of Windows. You must know which ports are available on your laptop so that you may buy the relevant adapter to connect the external monitor to the laptop. We know that you must be confused with that part and have questions like how to connect dual monitors to the laptop. That’s why we are here for you.
As you read, you will discover distinguished ways to connect an extra monitor to your laptop. We have specified the requirements for connecting a monitor to Mac and Windows 10 while mentioning their details, so read ahead to learn more.
How to Connect Your Laptop to a Monitor: Step-by-Step Guide
To connect your laptop to a monitor, you can follow these general steps:
1. Check the ports
Identify the available ports on both your laptop and the monitor. The most common ports are HDMI, DisplayPort, DVI, and VGA. Ensure that your laptop and monitor have at least one common port.
2. Obtain the necessary cable
Depending on the ports available, you may need to acquire the appropriate type of cable. For example, if your laptop and monitor both have HDMI ports, you'll need an HDMI cable. If they have different ports, you may require an adapter or a cable that converts from one port type to another.
3. Power off both devices
Before making any connections, turn off your laptop and monitor. This is a safety measure to prevent potential damage during the connection process.
4. Connect the cable
Take one end of the cable and plug it into the corresponding port on your laptop. Then, take the other end and connect it to the matching port on the monitor. Ensure that the connections are secure.
4. Power on the monitor
Turn on the monitor by pressing the power button. It should detect the incoming signal automatically, but if it doesn't, you may need to adjust the input source using the monitor's menu buttons.
5. Power on the laptop
Switch on your laptop. By default, most laptops will recognize the external monitor and extend the display or mirror it. If it doesn't automatically detect the monitor, you can usually activate it by pressing the function key (Fn) on your laptop's keyboard along with a designated key (e.g., F4, F5, or another key marked with a monitor icon). The specific key combination can vary depending on your laptop model, so consult your laptop's manual if needed.
6. Adjust display settings (optional)
Once your laptop is connected to the monitor, you may want to adjust the display settings to optimize your viewing experience. On most operating systems (e.g., Windows or macOS), you can access the display settings by right-clicking on the desktop and selecting "Display settings" or a similar option. From there, you can choose the screen resolution, orientation, and other preferences.
Adjusting Display Settings on Windows:
Open Display Settings:
- Right-click on your desktop and select “Display settings” from the context menu.
Select the Monitor:
- If you have multiple monitors connected, click on the monitor you want to adjust.
Change Orientation:
- Scroll down to the "Orientation" dropdown menu and select the desired orientation:
- Landscape: Standard horizontal view.
- Portrait: Vertical view.
- Landscape (flipped): Upside-down horizontal view.
- Portrait (flipped): Upside-down vertical view.
- Scroll down to the "Orientation" dropdown menu and select the desired orientation:
Adjust Resolution:
- In the same window, you can adjust the resolution. Choose the recommended resolution for the best display quality.
Scale and Layout:
- Adjust the scaling settings to make text and other items larger or smaller. Typically, 100% is the default, but you can increase this for better readability.
Multiple Displays:
- If you’re using more than one monitor, decide how you want to use them:
- Extend: Extend your desktop across all monitors.
- Duplicate: Mirror the same content on all monitors.
- Show only on 1/2/etc.: Display content only on the selected monitor.
- If you’re using more than one monitor, decide how you want to use them:
Apply Changes:
- Click “Apply” to save your changes. You may be prompted to confirm the changes within a certain time.
Adjusting Display Settings on macOS
Open System Preferences:
- Click on the Apple menu in the top-left corner of the screen and select “System Preferences.”
Select Displays:
- In the System Preferences window, click on “Displays.”
Arrange Monitors:
- If you have multiple monitors, go to the “Arrangement” tab to arrange them. Drag the display icons to match your physical setup.
Rotate Display:
- In the “Display” tab, find the "Rotation" dropdown menu and select the desired rotation (90°, 180°, 270°). Note that this option may only appear if the monitor supports rotation.
Adjust Resolution:
- In the “Display” tab, you can choose between “Default for display” or “Scaled.” Select “Scaled” to manually choose a resolution that suits your needs.
Set Primary Display:
- To set a primary display, drag the white menu bar to the monitor you want to use as your main screen.
Optimize Screen Settings:
- Use the “Night Shift” tab to reduce blue light emission for better night-time viewing. Adjust color settings if needed.
Cables to Connect a Laptop to a Monitor
This table provides a quick reference to help you choose the appropriate cable for connecting your laptop to a monitor, based on resolution, refresh rate, audio support, and power delivery requirements.
| Cable Type | Connector Type | Max Resolution | Max Refresh Rate | Audio Support | Power Delivery | Typical Use Case |
|---|---|---|---|---|---|---|
| HDMI | Type A, Type C, Mini | Up to 10K (HDMI 2.1) | 120Hz at 4K | Yes | No | TVs, monitors, game consoles, Blu-ray players |
| DisplayPort | Standard, Mini | Up to 16K (DP 2.0) | 240Hz at 4K (DP 1.4) | Yes | No | Monitors, gaming PCs, docking stations |
| USB-C | USB Type-C | Up to 8K (DP Alt Mode) | 60Hz at 4K (Standard) | Yes (DP Alt) | Yes, up to 100W | Laptops, smartphones, docking stations |
| VGA | DE-15 | Up to 1080p | 60Hz | No | No | Older monitors and projectors |
| DVI | DVI-I, DVI-D | Up to 2560 x 1600 | 60Hz | No | No | Older monitors, desktop PCs |
| Thunderbolt | Thunderbolt 3/4 (USB-C) | Up to 8K | 120Hz at 4K | Yes | Yes, up to 100W | High-end monitors, docking stations, laptops |
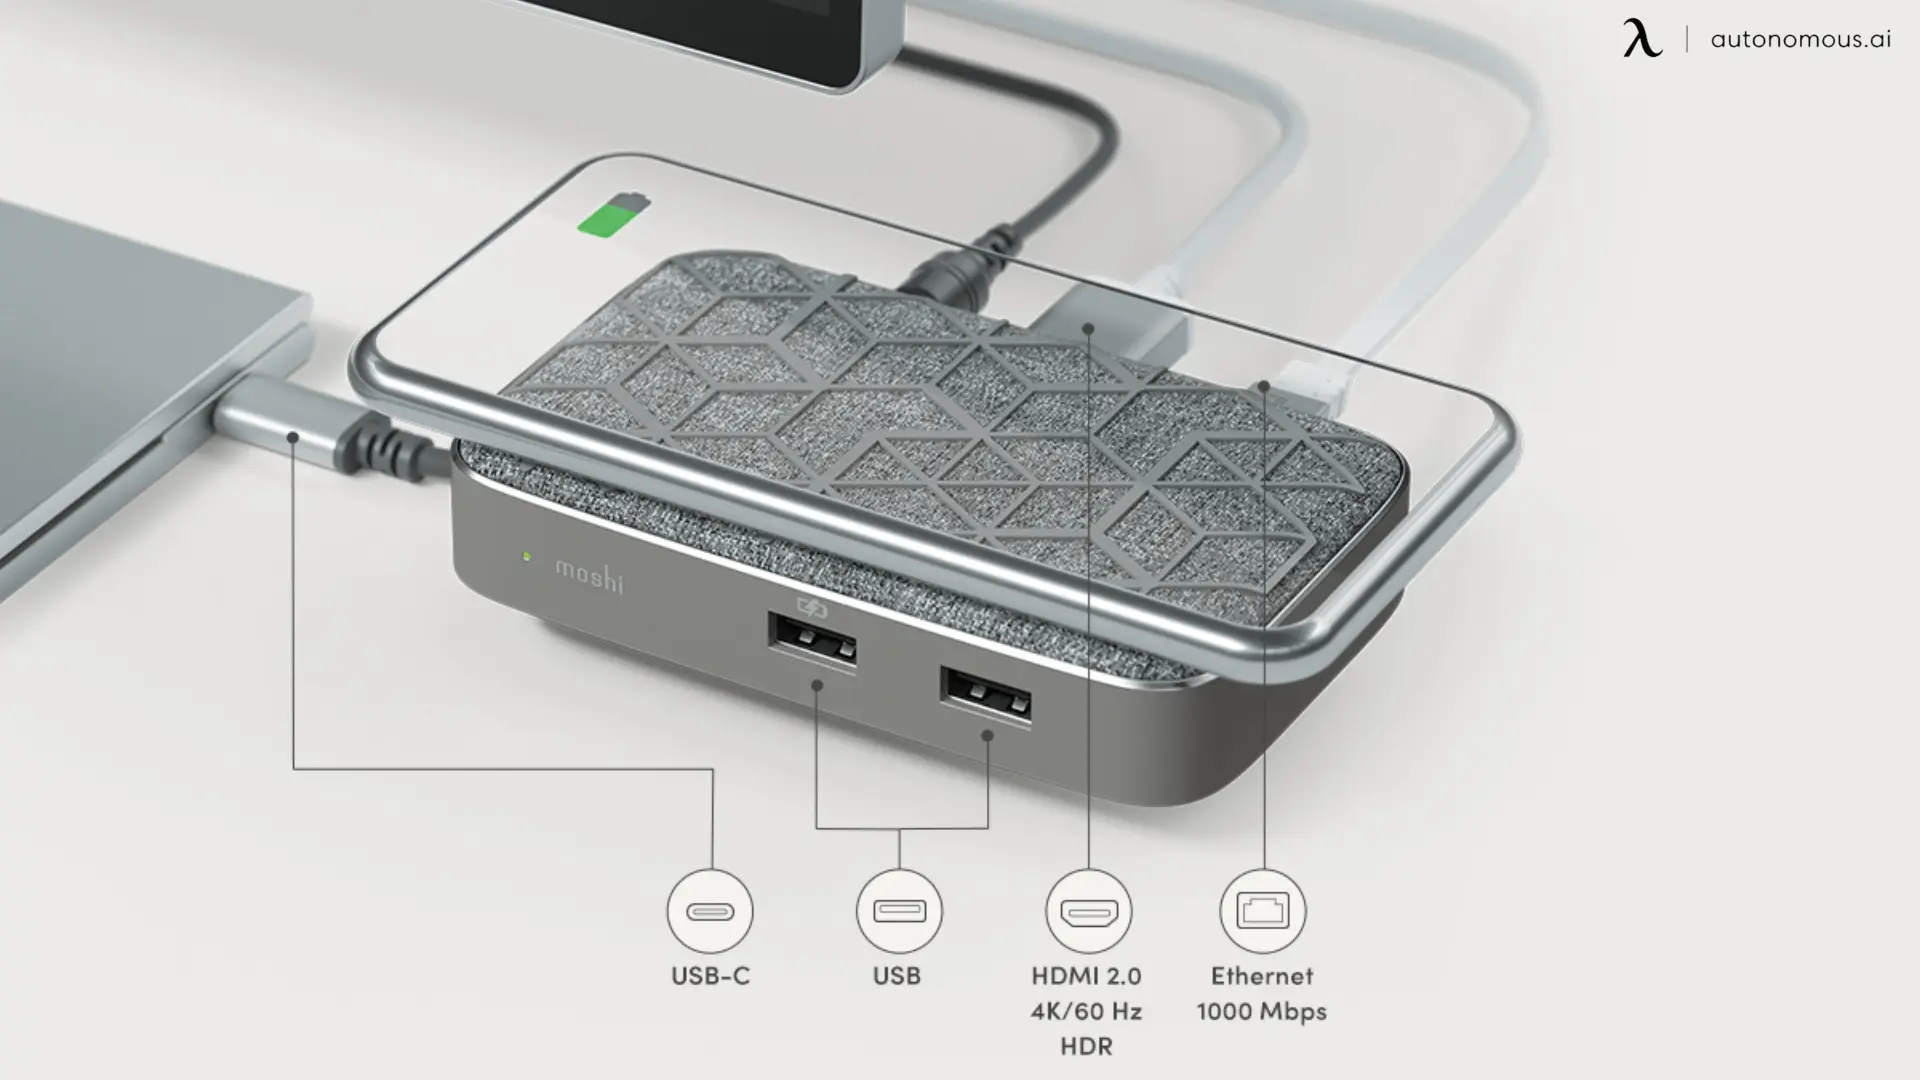
1. Connect Monitor to Laptop with USB
You may find a USB C port available on Windows 10. You will even need a USB-C connector if you are using Thunderbolt 3 or 4, but we will discuss that later. The USB C port allows you to connect your laptop to an HDMI. You may get it confirmed whether your laptop supports HDMI from the manufacturer if you have Windows 10.
Once you have connected your monitor to a power source and the computer, it will automatically detect a laptop in the Windows 10 setup. However, if it is not detecting, click on the start menu, go to settings, and from there, open the system tab. You will find a panel of display headers there. You will then have to click on the detect option under the multiple displays header.
If you plan to connect multiple monitors, you must know that the USB C port does not allow you to connect three or more monitors. So, you will be required to use an USB C docking station for 3 monitors to connect more monitors. You may even go for the 12–in–1 USB C hub dual monitor docking station to connect 2 monitors to the laptop. For those considering advanced setups, check out how to build a triple monitor setup.
2. Connect Monitor to Laptop with HDMI
The HDMI port is available both on Mac and Windows 10. You will need an HDMI cable if you plan to connect your monitor via the HDMI port. If you have extra-long HDMI cords, you must know that they are not reversible and that they have connectors labeled source and TV; you must ensure that you are plugging in the right port.
Mac automatically detects a laptop and monitor setup; however, if it doesn't, you should open the system preferences option and go to displays to select your display settings. You can even decide which arrangement of screens will be the most suitable one for you and select it under the arrangements option in Mac.
You will have to drag the boxes shown on your screen to set the screen's arrangement. You must click the mirror displays option if you wish to mirror your desktop on the second display. For Mac users, here’s a detailed guide on MacBook Air dual monitor setup.
3. Using Displayport
Several gaming monitors support a DisplayPort instead of HDMI. The Mac laptops feature a Thunderbolt connector that you can connect to displays that support DisplayPort. The DisplayPort and HDMI look quite similar.
However, a basic difference is in the shape of these connectors. If you observe an HDMI port, both its sides are slant. On the other hand, the DisplayPort has only one side slant while the other is flat.
Once you have connected the laptop to the monitor, it will detect the monitor automatically. However, if it is not doing that, you will be required to do the same steps that we mentioned for Mac and Windows 10 for connecting the laptop via USB C or HDMI.
4. Connect Monitor to Laptop Via Thunderbolt
You will find a Thunderbolt 3 or 4 on Mac laptops only. They are special USB-C connectors that allow you to connect a monitor to the laptop via DisplayPort, mini-DisplayPort, HDMI, or VGA. Every display device does not support a port that your laptop has.
So, you may use the Thunderbolt 3 or 4 to connect with devices that support any of the ports that we mentioned above. If you have an iMac or Mac mini, you may find a port with a thunderbolt symbol on them. You will have to use these ports to connect an extra monitor to the laptop.
5. Using Wireless Display Adapter
To connect your laptop to a monitor using a wireless display adapter, follow these steps:
- Plug the wireless display adapter into the HDMI port of your monitor.
- Connect the USB cable of the wireless display adapter to a USB port on your laptop for power.
- Turn on the monitor and select the HDMI input that the wireless display adapter is connected to.
- On your laptop, go to Settings > Devices > wireless & other devices.
- Click on "Add wireless or other device" and select "Wireless display or dock."
- Your laptop will scan for available wireless displays. Select the name of your wireless display adapter when it appears.
- Your laptop will connect to the wireless display adapter and the monitor should display your laptop screen.
Note: The exact steps may vary depending on the type of wireless display adapter you are using and the operating system of your laptop. Make sure to consult the user manual of your wireless display adapter for detailed instructions.
6. Via VGA cable
To connect your laptop to a monitor using a VGA cable, follow these steps:
- Make sure your laptop and monitor are turned off.
- Plug one end of the VGA cable into the VGA port on your laptop.
- Plug the other end of the VGA cable into the VGA port on your monitor.
- Turn on your monitor and set it to the correct input source for VGA (usually by pressing the Input or Source button on your monitor).
- Turn on your laptop.
- Right-click on your desktop and select "Display settings" or "Screen resolution" from the context menu.
- In the Display settings or Screen resolution window, you should see two displays: one labeled "1" for your laptop and one labeled "2" for your monitor. Make sure the "Extend these displays" option is selected.
- If your laptop does not automatically recognize the monitor, you may need to click on "Detect" or "Identify" to force your laptop to detect the external display.
- Adjust the resolution and orientation of your external monitor as needed.
Note: Some laptops may require you to press a function key combination (such as Fn + F5) to switch to the external monitor. Check your laptop's user manual for specific instructions.
Troubleshooting Common Issues
Monitor Not Detected: Ensure all cables are securely connected. Restart your computer and check for driver updates.
Incorrect Resolution: Manually set the monitor resolution in display settings. Ensure your graphics card supports the desired resolution.
Display Orientation Issues: Make sure your monitor supports rotation. Adjust the orientation settings as needed.
FAQs
1. Why won't my laptop connect to a monitor with HDMI?
There could be several reasons why your laptop is not connecting to a monitor using an HDMI cable:
- Incorrect input source: Make sure you have selected the correct input source on your monitor. Most monitors have multiple input options (e.g., HDMI, VGA, DisplayPort), so ensure that you have selected the HDMI input.
- Faulty cable or port: Try using a different HDMI cable or connecting to a different HDMI port on your laptop. Sometimes, a faulty cable or port can prevent the connection.
- Display settings: Check your laptop's display settings to ensure that it is configured to extend or duplicate the display to an external monitor. On Windows, you can usually access display settings by right-clicking on the desktop and selecting "Display settings." On macOS, go to the Apple menu, choose "System Preferences," and then select "Displays."
- Graphics driver issues: Outdated or incompatible graphics drivers can sometimes cause issues with connecting to an external monitor. Visit the manufacturer's website for your laptop's graphics card and download the latest drivers.
- Hardware compatibility: In rare cases, there may be compatibility issues between your laptop and the monitor. Verify that both your laptop and the monitor support HDMI connectivity.
2. Why isn't my laptop displaying on my monitor?
If your laptop is not displaying on your monitor at all, there are a few steps you can take to troubleshoot the issue:
- Check physical connections: Ensure that the HDMI cable is securely connected to both the laptop and the monitor. Also, confirm that the monitor is powered on and set to the correct input source.
- Function key or display toggle: Some laptops have a function key (e.g., Fn key) that allows you to toggle between different display modes. Press the appropriate function key combination (often labeled with a monitor icon) to cycle through the display options, such as laptop screen only, external monitor only, or both screens.
- Display settings: Verify the display settings on your laptop to ensure it is set to extend or duplicate the display to an external monitor. Refer to the previous answer for instructions on accessing display settings on Windows and macOS.
- Graphics driver issues: Outdated or incompatible graphics drivers can sometimes prevent the laptop from displaying on an external monitor. Update the graphics drivers by visiting the manufacturer's website for your laptop's graphics card.
- Try a different monitor: If possible, test your laptop with a different monitor to rule out any issues with the original monitor.
3. How do I connect my laptop to a monitor and use both screens?
To connect your laptop to a monitor and use both screens, follow these general steps:
- Check the available ports: Identify the video output ports on your laptop (e.g., HDMI, VGA, DisplayPort) and the corresponding input ports on the monitor. Ensure that you have the necessary cables and adapters to connect the two.
- Connect the cable: Plug one end of the cable into your laptop's video output port and the other end into the monitor's input port. Make sure the connections are secure.
- Power on the monitor: Turn on the monitor and set it to the correct input source (e.g., HDMI).
- Configure display settings: On your laptop, access the display settings. On Windows, right-click on the desktop and select "Display settings." On macOS, go to the Apple menu, choose "System Preferences," and then select "Displays." Look for an option to extend or duplicate the display and select it. You may also need to adjust the screen resolution to match the monitor.
- Arrange display layout: Once the monitor is recognized by your laptop, you can arrange the display layout. In the display settings, you can drag and arrange the display icons to match the physical arrangement of your monitors. This step ensures that your mouse cursor moves correctly between screens.
For specific scenarios such as gaming or working from home, refer to these guides on PS5 dual monitor setup and best laptops for working from home to get the most out of your setup.
For more detailed guides on different setups, check out:
Bottom Line
With this, we come to the end of today's blog. We hope that you would have found this article insightful and that you have a clear idea of how to connect the monitor to the laptop. If your laptop still fails to detect the device, you should try restarting it.
Once that is done, you are all good to go. If you don’t know where to buy the best gaming monitor and its peripheries for your gaming setup, you should consider the Autonomous store.
The Autonomous provides you with gaming accessories and furniture at discounted rates. The Autonomous will offer you everything, whether it be a gaming desk, an ergonomic chair, or any other accessory. Explore now!