


Is It Possible to DIY an Office Chair?
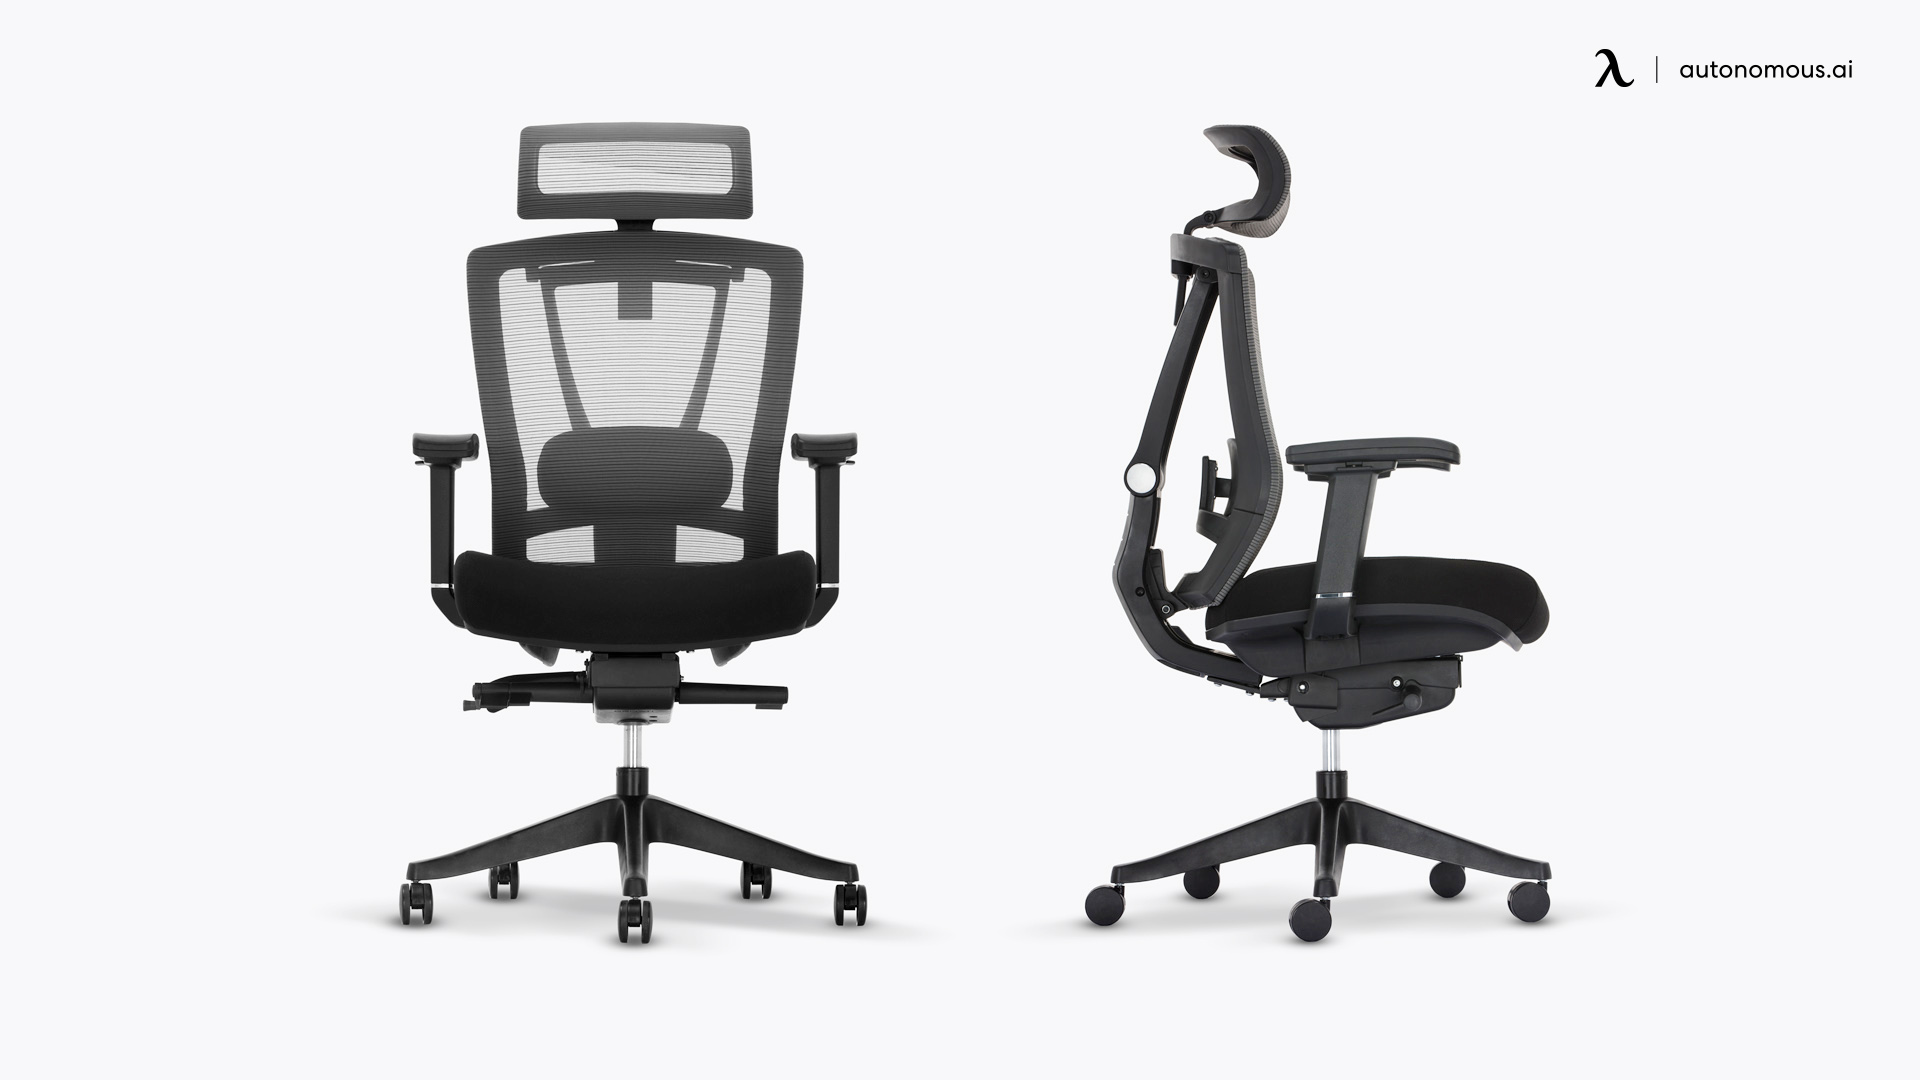
Table of Contents
If you work remotely at home, you need a chair to support your comfort level. Health experts suggest sitting too long gives you back and neck problems. If you feel uncomfortable at work, your current chair might not offer the right back to support your body's needs. Why not build your own office chair? For these reasons alone, you should consider a Do-It-Yourself (DIY) project. With a hands-on, creative approach, you can personalize a DIY ergonomic chair just for you and your back.
There are numerous health benefits to a homemade ergonomic chair, such as correct spine alignment and stress reduction. All you need to do is figure out how to build your own office chair with an ergonomic mindset. In this article, you should understand what makes chairs ergonomic, so you can make your DIY ergonomic chair step by step. You can do this with any project, such as a DIY standing desk chair.
What Makes A Chair Ergonomic?
The term ergonomic refers to a scientific discipline of how to increase your efficiency in your workplace. It involves an arrangement of your workplace furniture to maximize potential comfort and safety. A DIY office chair should have the following ergonomic features:
- Adjustability for better control, which includes the armrests and backrests
- Correct measurements to your seat height, width, and depth
- Lumbar support, which promotes proper posture
- Seat material with premium quality and comfort
- Swivel which allows circular rotation
You should also know how to properly sit up straight, with an arm’s length away from the keyboard. Your neck specifically should be in a state of relaxation. To control better blood circulation, make sure your feet firmly plant themselves on the floor. If comfort is a priority, consider integrating a heated office chair feature.

Build Your Own Ergonomic Chair Step By Step
A homemade ergonomic chair only requires patience in the understanding of the materials. To start, you can choose from several models at Autonomous Smart Office. There are several options to choose from for your homemade ergonomic chair. Autonomous specializes in height adjustable office chairs and standing desks for your needs. Whether it’s a DIY standing desk chair or you want to learn DIY lumbar support, this guide is for you. You might want to refer to office chair dimensions to ensure your chair will fit comfortably in your workspace.
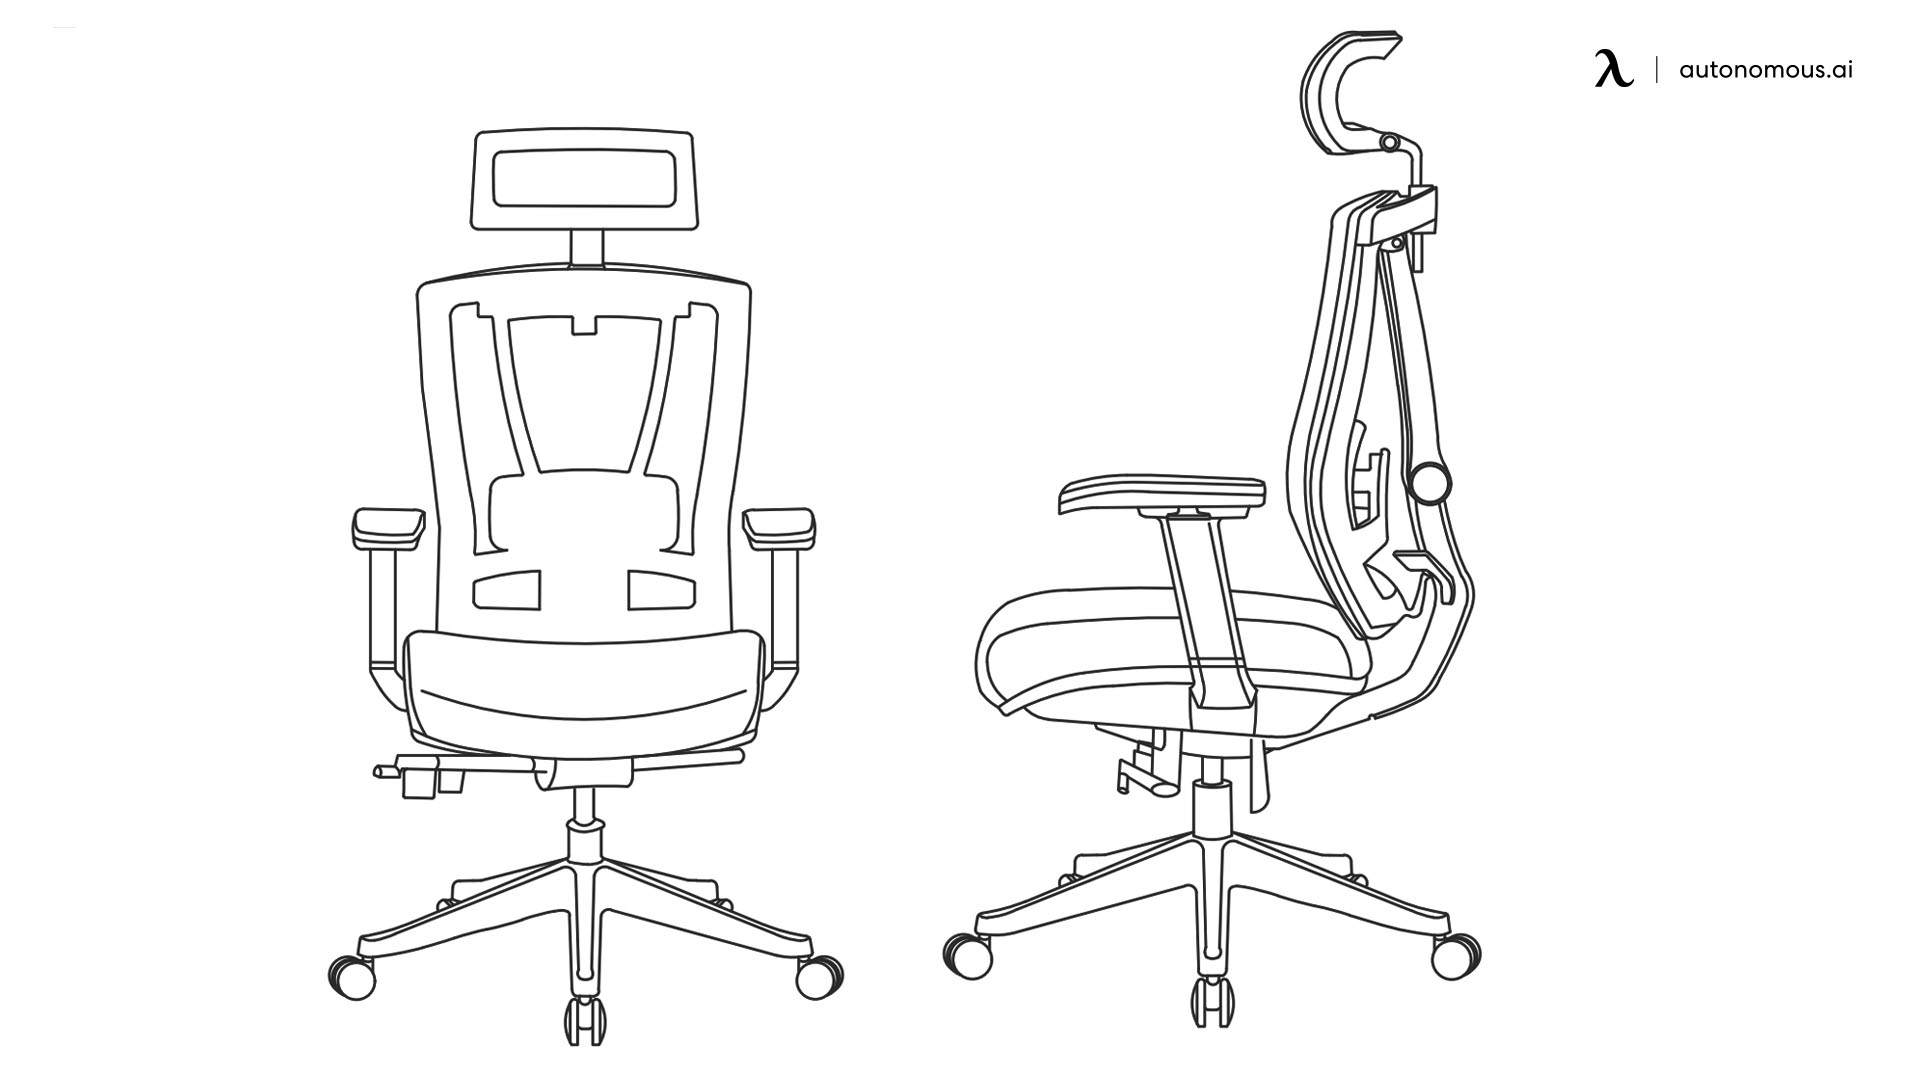
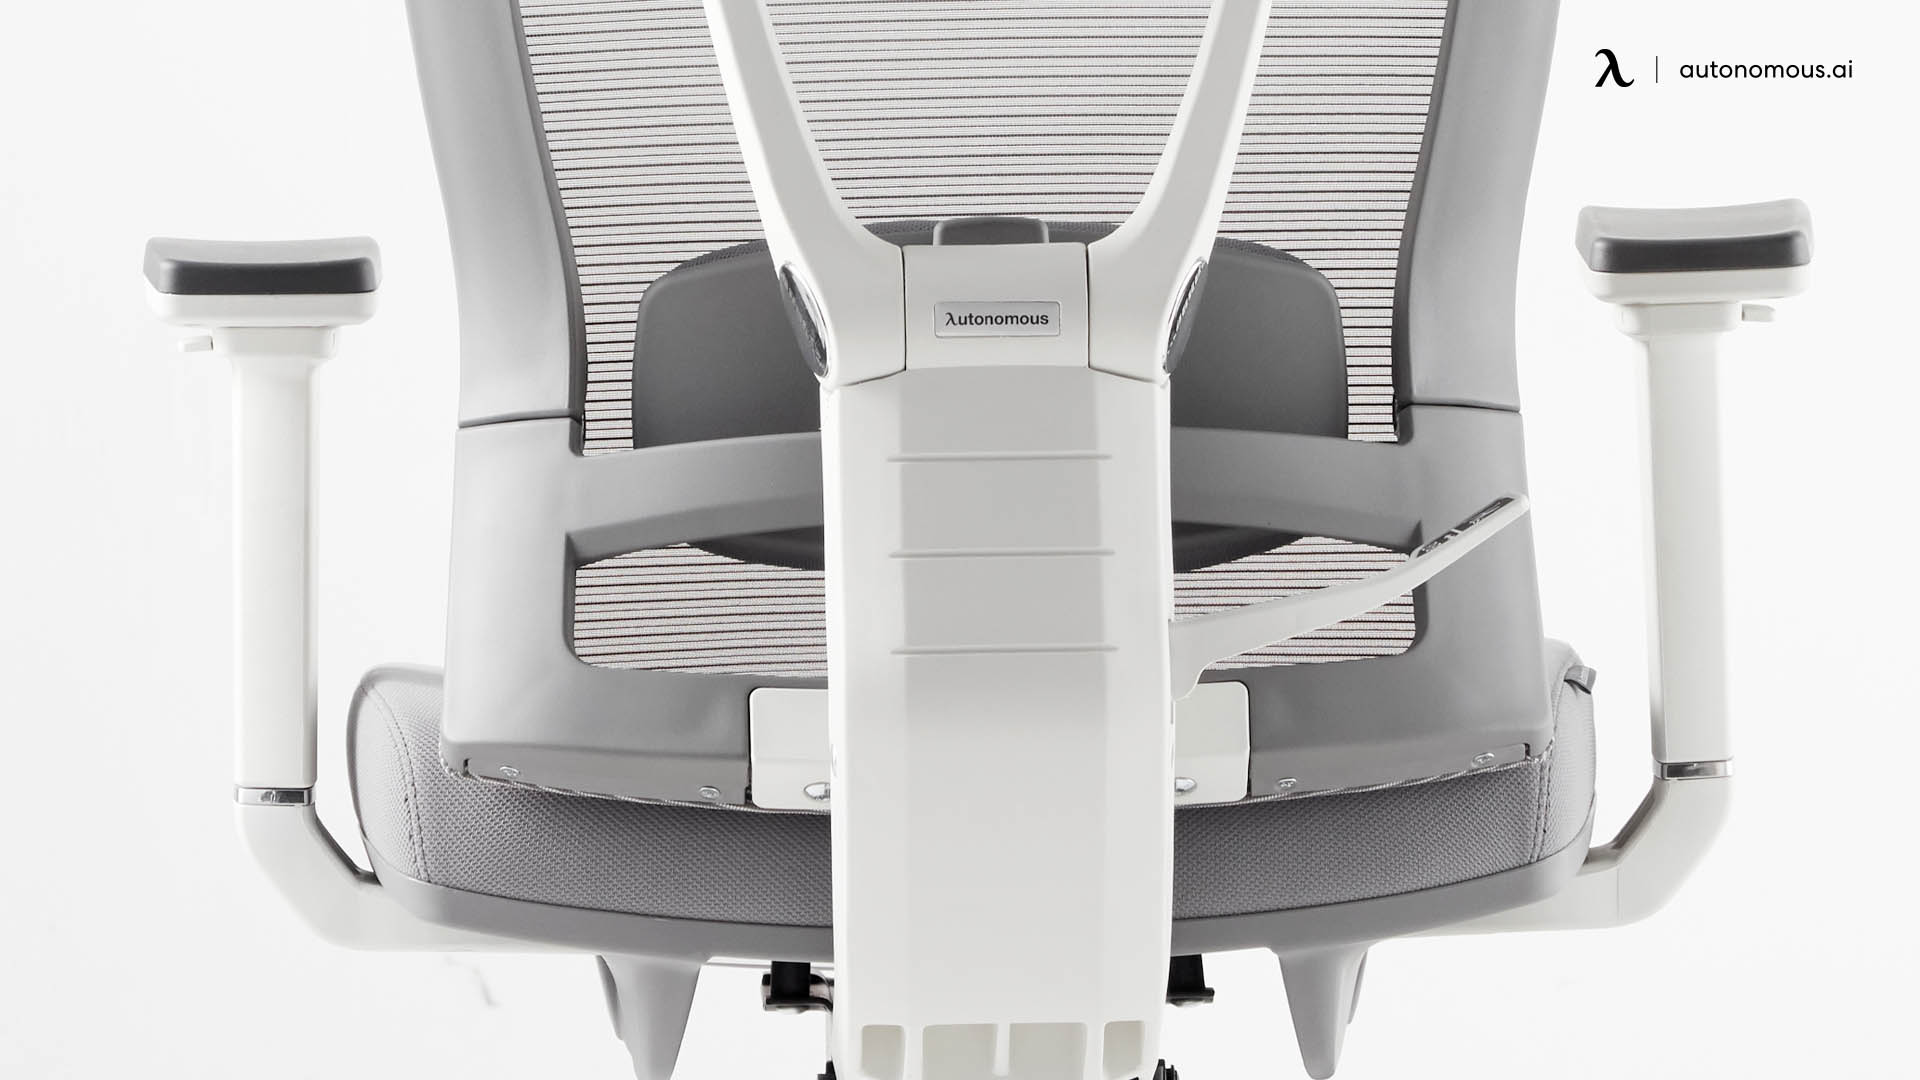
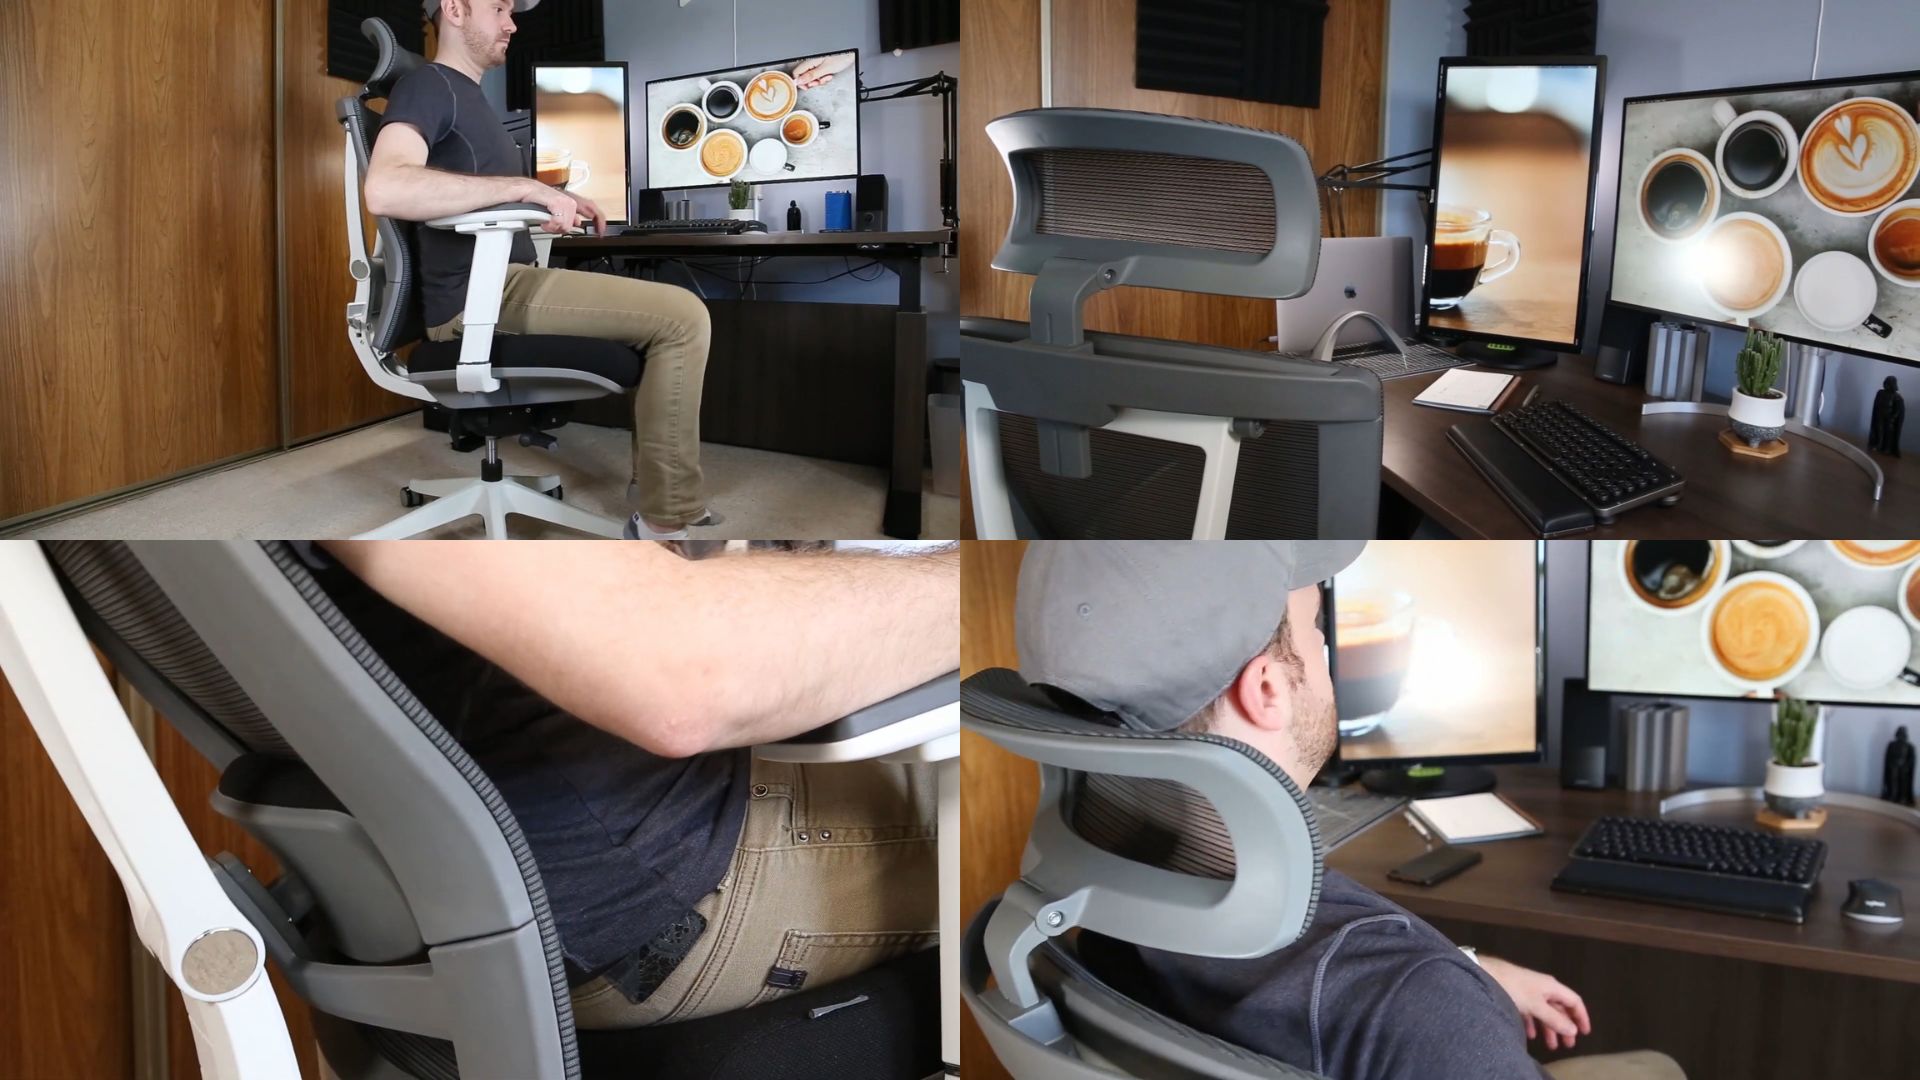
The first DIY ergonomic chair you should look at is the ErgoChair Pro. It prevents back pain through DIY lumbar support and includes a headrest and armrest. The ErgoChair Pro also has adjustments for its height, tilt, and tension. You could tailor the height and support to suit your specific body type, much like the considerations detailed in articles about the best office chair for short person.
1. How to Build Your Own Office Chair - Featuring the ErgoChair Pro
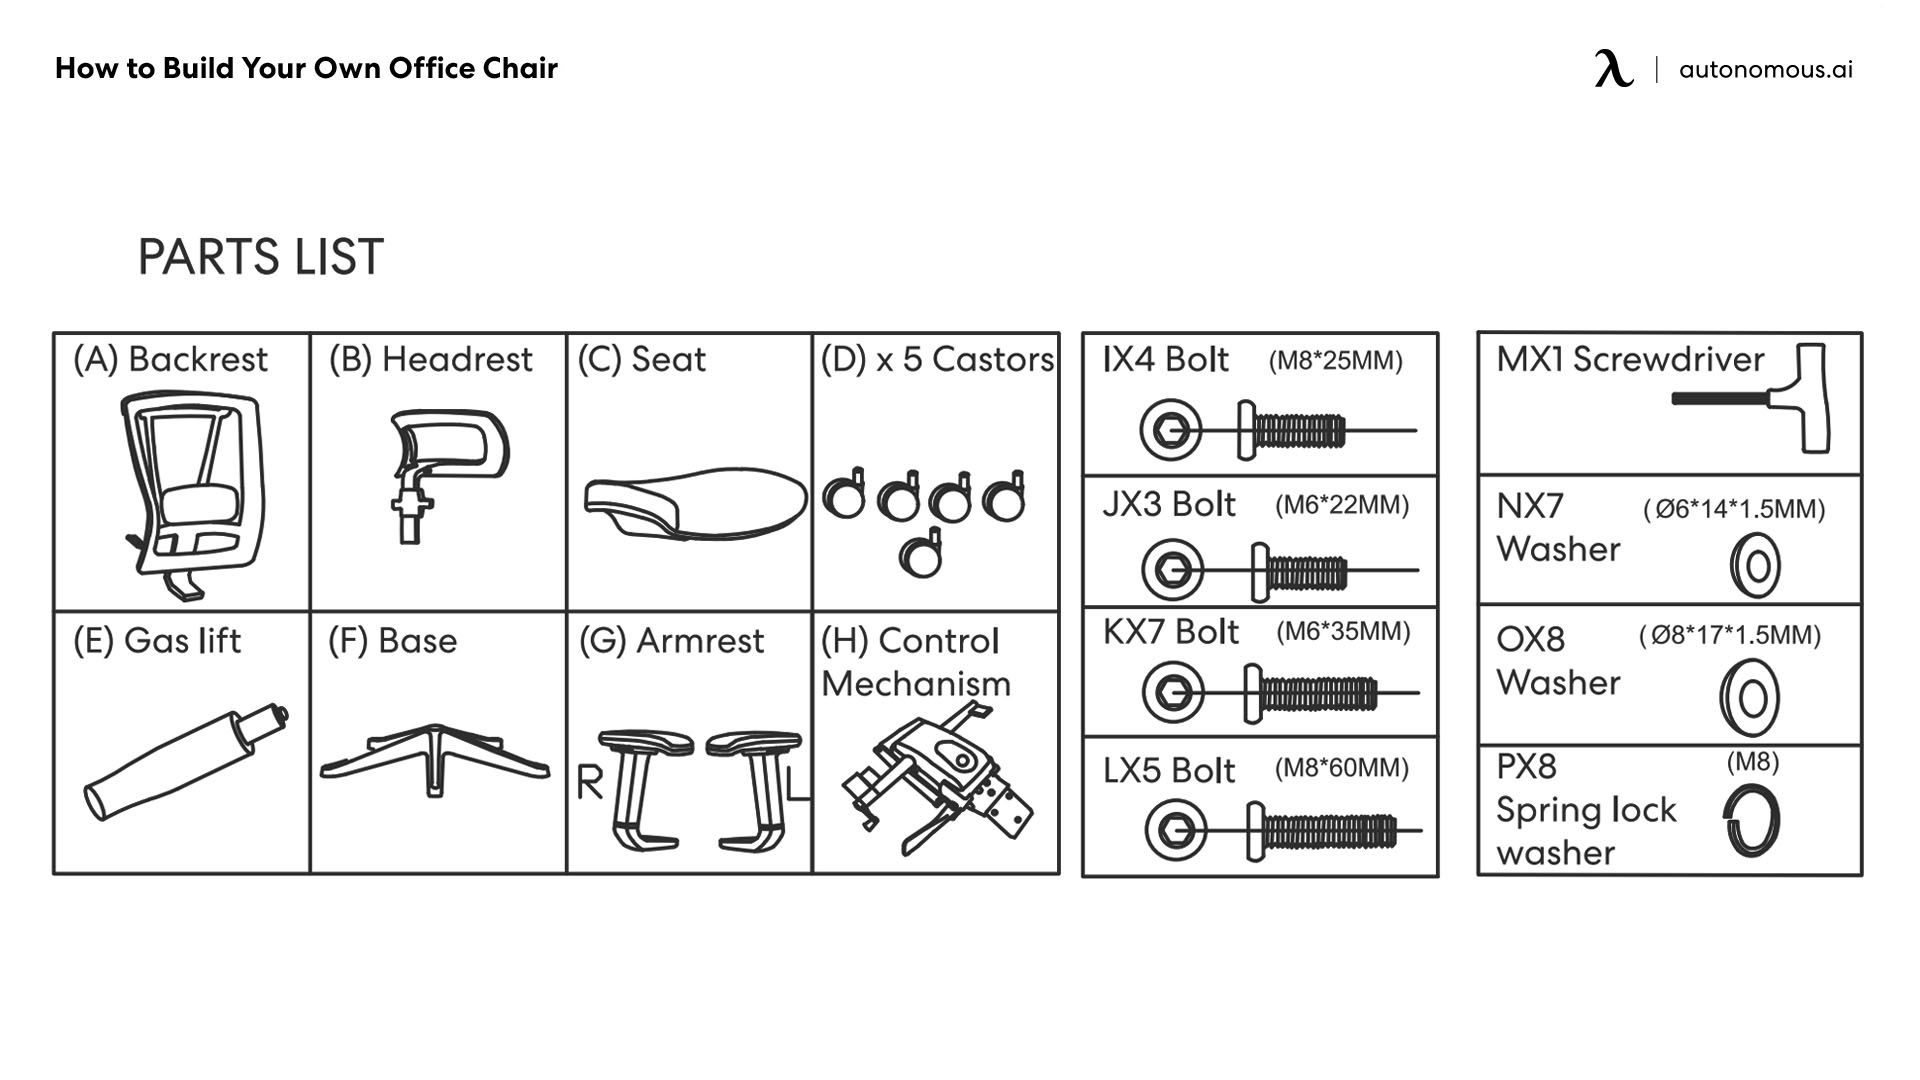
When you build your own office chair, keep in mind the instructions as follows. The parts are in numerical order (A-Z). Just read the guidelines carefully while you assemble the ErgoChair Pro. Here are the step-by-step directions to follow as you build your office chair. The list of parts is in alphabetical order:
- (A) Backseat
- (B) Headrest
- (C) Seat
- (D) x 5 Castors
- (E) Gas Lift
- (F) Base
- (G) Arm Rest
- (H) Control Mechanism
Below is a list of bolts:
- IX4 Bolt
- JX3 Bolt
- KX7 Bolt
- LX5 Bolt
Finally, here are the remaining parts. Also, the number after the X in its name refers to the number of items. For example, MX1 Screwdriver means there’s only one driver. The NX7 washer means there are seven washers of that type. Here is the list:
- MX1 Screwdriver
- NX7 Washer
- OX8 Washer
- PX8 Spring Lock Washer
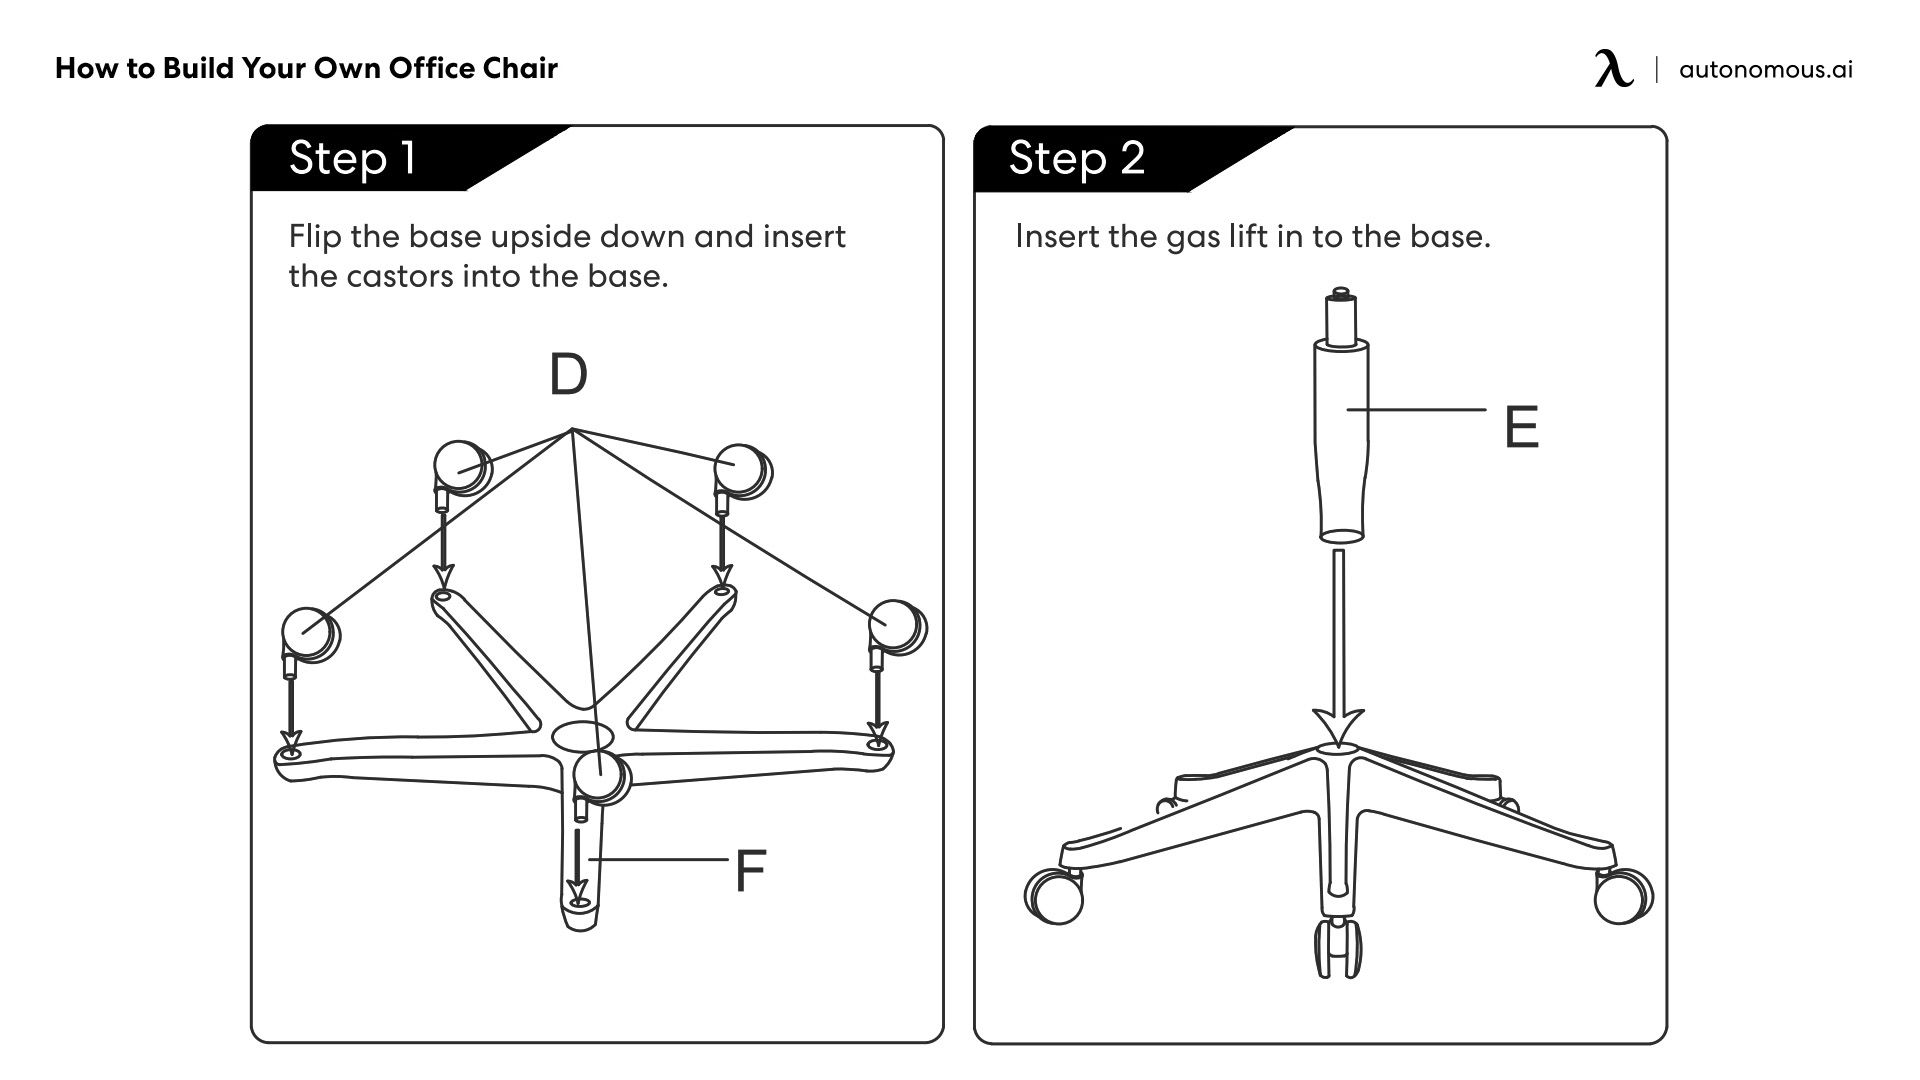
Step 1: You must turn the base (F) upside down to insert the five castors (D) at the ends of the base itself.
Step 2: Insert the gas lift (E) into the base (F).
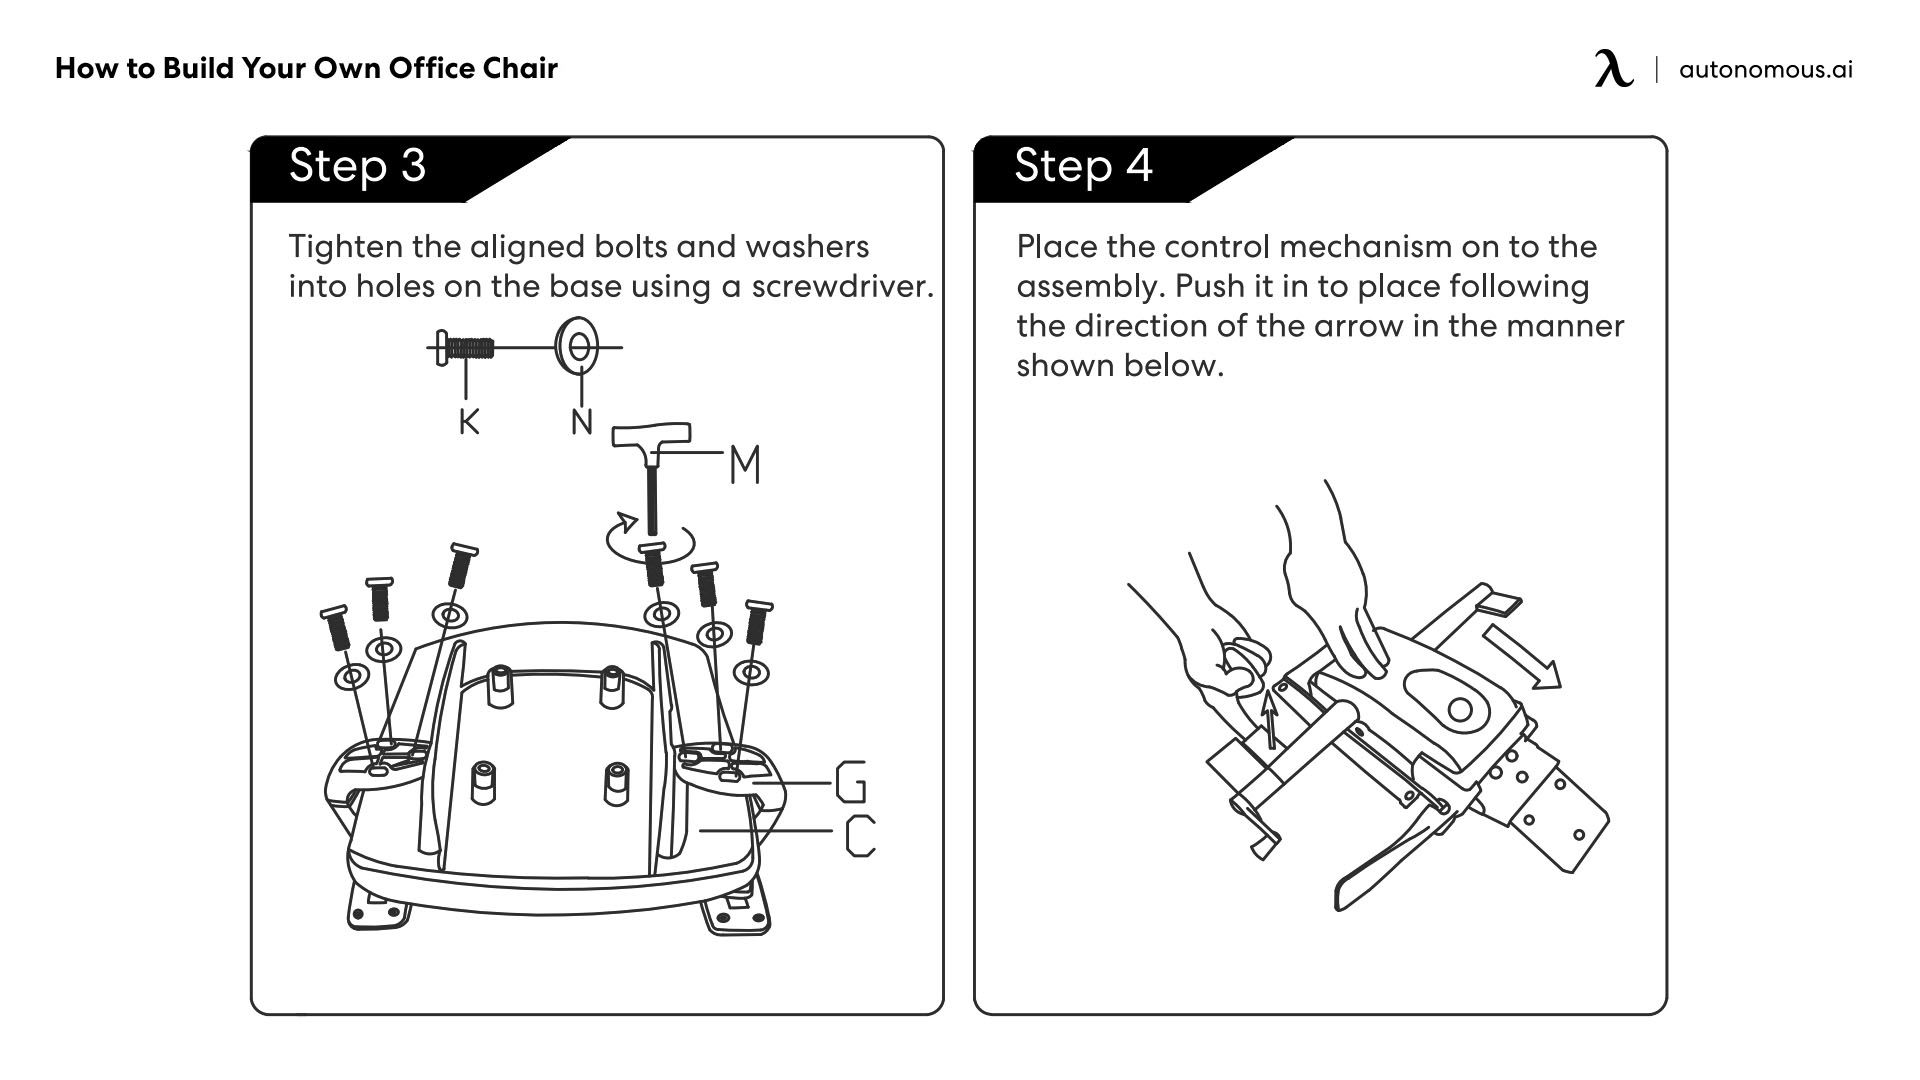
Step 3: Put the seat (C) upside down, with the armrest (G) aligned with the holes. Use a screwdriver (M) to secure the aligned bolts and washer. Specifically, screw the KX7 bolts (K) into the NX7 washers (N). It should connect the seat (C) and the armrest (G).
Step 4: Put the control mechanism (H) on the assembly. Slide it horizontally; use the instruction manual for a visual guide of the direction if you are not sure how it works.
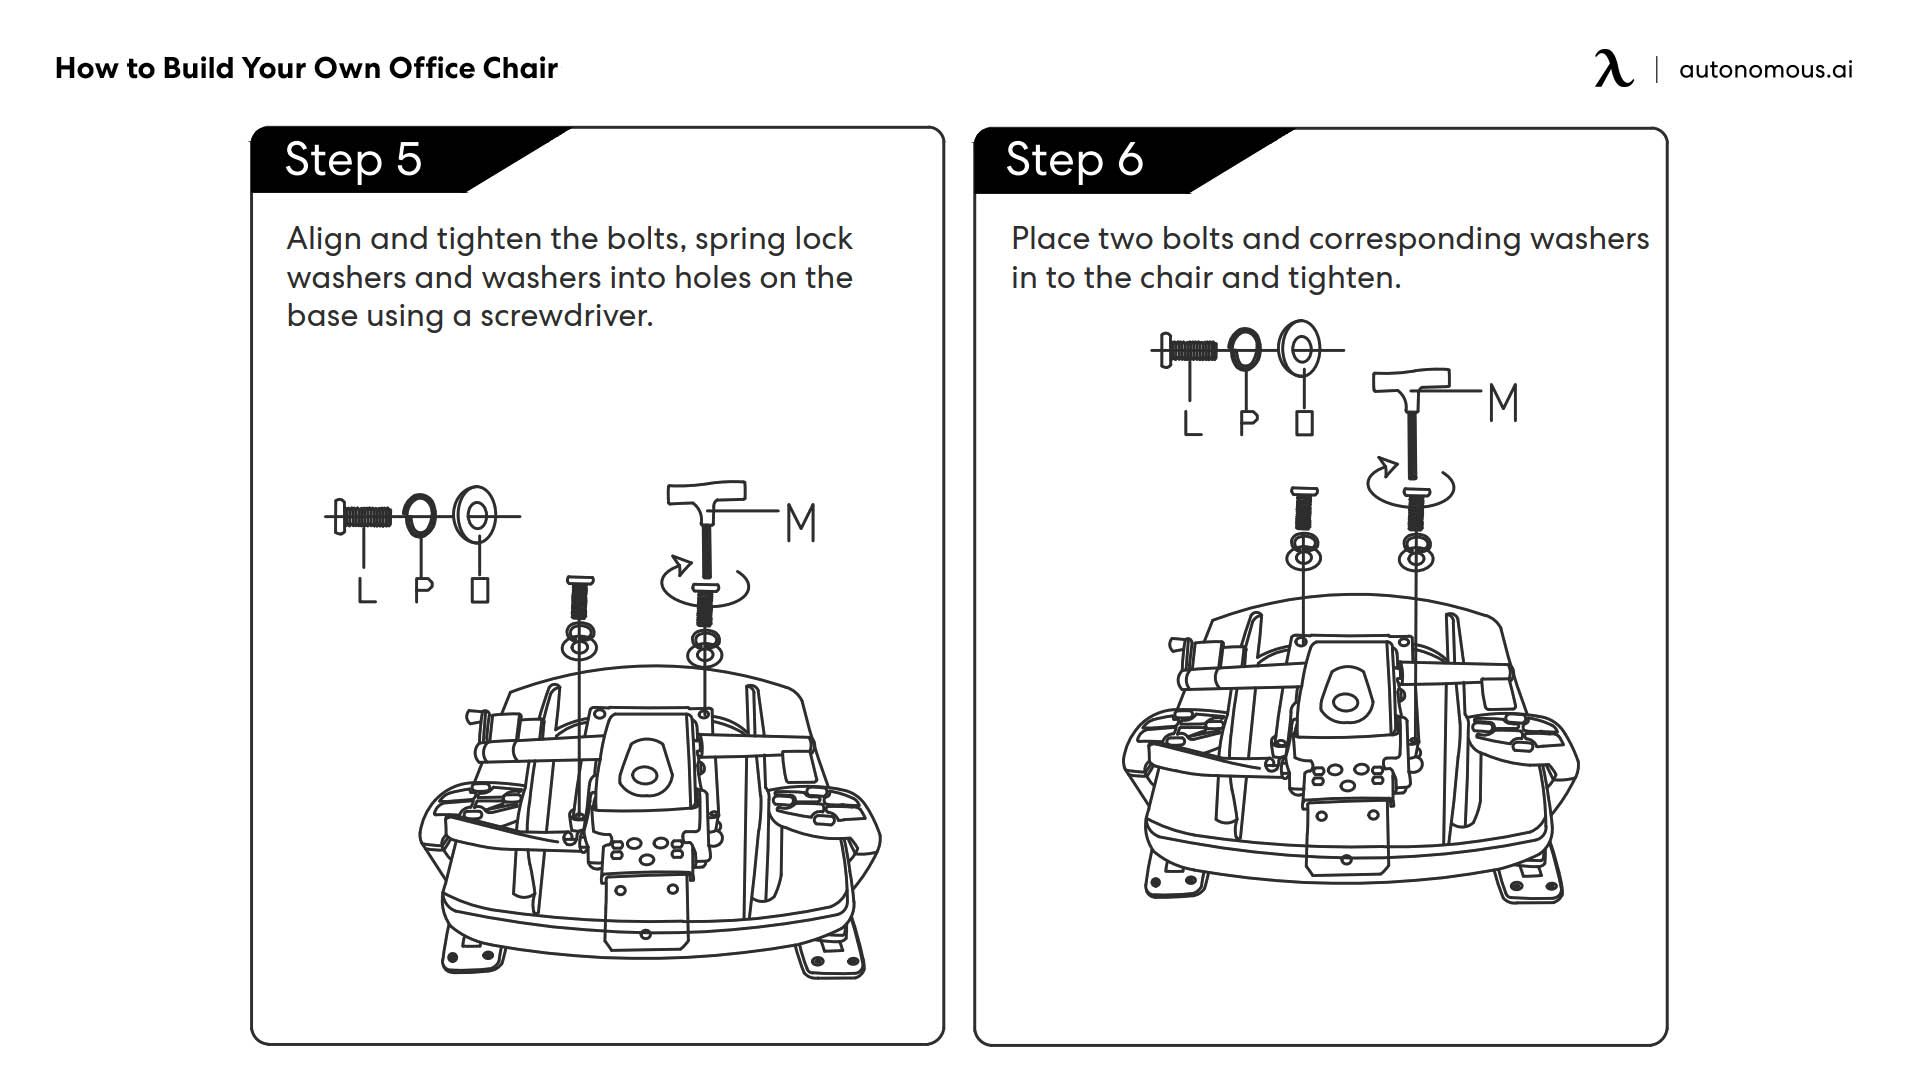
Step 5: Screw the LX5 bolts (L) through the PX8 spring lock washer (P) and OX8 washer (O) with your screwdriver (M), in that exact order. It allows the control mechanism (H) to stay in place on the bottom of the seat (C).
Step 6: Place two bolts and the correct washers, in the L -> P -> O order, to tighten the chair.
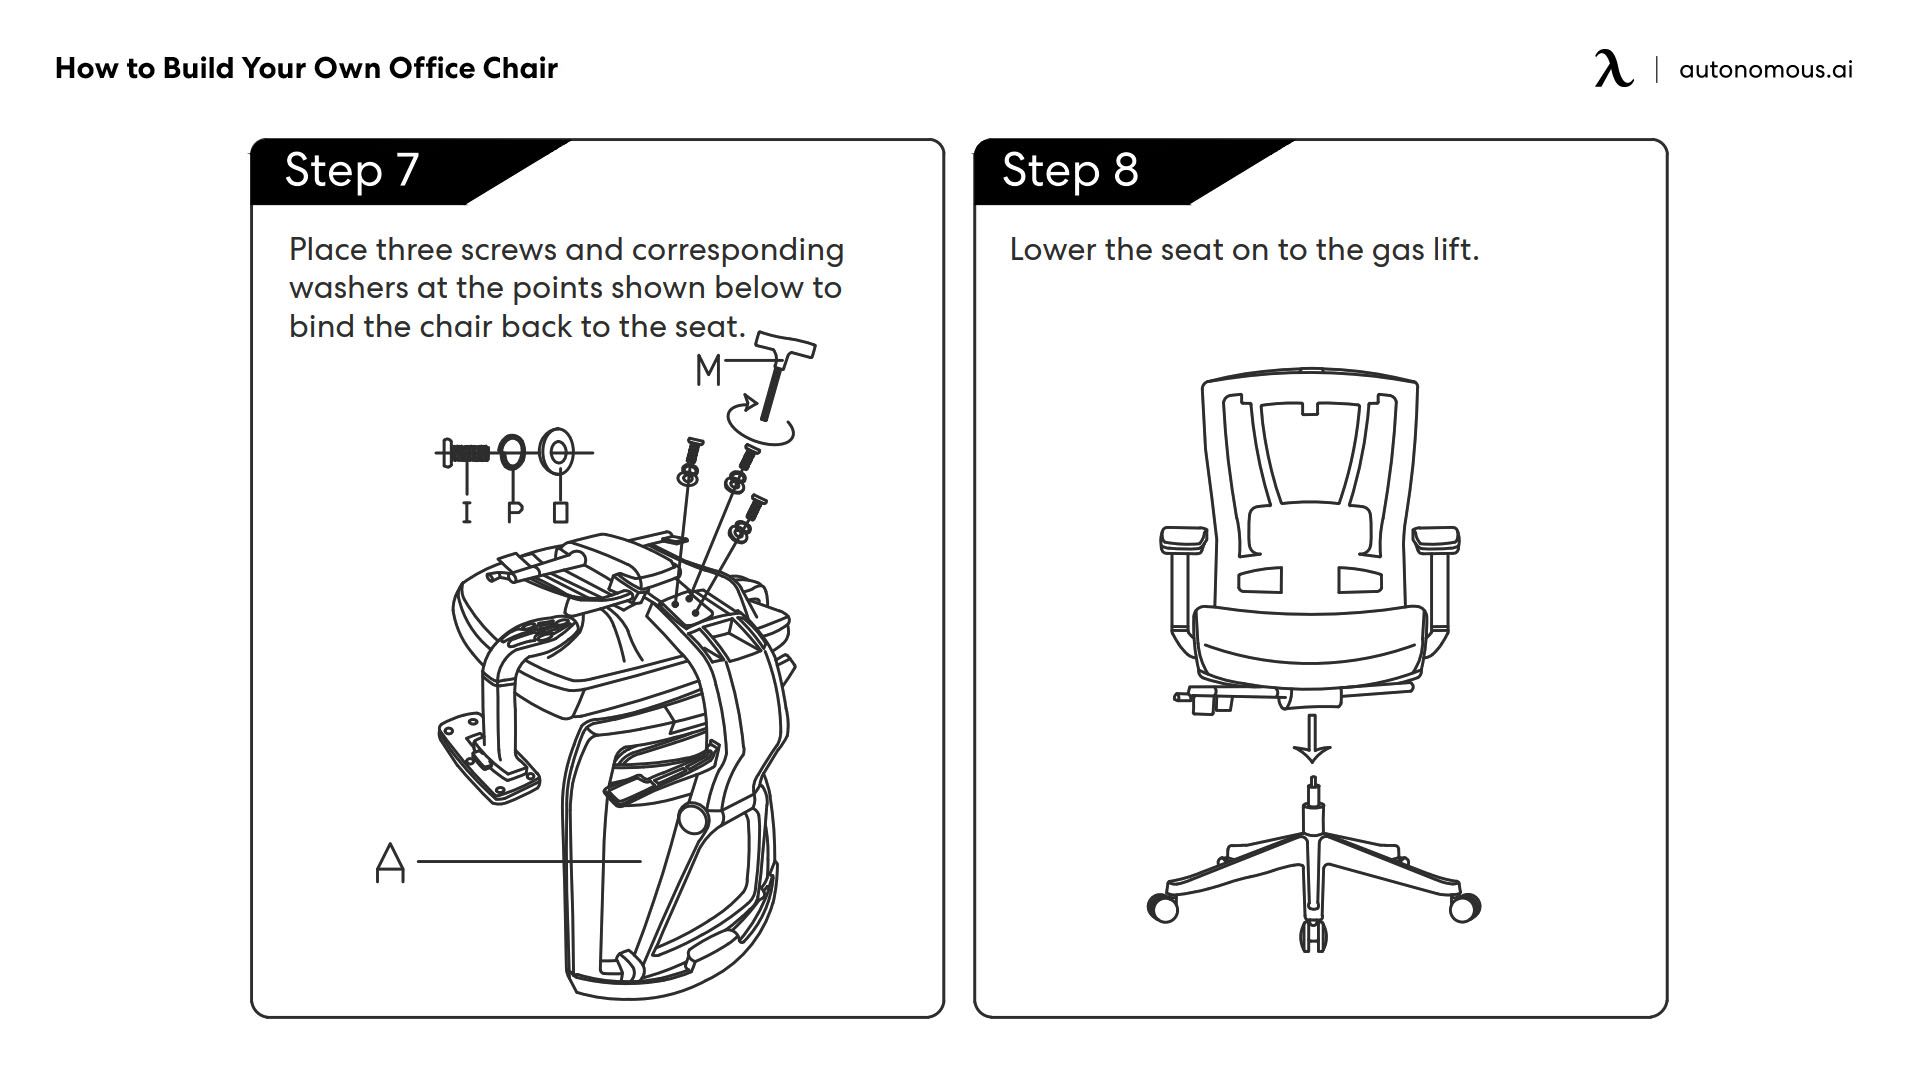
Step 7: Take three IX4 screws (I) through the (P) and (O) washers at the point which connects the seat © and the backrest (A). Now the chair is attached to the seat.
Step 8: Remember earlier when you attached the gas lift (E) to the base (F)? Well, now you should lower the seat onto the gas lift (E).
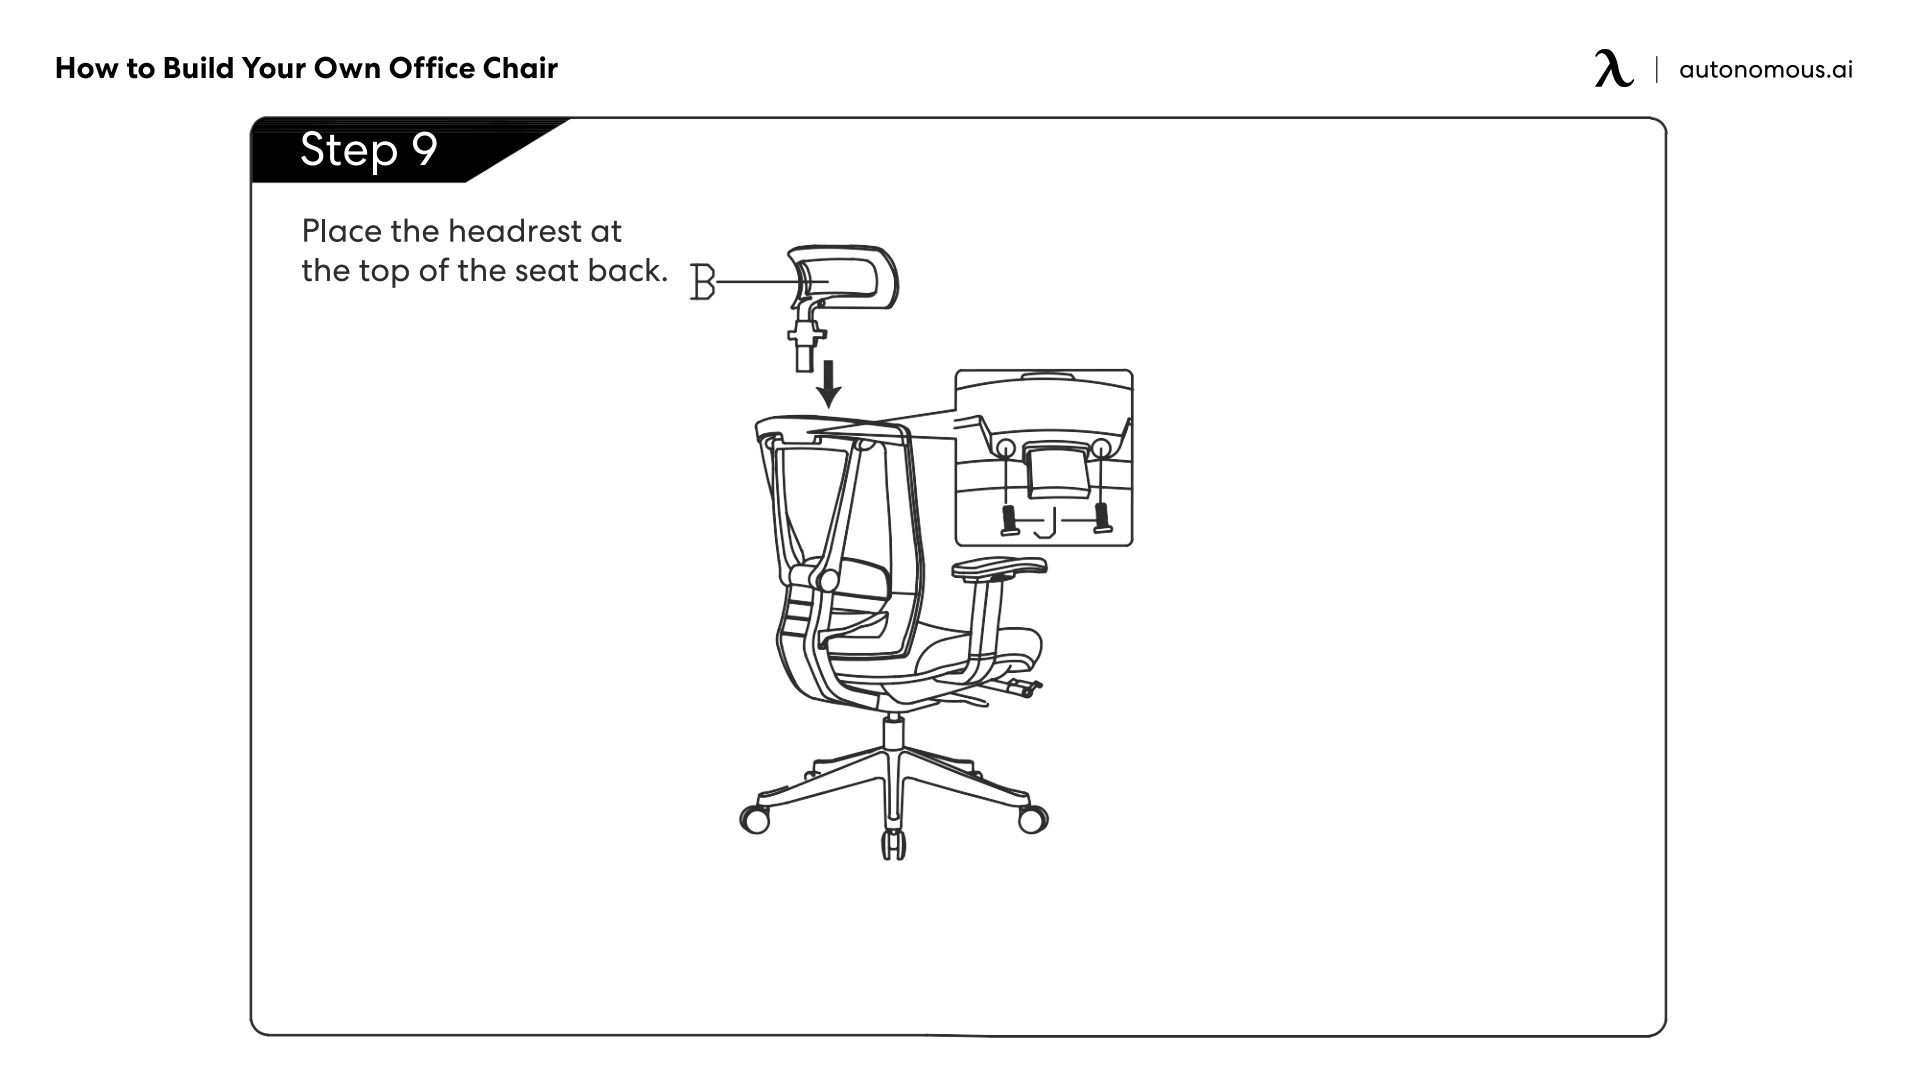
Step 9: Put the headrest (B) right on top of the seatback.
There you go! Now that you know how to build your own office chair, here are a few functions to keep in mind. It includes DIY lumbar support for your ergonomic needs.
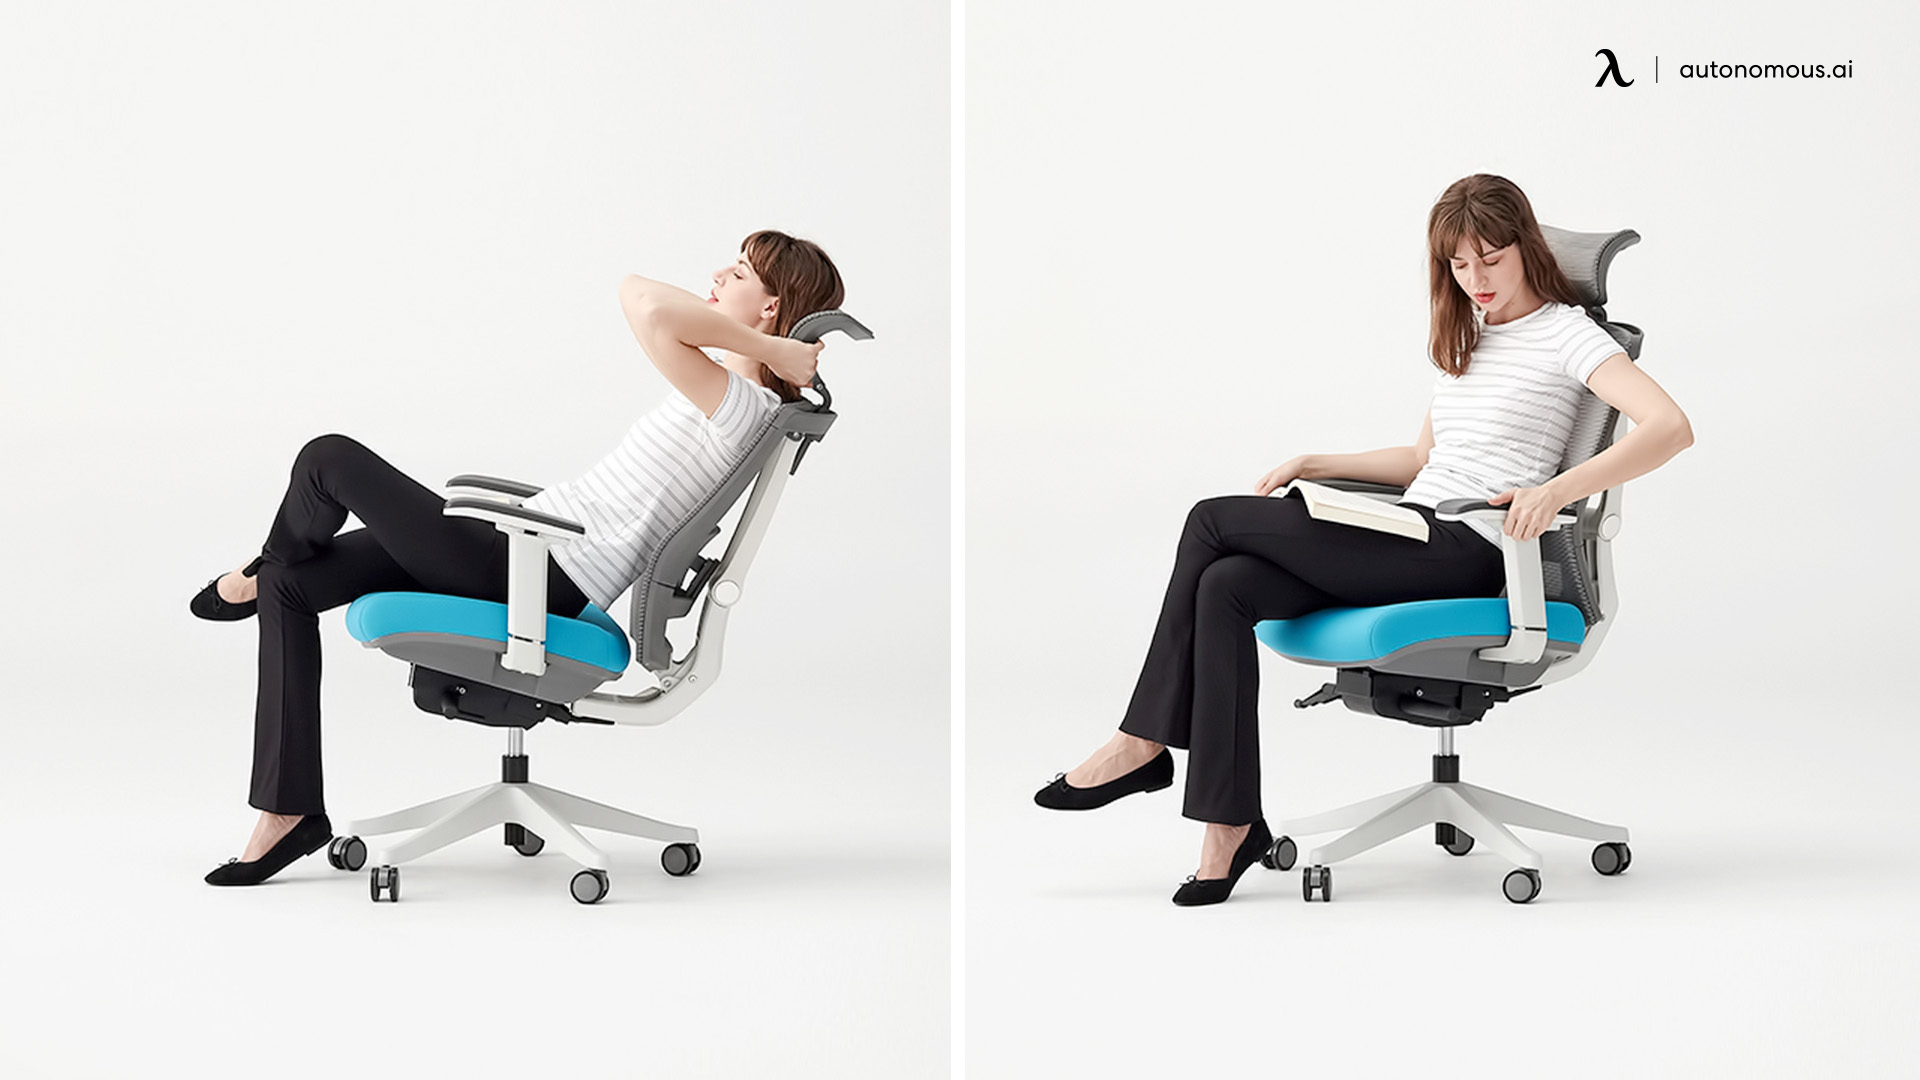
The ErgoChair Pro has a seat tilt, which you activate by the handle. Turn the handle clockwise to tilt, then turn the handle counterclockwise to lock it in place. This homemade ergonomic chair also has tilt tension. All you have to do is rotate the handle in a clockwise direction to increase the tension. If you want to decrease it, rotate the handle counterclockwise. You can also adjust the headrest and armrest of the chair. Decide whether you want armrests or an armless desk chair design. If you prefer flip-up arms for versatility, consider office chair flip-up arms options.
2. DIY Lumbar Support for the ErgoChair Pro
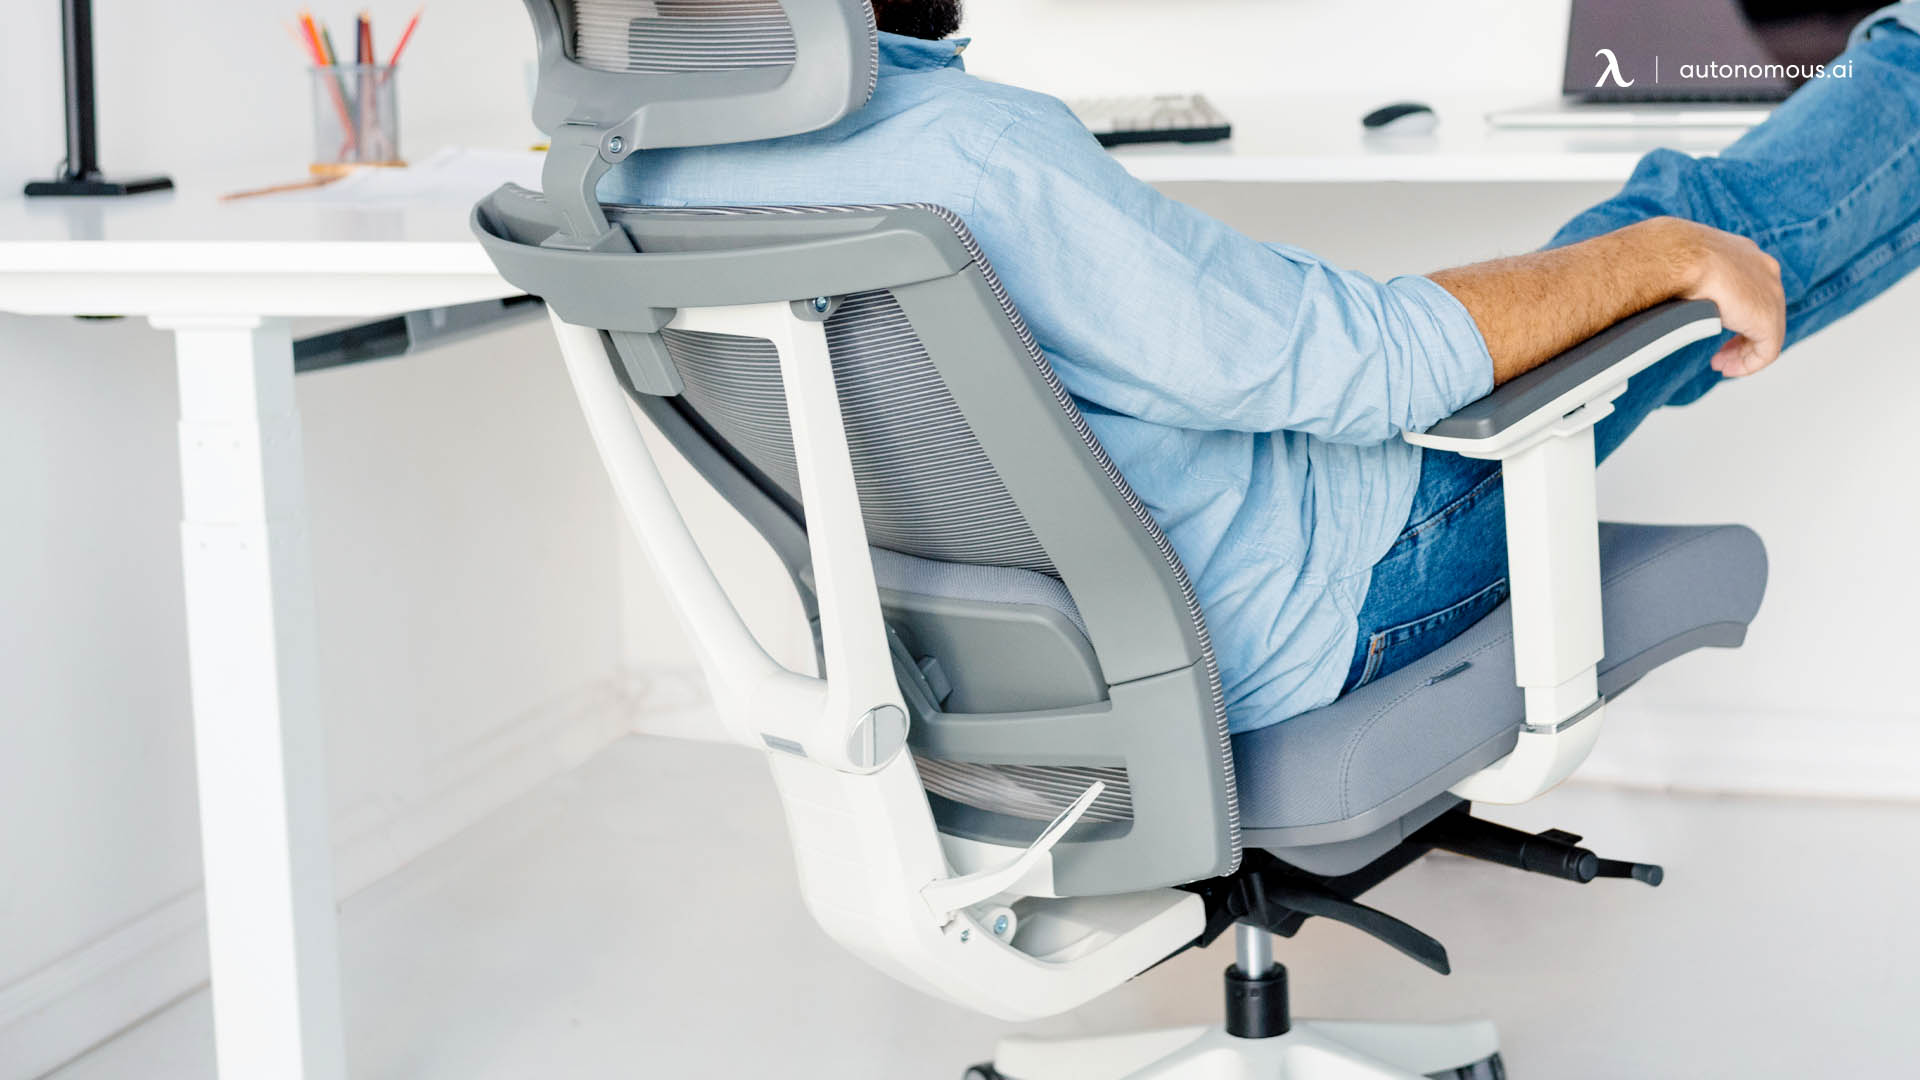
There is also DIY lumbar support for your DIY office chair. Lumbar support refers to what fills the gap between the seat and the lower part of your spine. With that in mind, the ErgoChair Pro has a handle to adjust your seat up or down. Pull the lever, move the seat up or down, and release when at the right height. The lever itself adjusts the lumbar support your back receives. A refers to the locked position, while B refers to the unlocked position. DIY lumbar support has the advantage of personal inspection. In other words, since you build your office chair, you can understand what goes into every single part, which includes the DIY lumbar support. As you build your own office chair, the lumbar support is key to its success. If you’re including electronics like an office chair heating pad or any complex mechanisms, you may need additional tools.
Warning - Safety Guidelines
Now that you know how to build your office chair, you need to maintain safety guidelines. If you properly do so, you should avoid the risk of injury. Here are a few things to note:
- You should only sit and not stand on the ErgoChair Pro.
- Make sure all the bolts are firmly tight and in the right locations.
- Should there be missing parts or damage, try to repair or replace the part from the manufacturer.
- Only sit on the seat and not on the armrest.
- Due to its design, only one person can sit on this DIY office chair.
- If you have children under the age of ten, supervise them. They may need assistance.
- Protect your flooring by researching how to handle an office chair on carpet.
Customizing Your DIY Office Chair
If you've ever found yourself staring at your office chair, wondering if you could build or upgrade one yourself, you're not alone. The concept of a DIY office chair may seem daunting, but it's entirely possible with the right tools, materials, and a bit of creativity.
Customizing your chair can make it truly unique. Whether you’re adding a chair posture corrector to help improve your seating habits or installing a chair cylinder to adjust the height, the possibilities are endless. You can even consider adding a reclining ergonomic chair with footrest for added comfort during long work hours.
FAQs for Making a DIY Office Chair
Whether it’s a DIY office chair or standing desk chair, any homemade ergonomic chair requires knowledge about what they do and why they matter. If you have any questions, here are some answers.
1. What is The Best Material for Your DIY Ergonomic Chair?
To make the best DIY ergonomic chair, you need the right materials for the job. The better the office chair materials are, the longer it lasts. Below is a list of materials, alongside their respective pros and cons, as you build your own office chair.
Vinyl is a common material for a DIY office chair. The material’s main advantage is it’s clean and lasts a long time. There are several grades and styles to choose from. The downside is that vinyl does not withstand hot temperatures well, especially in the summer.
Leather is a luxurious material with a classic and clean look. As a result, stain removal is easy. However, leather on a DIY office chair might not work efficiently since it is not as breathable as materials like mesh. It can also be expensive. Ultra-Leather is a synthetic version of leather. It also retains a more decisive cleanliness factor but does not last as long.
Woven materials are versatile due to their colors, designs, textures, and shapes. Their level of customization is high for any homemade ergonomic chair. The material pairs well with a meshed look and are useful for any DIY office chair. With that said, they are more prone to damage and are not as easy to clean. Knitted materials are similar, but they not only breathe much better but also cleans much better. Since it is of higher quality, it is more expensive as a result. Woven and knitted materials are also comfortable.
Mesh Fabric provides airflow that gives you more comfort as you work longer hours. It also has a clean, stylish look, which makes it a popular choice for a typical DIY office chair. The shape of the mesh conforms to your body type, so your spine maintains its natural curve. One negative trait of mesh is that it could potentially cause abrasions to your clothes.
Plastic is durable and outlasts most types of upholstery in DIY office chairs. The higher quality plastic, the better the chair base; it is an essential factor of any DIY ergonomic chair. One problem is the material is much more challenging and less comfortable.
2. What are the Pros and Cons of Mesh vs. Leather Chairs?
When you make your DIY ergonomic chair, you should compare the materials. Mesh and leather are incredibly popular types of materials for workplace chairs. Consider both the pros and cons of each material to get an idea of what you want.
Pros and Cons of Mesh Chairs
| Pros | Cons |
|---|---|
| Ventilation: Provides a cooling system that prevents your body from overheating. | Comfort Levels Decline: While initially flexible, the comfort of mesh chairs can decrease over time. |
| Lightweight: Allows for easy movement and flexibility around the chair. | Durability: Not as strong as leather, making it more prone to damage. |
| Easy Maintenance: Simple to maintain, requiring minimal time for repairs. | Design Limitations: Limited color options, typically only available in black and grey. |
| Availability: Widely available in the market, making it a convenient choice. | |
| Affordable: Generally low cost, making it budget-friendly. |
Pros and Cons of Leather Chairs
| Pros | Cons |
|---|---|
| Classic Look: Offers an elegant and distinguished appearance in any office space. | Costly: Expensive due to high-quality materials used in construction. |
| Durability: High-quality leather enhances longevity, providing a long lifespan. | Prone to Scratches: Leather can easily get scratched, damaging the overall aesthetic. |
| Low Maintenance: Easy to protect from liquids and stains, requiring minimal upkeep. | Difficult to Find Genuine Leather: Genuine leather is rare, with many options being artificial. |
| Comfort and Ventilation: Offers excellent comfort and stays cool on hot days. | Heat Sensitivity: Excessive heat can cause the leather to bleach and crack over time. |
| Hygienic: Easy to clean, promoting good hygiene. |
You can decide for yourself if you prefer mesh or leather on your DIY ergonomic chair with all this in mind. Both materials have their advantages and disadvantages to consider. Either way, when you choose an ergonomic chair that works for you, comfort should always be at the forefront of any decision you make.
3. Why Do You Build a Homemade Ergonomic Chair?
Building your own office chair allows for complete customization. You can design it to suit your specific ergonomic needs, choose the materials that match your style, and even add unique features that might not be available in commercial options. Whether you're a petite person struggling to find a chair that fits or someone with ADHD who needs specific seating features, a DIY approach can tailor the chair to your exact requirements. For instance, those seeking alternatives to traditional seating may explore ideas from saddle office chairs or other office chair alternatives to inspire their DIY project.
Several major companies build their ergonomic chairs or DIY office chairs since it promotes high-level work efficiency. An excellent DIY ergonomic chair has several health benefits. If you are a remote worker who spends countless hours on a chair, then you need comfort and stability. A good ergonomic chair aligns your spine to its natural curve. Not only that, but good body posture results in good blood circulation. You can only adjust the settings to your liking and choose what materials work best for you. As a result, you can concentrate on your projects much more comfortably with a newfound sense of energy and freedom to move around.
Conclusion
Creating a DIY office chair is not only possible but also rewarding. It allows for complete customization to fit your specific needs and preferences. Whether you're incorporating elements like a heated seat, making it the best fit for your height, or adding a cozy office chair blanket, a DIY office chair can be tailored exactly how you want it. Plus, it can be a fun project that results in a unique piece of furniture for your workspace.